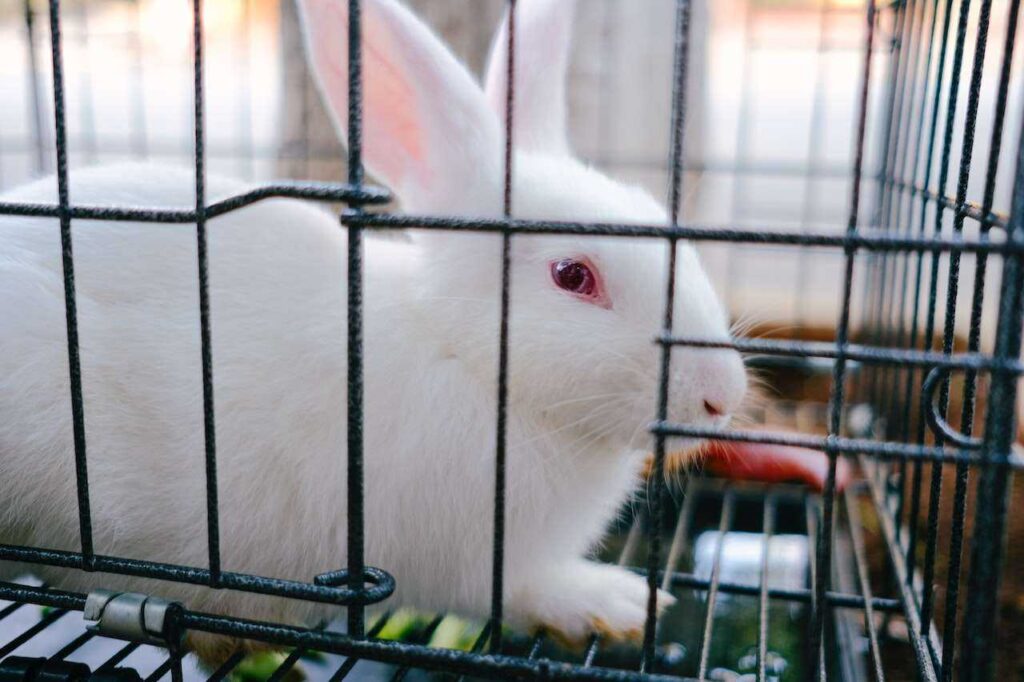
A rabbit enclosure doesn’t have to be expensive to work well. In fact, a spacious pen made from sturdy panels, comfortable flooring and a few thoughtfully arranged essentials may serve your rabbits better than an elaborate wooden hutch.
The mistake is trying to save money by making the enclosure too small.
Rabbits need room to run, stretch, stand upright, investigate their surroundings and rest somewhere secure. They also need appropriate companionship, which means the space must work for the rabbits living in it rather than just one small animal.
The easiest way to build an indoor rabbit cage cheaply is to create a large exercise-pen enclosure or rabbit-proofed room, cover the floor with a safe non-slip surface, secure the panels, and add a litter tray, hay, water, hiding places and enrichment.
You don’t need advanced carpentry skills. But you do need to measure carefully and check every material your rabbits can chew or touch.
The Rabbit Welfare Association & Fund’s indoor housing guidance recommends a continuous living area of at least 3 m × 2 m × 1 m high for a pair of average-sized rabbits.
This guide shows how to work towards that space economically, including a C&C-grid option, materials to avoid and a final safety inspection.
Table of contents
- Can you really build a rabbit cage cheaply?
- How big should a DIY rabbit cage be?
- What materials do you need?
- Step 1: Choose a suitable room
- Step 2: Mark out the full floor area
- Step 3: Build the walls with secure exercise-pen panels
- Step 4: How to build a C&C grid cage for rabbits
- Step 5: Install safe, non-slip flooring
- Step 6: Add a litter tray in a practical location
- Step 7: Add water, hay and comfortable hiding places
- Step 8: Add inexpensive enrichment
- Step 9: Rabbit-proof the space around the enclosure
- Step 10: Test the enclosure before your rabbits move in
- How to keep the DIY enclosure clean without spending much
- DIY rabbit cage versus exercise pen: Which is cheaper?
- Common mistakes when building an indoor rabbit cage
- Frequently asked questions
- Final safety checklist
- A better rabbit home doesn’t have to cost more
Can you really build a rabbit cage cheaply?
Yes, provided you think of the project as building a living enclosure, rather than a small box to keep a rabbit inside.
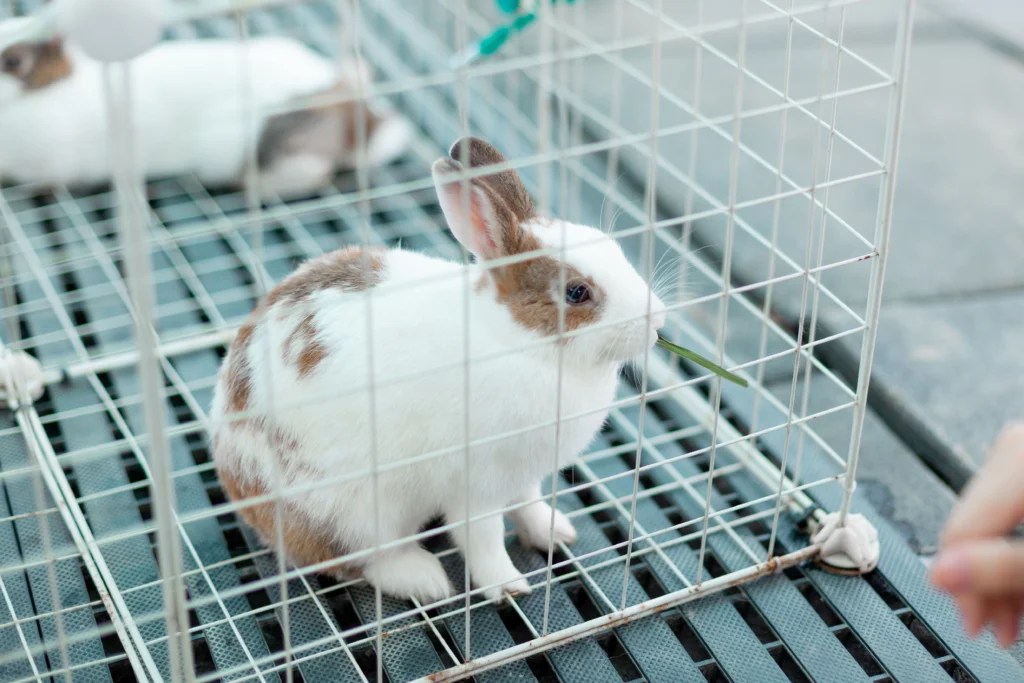
A conventional rabbit cage may cost less initially but provide inadequate room for normal activity. A large exercise pen can make better use of your budget by giving you more usable floor space.
Two straightforward options are:
- A sturdy exercise-pen system arranged to provide sufficient continuous space.
- A modular C&C-grid enclosure, provided the exact panels and connections can be made secure enough for the rabbits.
A properly rabbit-proofed room can also work well if you already have enough available space.
The House Rabbit Society’s rabbit housing guide illustrates pens, rabbit-proofed rooms and rabbit-home-base arrangements, with an emphasis on exercise and enrichment.
The lowest-priced product is not necessarily the most economical choice if it requires repeated replacement or fails to provide adequate space.
A bird cage isn’t just a place for your feathered friend to sleep it’s their entire world, and getting it right from the very start matters more than most new bird owners realize. Follow this comprehensive beginner’s guide to setting up a bird cage and create a safe, stimulating, and beautifully comfortable home your new feathered companion will absolutely thrive in from day one.
How big should a DIY rabbit cage be?
This is the first measurement to settle.
For two average-sized rabbits, the RWAF recommends a living area of at least 3 metres long, 2 metres wide and 1 metre high.
That is approximately:
| Dimension | Recommended benchmark |
|---|---|
| Length | 3 m / 9 ft 10 in |
| Width | 2 m / 6 ft 7 in |
| Height | 1 m / 3 ft 3 in |
| Continuous floor area | 6 m² / about 64.6 sq ft |
| Availability | At all times, including overnight |
The RWAF’s minimum space recommendations explain that the ground-level area should form a single usable footprint. Upper shelves, tunnels and extra storeys do not replace that space.
PDSA and the RSPCA publish closely aligned guidance for indoor rabbit accommodation.
Why 36 inches isn’t quite enough
Thirty-six inches is approximately 91.4 cm.
That falls below the 1-metre enclosure-height benchmark.
Some rabbits can also jump surprisingly high, so the correct enclosure height must take the individual animal’s behaviour into account.
For athletic escape artists, a properly designed secure roof may be needed. The roof should not create new entrapment risks or prevent normal upright movement.
What about a single rabbit?
A rabbit living alone does not automatically need half the space.
Rabbits are social animals and generally need a suitable rabbit companion. Their exercise requirements don’t disappear simply because they’re alone.
If your home cannot accommodate adequate housing for a compatible pair, reconsider whether rabbit ownership is currently practical.
Does free roaming count?
A genuinely rabbit-proofed room or area that remains accessible may provide more space than a pen.
However, occasional exercise sessions don’t turn a tiny locked cage into suitable permanent accommodation.
Aim to provide sufficient secure living space throughout the day and night.
What materials do you need?
A low-cost setup can use relatively simple equipment.
| Material | What it’s for | What to check |
|---|---|---|
| Heavy-duty exercise-pen panels or suitable metal grids | Enclosure walls | Height, rigidity and safe openings |
| Secure connectors and metal latches | Structural assembly | No weak or exposed chewable fittings |
| Waterproof floor protector | Protects household flooring | Non-toxic material, no exposed chewable edges |
| Non-slip floor mats or suitable washable covering | Comfortable traction | Secure fit and no ingestion of loose pieces |
| Large low-sided litter tray | Toileting area | Stable, easy to clean and roomy |
| Unscented paper-based litter | Absorbency | Non-clumping and suitable for rabbits |
| Fresh hay | Feeding | Clean, accessible supply |
| Heavy water bowl | Drinking | Stable and easy to clean |
| Hiding boxes or tunnels | Security and exploration | Stable, large enough and without trap points |
| Rabbit-safe enrichment | Digging, chewing and foraging | Appropriate materials and regular inspection |
You may already own some suitable materials, particularly washable mats or storage containers that can be repurposed safely.
Avoid choosing an item purely because it is available at a low price.
Step 1: Choose a suitable room
Select a part of your home where the rabbits can live without constant disturbance.
A quiet living room, spare room or another suitable indoor area may work, depending on household activity and available floor space.
The RSPCA’s guide to keeping indoor rabbits recommends a calm location with protection from household hazards.
What makes a room suitable?
The room should have appropriate ventilation and a manageable indoor temperature.
Keep the enclosure away from radiators, fireplaces and areas that become hot in direct sunlight.
Avoid draughty positions and places where the rabbits will be continually disturbed.
Bringing a new rabbit home is exciting but introducing them to your existing pets requires a little more patience, strategy, and understanding than most people expect. Learn exactly how to introduce a new rabbit to your existing pets with these calm, step-by-step strategies that protect everyone involved and set the foundation for a peaceful, harmonious household every single animal in your home deserves to live in.
Protect rabbits from household pets
Dogs and cats must not be able to reach the enclosure or frighten the rabbits through its barriers.
An ordinary exercise pen may be unsuitable as a predator-proof barrier, particularly if a larger dog can jump over or push it aside.
Where other pets are present, a separate room with a secure door may be necessary.
Check the surroundings
Before assembly, identify electrical cords, houseplants, furniture gaps and other objects the rabbits could reach if they climbed or escaped.
The enclosure should not sit where chewing through one unsecured cable could cause a serious accident.
Step 2: Mark out the full floor area
Use a tape measure to mark an area approximately 3 m long and 2 m wide, or larger.
A simple paper sketch is useful before buying the panels.
Include the locations of doors, furniture and the entrance to the enclosure.
Keep the footprint continuous
Try to create one uninterrupted area where rabbits can move comfortably.
A narrow arrangement made from disconnected compartments isn’t equivalent to an open rectangular enclosure.
Allow enough room for the rabbits to run, turn, rest, investigate objects and avoid one another when they want some space.
Leave practical access for cleaning
Position the gate so you can reach the litter tray, water bowl and other items without dismantling the enclosure.
A setup that is easy to clean is more likely to stay hygienic.
Step 3: Build the walls with secure exercise-pen panels
For most beginners, a well-built exercise pen is simpler than constructing an entire wooden cage.
Arrange the panels around the marked floor area.
Connect them according to the manufacturer’s instructions and check that the structure remains stable when touched or pushed.
Make sure the height is sufficient
The finished enclosure should meet the height and movement needs of the actual rabbits.
If using a 1-metre benchmark, verify the true assembled height rather than relying solely on advertising descriptions.
Some rabbits may need a secure roof or an alternative room arrangement.
Check for dangerous gaps
Panel openings must be narrow enough to prevent a rabbit pushing its head through and becoming trapped.
The appropriate gap size depends on the rabbit’s size, age and body shape.
Do not assume a gap is safe just because it is narrower than 1.5 inches.
The RWAF’s indoor housing guidance specifically warns that unsuitable pen-bar gaps can trap a rabbit’s head or legs.
Test the gate
Close the gate and inspect the catch.
A secure latch should not swing open because the rabbit pushes against the panel.
Check that the gate doesn’t leave a large gap near its hinges or the floor.
Step 4: How to build a C&C grid cage for rabbits
C&C grids are modular wire panels often sold as cube-storage systems.
They can be useful for building customised barriers and enclosure shapes.
However, a storage grid isn’t automatically safe simply because it is made from metal.
Assemble the main perimeter
Choose sturdy panels with suitably small openings.
Lay them out to form a large, continuous enclosure, then connect the panels securely.
Inspect the joints carefully.
Weak connectors can allow a panel to separate if the structure is pushed or climbed.
Use fasteners carefully
Some DIY builds use cable ties to reinforce the joints.
If used, connections must be strong enough for the structure and kept where rabbits cannot easily chew them.
Trim any sharp ends flush and inspect the joints routinely.
For gates and moving sections, a reliable mechanical closure is preferable to a flimsy plastic clip.
Don’t leave unfinished grid edges
Check the entire perimeter for exposed wire ends, bent panels, damaged coatings and protruding fasteners.
A wire shelf panel with sharp or broken connections is unsuitable for a rabbit’s living area.
Don’t build a tall stack of small cubes instead of floor space
Raised levels can offer enrichment in an appropriately designed enclosure.
But several small stacked cubes are not a replacement for the required ground-level running space.
Rabbits need room for horizontal movement.
A broad, secure pen is usually the more useful DIY project.
When should you abandon the C&C approach?
If suitable panels and secure connectors are hard to obtain, a purpose-built heavy-duty exercise pen may be more practical.
The goal is a safe enclosure, not proving that every material in a storage shop can be repurposed.
Step 5: Install safe, non-slip flooring
The floor deserves just as much attention as the walls.
Rabbits need traction for hopping, turning and moving at speed.
Slippery flooring can make them hesitant to move and increase the chance of injury.
The RSPCA’s indoor-rabbit guidance recommends solid, non-slip floors and advises against mesh flooring.
A practical layered approach
For a room with flooring that needs protection, use:
- A securely fitted waterproof protective layer.
- A stable, non-slip surface above it.
- Additional comfortable resting mats or beds where appropriate.
The waterproof material should not remain exposed in areas where the rabbits repeatedly chew it.
Can you use vinyl or lino?
Sheet vinyl or lino may be useful as a protective underlayer.
However, smooth surfaces can be slippery.
Cover exposed areas with appropriately secured non-slip material.
Inspect the edges frequently. If a rabbit begins chewing or swallowing the material, replace it with a more suitable arrangement and seek veterinary advice if ingestion is suspected.
Is fleece suitable?
Washable fleece may be useful for some rabbits when it stays intact.
It is not suitable as a universal recommendation for animals that tear, chew or swallow fabric.
Pay attention to frayed edges and loose fibres.
What about carpet?
Carpet can provide traction, but some rabbits chew or pull out the fibres.
If your rabbits do that, choose another flooring option.
Avoid bare wire floors
Wire flooring can place uncomfortable pressure on rabbits’ feet and may contribute to foot problems.
A wire-grid wall is not the same as a wire-grid floor.
The floor should be solid and suitable for comfortable movement and resting.
Step 6: Add a litter tray in a practical location
Rabbits can learn to use litter trays, which helps keep a large indoor enclosure manageable.
Choose a tray big enough for the rabbit to turn around and sit comfortably.
For a compatible pair, a larger tray or more than one tray may be useful.
Where should the litter tray go?
Rabbits often choose a preferred toileting area.
Placing the tray in that location may help establish a consistent routine.
A corner can be convenient, but there is no requirement to force the tray into a particular corner if the rabbits use another area.
Choose rabbit-safe litter
A simple beginner choice is unscented, non-clumping paper pellets.
The PDSA’s litter-training advice recommends suitable paper-based and other rabbit-appropriate materials while warning against ordinary clumping or clay cat litter.
Avoid strongly scented materials and dusty bedding.
What about kiln-dried pine pellets?
Different veterinary and welfare guidance discusses processed wood-based litter differently.
PDSA’s indoor-rabbit guide specifically advises avoiding pine pellets, while another PDSA resource allows some processed, non-clumping wood-based products.
For beginners, unscented paper pellets are the simpler default while any alternative product is checked for its exact composition and suitability.
Put hay close to the litter tray
Rabbits often eat hay while using the litter area.
Keep clean hay within easy reach rather than putting it at the opposite end of the enclosure.
The PDSA indoor-rabbit guide specifically notes this natural behaviour.
Clean the tray regularly and replace soiled litter.
Step 7: Add water, hay and comfortable hiding places
The enclosure is beginning to take shape, but a pen with walls and flooring still isn’t a complete home.
Provide clean water
Use an appropriately sized, stable water bowl that’s difficult to overturn.
Place it where the rabbits can reach it comfortably and where it won’t be filled with litter or hay.
Refresh the water and clean the bowl routinely.
Make hay easy to reach
Rabbits should have access to suitable hay as part of their normal daily care.
Position it so the animals can feed without squeezing into an awkward gap or getting trapped beside the litter tray.
Dietary changes and special nutritional needs should be discussed with a rabbit-experienced veterinarian.
Provide more than one hiding place
Rabbits are prey animals and need areas where they can retreat.
A cardboard box with appropriately sized exits can be an inexpensive hiding space.
For rabbits living together, provide enough retreat options that one animal cannot constantly block another’s access.
The RSPCA recommends a hiding place for each rabbit plus an additional one.
Avoid single-exit traps
A shelter with two usable openings can help prevent one rabbit from trapping another inside.
Make sure the shelter is stable and cannot collapse.
Step 8: Add inexpensive enrichment
A large empty pen can still become boring.
Rabbits need opportunities to investigate, forage, chew, dig and rest.
Many enrichment items can be made from suitable household materials.
Affordable enrichment ideas
Cardboard tunnels: Use sturdy, clean boxes joined or arranged to create passages with exits.
Digging box: Provide an appropriate container with safe digging materials, chosen for the rabbits and their chewing habits.
Hay-stuffed cardboard: Use clean cardboard items where the rabbits can forage safely, monitoring whether they begin consuming excessive amounts of the material.
Natural grass mats: Suitable rabbit-safe mats may provide texture and opportunities to explore or chew.
Hide-and-seek arrangements: Rearrange a few safe boxes or tunnels to encourage investigation.
The House Rabbit Society’s rabbit-proofing resources describe chew, digging and foraging opportunities as important parts of a rabbit’s environment.
Don’t overcrowd the pen
Leave a clear route for moving around.
A large litter tray, several hiding boxes and too many tunnels can use up much of the running area.
Choose enrichment that provides interest without blocking normal activity.
Step 9: Rabbit-proof the space around the enclosure
Even a carefully built enclosure needs a safe surrounding environment.
Rabbits can chew, climb, dig and investigate objects that appear uninteresting to humans.
Protect electrical cords
Move electrical cables out of reach wherever possible.
Additional cable guards and barriers may help, but they are not substitutes for preventing access.
The RSPCA Australia’s guide to household rabbit hazards specifically identifies electrical cables as a major risk.
Remove unsuitable plants
Keep houseplants outside the rabbits’ accessible area.
Don’t assume a plant is safe because it is commonly kept indoors.
Block hazardous gaps
Inspect spaces behind appliances, under furniture and beside cupboards.
If a rabbit escapes from the enclosure, it should not be able to become trapped in a place you cannot reach safely.
Keep cleaning products inaccessible
Store household chemicals and medicines away from rabbit living spaces.
Clean the enclosure using methods and products suitable for rabbits, and avoid leaving residues or strong fumes.
Step 10: Test the enclosure before your rabbits move in
A final inspection is essential.
Walk around the enclosure and look at it from the rabbit’s height.
Check whether a head, leg or foot could become trapped in any opening.
Push gently against the panels to check stability.
Open and close the gate several times.
Inspect flooring edges, connectors, toys and hiding boxes.
Ask these final questions
- Is the continuous floor area large enough?
- Can the rabbits stand upright without obstruction?
- Are the walls secure for these particular animals?
- Are all grid gaps safe?
- Is the floor solid and non-slip?
- Can the rabbits reach hay and water easily?
- Is the litter tray accessible?
- Are there enough comfortable hiding places?
- Could the rabbits chew exposed plastic, cables or unsafe fittings?
- Can other pets reach the enclosure?
Do not move the rabbits in until you are satisfied that the structure is secure.
Recheck it after use
Rabbits may discover weaknesses that aren’t obvious during assembly.
Watch whether they climb the panels, push against the gate, chew flooring edges or move enrichment into unsafe positions.
Adapt the design when necessary.
How to keep the DIY enclosure clean without spending much
An economical enclosure should also be economical to maintain.
Start with washable surfaces and equipment that can be removed without dismantling the walls.
Daily maintenance
Check and refresh drinking water.
Remove soiled litter and hay.
Inspect the floor for dampness, frayed material or unsafe debris.
Look at the panels and connectors for signs of chewing or damage.
Regular deeper cleaning
Wash and dry the litter tray as needed.
Clean the protective flooring and replace damaged sections.
Inspect hiding boxes and enrichment for contamination or sharp edges.
Don’t leave wet flooring beneath mats where moisture can accumulate unnoticed.
Plan for replacement items
Cardboard boxes, grass mats and some fabric coverings are consumable supplies.
They’re inexpensive partly because they can be replaced when they become damaged or heavily soiled.
DIY rabbit cage versus exercise pen: Which is cheaper?
An elaborate handmade wooden hutch may require timber, tools, fasteners, coatings and significant construction time.
A sturdy modular exercise pen may need only secure panels and suitable flooring.
A rabbit-proofed room may be cheaper still if the room already has safe flooring and you only need to protect furniture, wires and access points.
| Option | Potential cost advantage | Important limitation |
|---|---|---|
| Exercise-pen enclosure | Minimal construction and reusable panels | Must still meet space and security needs |
| C&C-grid enclosure | Flexible shape; modular construction | Panel gaps, rigidity and connectors require careful assessment |
| Adapted rabbit-proofed room | Uses existing walls and floor space | Requires thorough protection of cables, plants and furnishings |
| Traditional wooden cage | May suit a sheltered resting area | Small cages are not adequate complete living spaces |
Prices depend on your location, material quality and what you already own.
Without current supplier quotations or actual purchase records, it’s not possible to promise that one design will always cost less.
Where you can save
Choose simple shapes.
Reuse suitable undamaged materials where safety can be verified.
Avoid decorative roofing, expensive accessories and unnecessary multi-level construction.
Spend your money first on safe space, secure barriers and flooring.
Those are the parts that matter most.
Common mistakes when building an indoor rabbit cage
| Mistake | Why it matters | Better choice |
|---|---|---|
| Building a small cube-style cage | Doesn’t allow sufficient movement | Large continuous pen or rabbit-proofed space |
| Assuming 36-inch walls meet all height guidance | Below the RWAF 1 m benchmark | Meet the relevant height requirement and assess escape ability |
| Using unsafe grid openings | Risk of head or limb entrapment | Verify suitable openings and reinforce hazardous gaps |
| Leaving plastic flooring exposed | May be slippery or chewed | Secure a non-slip covering |
| Making the floor from wire mesh | Can damage rabbit feet | Use solid, comfortable flooring |
| Using weak panel connectors | Escape or collapse risk | Robust, inspected connections |
| Using scented or clumping cat litter | Inappropriate for rabbits | Suitable unscented rabbit litter |
| Putting hay too far from the litter tray | Ignores normal feeding behaviour | Keep clean hay within easy reach |
| Adding too many boxes and tunnels | Reduces usable running space | Preserve a clear movement area |
| Forgetting rabbit-proofing outside the pen | Escape may expose rabbits to hazards | Protect the surrounding room |
Frequently asked questions
For a pair of average-sized rabbits, RWAF, RSPCA and PDSA recommend a continuous living area of at least 3 m × 2 m × 1 m high. Larger rabbits or groups may require more space. A small cage isn’t suitable as their entire permanent home.
Wire floors are not recommended because they can place damaging pressure on rabbits’ feet. Secure wire or metal-grid walls are a different matter, but the openings must not allow entrapment or escape.
Choose properly identified, untreated materials appropriate for the intended use, with no unsafe coatings, splinters or chemicals. Don’t assume all woods or plywood products are suitable for chewing. If uncertain, use a robust manufactured exercise pen rather than exposed timber.
Yes, suitable modular metal grids can help form enclosure walls or barriers. However, the entire structure must be stable, the gaps safe and the footprint large enough. A collection of small cubes doesn’t replace a proper running area.
A solid, non-slip, washable surface is a good starting point. A waterproof protective layer may be used underneath suitable floor coverings, provided the rabbits cannot chew exposed edges or swallow loose material.
It can be appropriate for some rabbits when intact and securely fitted, but not for animals that chew or ingest fabric. Monitor it carefully and replace it if necessary.
A small cage shouldn’t become the rabbit’s regular overnight home. Rabbits need suitable living space and access to normal movement throughout the day and night, not only during scheduled exercise sessions.
Unscented paper-based litter is a practical option for the litter tray. For the main floor, washable, secure non-slip coverings may reduce ongoing costs. The best combination depends on the rabbits’ chewing behaviour and the enclosure design.
Final safety checklist
Before using your new setup, confirm all of the following:
- The enclosure provides appropriate continuous floor space.
- Wall height and escape prevention are suitable.
- Panels and connectors are stable.
- No dangerous grid gaps or exposed sharp edges remain.
- Flooring is solid, non-slip and free from chewable loose pieces.
- Litter is suitable, non-clumping and easy to replace.
- Hay and clean water are always accessible.
- There are enough safe hiding areas.
- Enrichment leaves room for running and jumping.
- Electrical cords, plants and household hazards are inaccessible.
- Other pets cannot reach or frighten the rabbits.
- Suitable rabbit companionship and daily care have been planned.
A better rabbit home doesn’t have to cost more
Building an indoor rabbit enclosure cheaply is mostly about spending money in the right places.
A large, secure pen with comfortable flooring, clean water, hay, a litter tray and simple hiding boxes can provide more practical value than a decorative hutch.
Don’t cut costs by reducing the floor area, using unsafe materials or accepting weak connections.
Start with the rabbits’ space and safety needs. Then choose the simplest materials that meet them.
The goal is not to build the cheapest cage possible. It’s to create a comfortable, secure rabbit home without paying for things the rabbits don’t need.