You’ve spent weeks planning a chicken coop. The timber is cut, the roof looks sturdy, and the run is surrounded by chicken wire. Everything seems ready for your new flock.
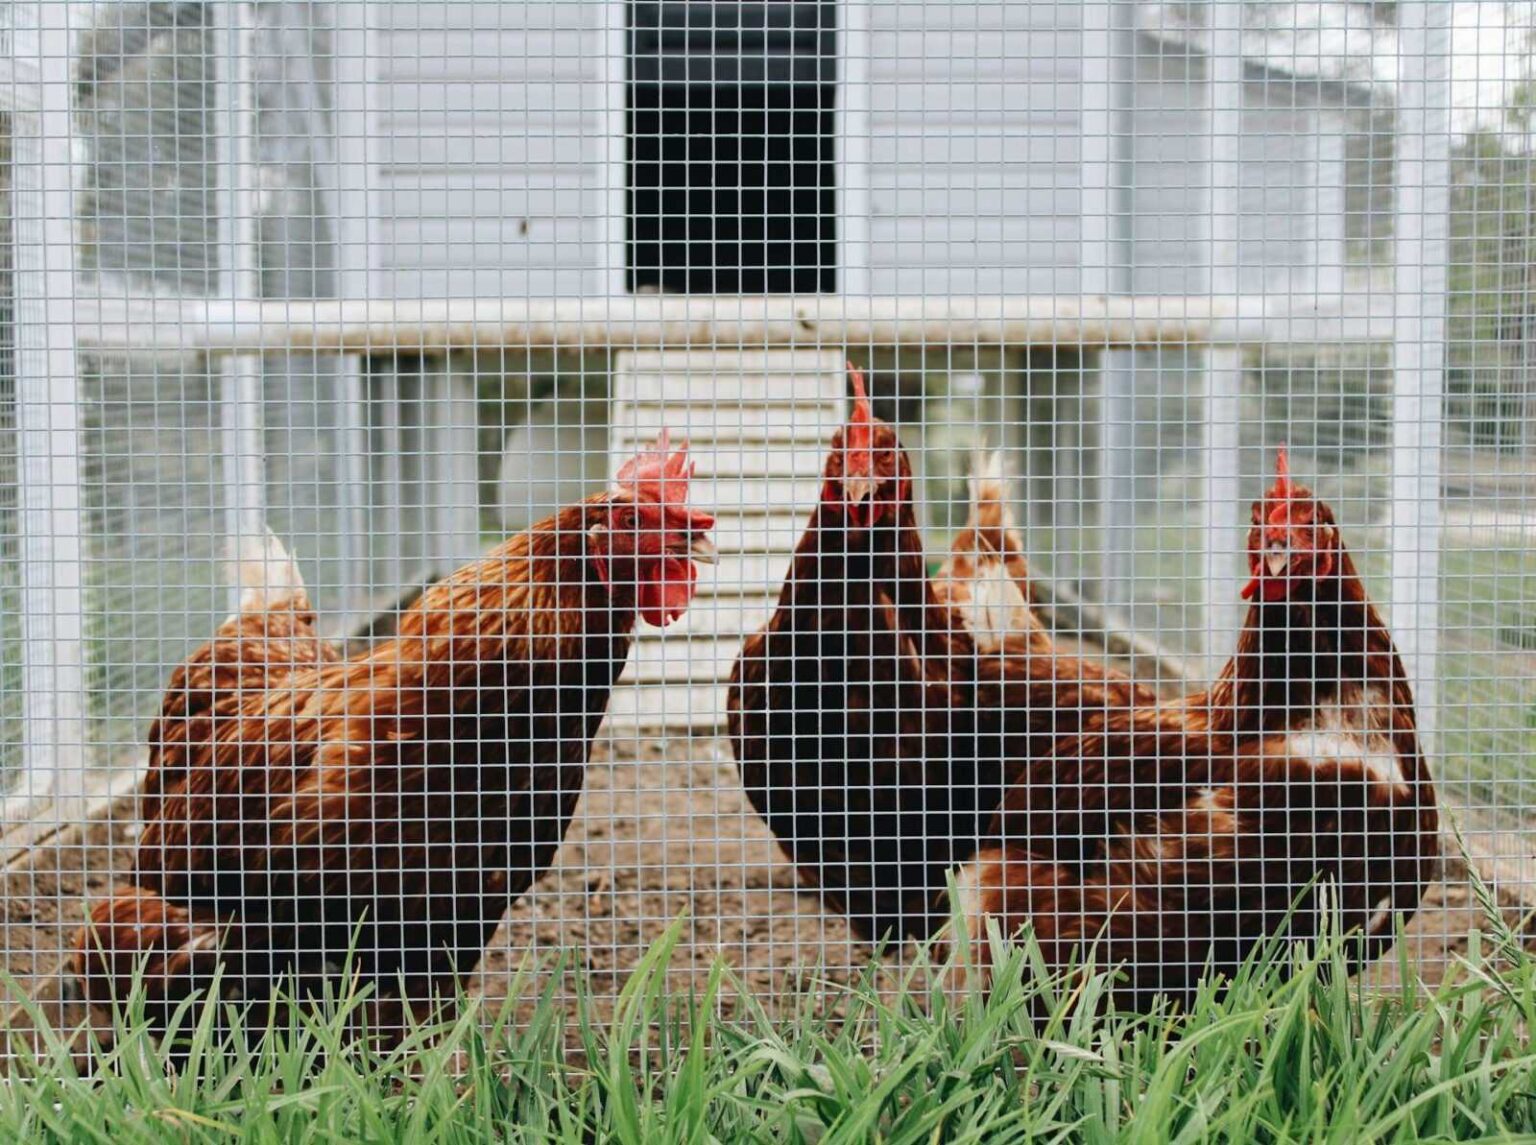
But there’s a problem: ordinary chicken wire is not a dependable barrier against determined predators.
Foxes can dig beneath fencing. Rats and other small animals may exploit narrow gaps. Climbing predators can reach poorly secured openings, and birds of prey can attack chickens in uncovered runs.
To build a predator-proof chicken coop, create a strong, secure night-time shelter with small-opening welded mesh over vulnerable openings, a protected floor or digging barrier, properly secured doors and locks, and a covered outdoor run. The structure must also provide adequate space, ventilation, comfortable roosts and easy access for cleaning.
No backyard enclosure is completely immune to every threat. However, careful construction can greatly reduce the risk of predators reaching your chickens.
This guide walks through the design, materials, construction sequence and final security checks, while explaining the most common mistakes to avoid.
Table of contents
- Predator-Proof Chicken Coop Requirements at a Glance
- Step 1: Choose a Safe Location for Your Chicken Coop
- Step 2: Decide How Much Space Your Chickens Need
- Step 3: Build a Strong Frame and Secure Floor
- Step 4: Install Hardware Cloth Instead of Ordinary Chicken Wire
- Step 5: Stop Foxes and Other Predators From Digging Under the Run
- Step 6: Make the Roof and Doors Predator-Resistant
- Step 7: Install Comfortable Roosting Bars
- Step 8: Build Nesting Boxes in a Quiet Location
- Step 9: Ventilate the Coop Without Creating Cold Draughts
- Step 10: Design the Chicken Coop for Easy Cleaning
- Step 11: Reduce Rodent Access and Food Attractants
- Step 12: Inspect Every Weak Point Before Moving Chickens In
- Step 13: Maintain Predator Security Throughout the Year
- UK Biosecurity and Housing Requirements
- Common Mistakes When Building a Chicken Coop
- Frequently Asked Questions
- Final Thoughts
Predator-Proof Chicken Coop Requirements at a Glance
Before cutting timber or buying mesh, establish the basic design.
| Coop component | Practical starting specification | Why it matters |
|---|---|---|
| Wall structure | Solid, weather-resistant timber or another appropriately designed material | Protects chickens from weather and predators |
| Predator mesh | Strong ½-inch (approximately 13 mm) galvanised welded mesh | Reduces the chance of predators reaching through vulnerable openings |
| Digging barrier | Appropriately secured buried fencing or outward-facing mesh apron | Helps prevent predators tunnelling beneath the perimeter |
| Indoor floor space | Approximately 3–5 sq ft (0.28–0.46 m²) per standard adult chicken as a preliminary guide | Reduces crowding and supports normal movement |
| Outdoor run | Plan generous permanent space, with 8–10 sq ft per bird treated only as an initial allowance | Gives chickens room to move, forage and exercise |
| Roosting space | Approximately 9–12 inches (23–30 cm) per bird | Allows birds to perch without excessive crowding |
| Nesting boxes | Around 12 × 12 inches (30 × 30 cm), adjusted for body size | Provides a suitable laying area |
| Ventilation | Protected high-level openings with controllable airflow | Removes moisture and stale air |
| Doors and latches | Strong doors with secure, predator-resistant fastenings | Prevents entry through vulnerable access points |
| Run roof | Secure solid roofing or suitable supported mesh | Helps exclude climbing and aerial predators |
These measurements are general planning references, not certified construction standards for every breed, climate or site.
Larger breeds, permanent confinement, difficult weather conditions and particular predator risks may require a more substantial design.
The University of Minnesota Extension’s chicken-keeping guide recommends approximately 3–5 square feet of indoor floor space per bird and emphasises secure overnight housing.
Step 1: Choose a Safe Location for Your Chicken Coop
A predator-resistant coop starts with the site.
A well-built structure can still develop problems when placed in an area that floods, traps moisture or makes inspection difficult.
Raising chickens for the first time is one of the most rewarding decisions you’ll ever make but choosing the right breed from the start makes absolutely everything easier, more enjoyable, and more successful. Discover the best chicken breeds for beginners and find the friendly, hardy, low-maintenance flock that will have you wondering why you didn’t start keeping chickens years ago.
Choose Well-Drained Ground
Look for a location that remains reasonably dry after rain.
Standing water around the coop can damage timber, deteriorate bedding and make maintenance difficult.
The Penn State Extension guide to small-scale poultry housing recommends building on elevated, well-drained ground to reduce persistent moisture.
If the site regularly floods, correct the drainage or choose a different position before construction.
Consider Nearby Vegetation and Structures
Dense vegetation, accumulated materials and clutter near the coop can provide hiding places for predators or rodents.
Keep enough clear space around the enclosure to inspect its walls, roof and perimeter.
Avoid positioning the run where overhanging branches allow easy access to an otherwise vulnerable roof.
Allow Access for Cleaning
You’ll need to reach feeders, drinkers, nesting boxes and manure-collection areas regularly.
Provide enough space around the structure to open doors, carry cleaning equipment and replace bedding comfortably.
A coop that’s difficult to maintain is more likely to develop hygiene problems.
Check Local Rules
Before building, check local planning requirements, restrictions on poultry keeping, boundary rules and any relevant conservation-area requirements.
In the UK, the applicable rules can depend on the property’s location, the building’s dimensions and its intended use.
Do not assume that every garden chicken coop is automatically exempt from planning controls.
Step 2: Decide How Much Space Your Chickens Need
Crowding is a welfare issue, not merely a design inconvenience.
Chickens need space to move, perch, access food and water, and perform normal behaviour.
Too little space can contribute to stress, feather pecking, poor litter conditions and competition.
A full egg basket every morning starts with one smart decision choosing the right hens for the job. Discover the best chicken breeds for maximum egg production and build a flock of reliable, prolific layers that keep your kitchen stocked with fresh, beautiful eggs day after glorious, abundant day.
How Many Square Feet per Chicken in a Coop and Run?
A frequently used planning range for standard laying hens is approximately 3–5 square feet per bird inside the sleeping coop.
The University of Minnesota Extension supports this indoor reference range.
Outdoor space needs more careful consideration.
Although 8–10 square feet per bird is often suggested in backyard guides, it should not be treated as a universal welfare minimum. A permanently confined flock may require considerably more room and environmental enrichment.
The design must allow for the birds’ actual breed, size, behaviour and access to outdoor areas.
Example: Planning for Six Hens
For six standard hens, an indoor floor area of approximately 24–30 square feet would fall within the commonly cited indoor planning range.
A 6 × 5-foot coop provides 30 square feet of floor area.
But a six-hen run should not be declared adequate merely because it meets a small numerical allowance.
Build the run as generously as the available safe space allows and check the relevant welfare guidance for the intended management system.
Remember Future Flock Changes
Avoid building the smallest possible coop if you expect to add birds.
Overcrowding can increase competition and make isolation or flock management more difficult.
However, larger capacity should not encourage acquiring more chickens than you can care for properly.
Step 3: Build a Strong Frame and Secure Floor
The structure must withstand ordinary weather, repeated use and attempts by predators to reach the birds.
A healthy, happy backyard flock doesn’t just happen it’s the result of consistent care, genuine knowledge, and a deep respect for the remarkable little creatures in your keeping. Explore this complete guide to owning and caring for a backyard chicken flock and discover everything you need to keep your hens thriving, your coop running smoothly, and your backyard farming journey as rewarding as it was always meant to be.
Choose Suitable Framing Timber
Use sound structural timber appropriate for outdoor construction.
All framing, bracing and joints should be capable of supporting the roof, walls, mesh and expected weather loads.
A simple rectangular frame is easier for many beginners to construct accurately than an elaborate decorative design.
Check that the structure is square and stable before attaching cladding.
For large structures, heavy roofs, exposed sites or unusual foundations, obtain competent construction advice.
Build a Secure Floor
A solid, appropriately supported floor helps prevent predators entering from below.
A practical design may use exterior-grade sheet material supported by suitably spaced framing.
Choose flooring that resists moisture and can be cleaned.
Avoid exposed sharp fasteners, broken sheet edges and coatings that are unsafe for poultry.
Raised or Ground-Level Coop?
Both arrangements can work when properly designed.
Raised coop: Can keep the floor away from wet ground and create an area beneath the shelter, but supports, ramps and access points must remain structurally sound and predator-resistant.
Ground-level coop: Can be convenient for large or heavy birds, but needs a secure foundation or other effective measures against digging predators.
Penn State Extension describes concrete floors and appropriately secured foundations as options for keeping rodents and other animals from entering beneath poultry houses.
Avoid Wire Floors for Routine Housing
Chickens should have appropriate solid or litter-covered surfaces for normal movement and resting.
An exposed wire floor can create welfare and foot problems.
The aim is a secure structure that’s also comfortable for the birds living inside it.
Step 4: Install Hardware Cloth Instead of Ordinary Chicken Wire
This is one of the most important predator-resistant upgrades.
Hardware Cloth vs Chicken Wire for Coop Security
Despite its name, ordinary chicken wire is not designed to resist every predator.
Traditional hexagonal poultry netting can help contain chickens, but many predators may damage it or reach through its openings.
Strong welded mesh provides a more suitable physical barrier when correctly specified and installed.
| Feature | Ordinary hexagonal chicken wire | Heavy-gauge welded hardware cloth |
|---|---|---|
| Main common use | Poultry containment | Securing vulnerable openings and run boundaries |
| Construction | Twisted hexagonal wire | Welded wire intersections |
| Typical predator resistance | Often insufficient as a primary barrier | Generally stronger when adequately specified |
| Openings | May allow animals to reach through | Smaller openings can reduce access |
| Installation | Requires secure fastening | Also requires secure fastening and framing |
| Best role | Secondary containment where appropriate | Principal barrier in predator-vulnerable areas |
The University of New Hampshire Extension recommends mesh openings smaller than one inch to reduce predators’ ability to reach through.
A ½-inch (approximately 13 mm) opening is a practical conservative choice for many backyard projects.
However, mesh size alone does not establish strength. Wire gauge, weld quality, corrosion resistance, attachments and support spacing all matter.
Where Should Hardware Cloth Go?
Pay particular attention to:
- Windows.
- Ventilation openings.
- Run walls.
- Gaps near doors.
- Roofline openings.
- Vulnerable joints and corners.
- Areas where small predators could reach birds.
How Should You Attach It?
Cut mesh with appropriate tools and wear protective gloves and eye protection.
Secure it firmly to structural framing using suitable corrosion-resistant fixings and retaining washers or battens.
Avoid relying on a few light-duty staples to resist repeated pulling.
Overlap and firmly secure adjoining mesh panels so a predator cannot create a gap at the seam.
Cover or fold sharp cut edges where birds or people might contact them.
Never assume a mesh opening is secure simply because the mesh itself feels strong. The attachment points are part of the barrier.
Step 5: Stop Foxes and Other Predators From Digging Under the Run
Foxes, dogs and other digging animals may attempt to enter where the run fencing meets the ground.
A secure wall above ground offers little protection if an animal can tunnel beneath it.
Option 1: Buried Fencing
The Penn State Extension poultry-housing guide recommends burying outdoor-run fencing at least 12 inches (30 cm) deep and turning the bottom approximately 6 inches (15 cm) outwards.
That creates a barrier against animals digging directly beside the fence.
The ground and foundation conditions need to be suitable for this approach.
Option 2: An Outward-Facing Mesh Apron
A horizontal apron is another approach.
In this design, welded mesh extends outward from the base of the run, rather than descending vertically for its full width.
It is secured to the structure and appropriately anchored or covered so a digging predator encounters a physical barrier.
For preliminary planning, an outward apron extending approximately 12–18 inches (30–46 cm) is commonly discussed. However, its adequacy depends on local soil, the predator species and how securely it is installed.
A horizontal apron and a 12-inch vertical burial are different construction methods, so their dimensions should not be treated as interchangeable requirements.
Which Method Is Better?
| Method | Advantage | Consideration |
|---|---|---|
| Buried vertical barrier with outward toe | Established documented design | Requires trenching and suitable ground |
| Horizontal outward apron | May be convenient around an existing run | Requires secure anchoring and protection against exposed edges |
| Solid engineered foundation | Can prevent access beneath walls | Requires suitable construction and drainage |
| Unprotected surface fencing | Simple to install | Vulnerable to digging predators |
Whatever design you choose, connect the below-ground or horizontal barrier securely to the wall mesh.
A gap between the two defeats the purpose.
Inspect for Digging
Look for:
- Disturbed soil.
- Tunnels.
- Exposed mesh edges.
- Loose fasteners.
- Corrosion.
- Gaps caused by ground movement.
Check more carefully after storms or evidence of predator activity.
Step 6: Make the Roof and Doors Predator-Resistant
A protected run needs more than secure side walls.
Some predators climb, and birds of prey can attack from above.
Cover the Chicken Run
A suitable solid roof or appropriately supported protective mesh can help exclude predators.
Ordinary lightweight bird netting may discourage some aerial access, but it should not automatically be regarded as a dependable barrier against climbing or determined ground predators.
The Penn State Extension recommends covered runs as part of poultry predator protection.
Choose roof materials and supporting members suitable for wind, rain and any expected snow loading.
Avoid sagging mesh, unsupported roof spans and gaps where the roof joins the walls.
Fit Strong Doors
The coop and run should have secure, well-fitting access doors.
Inspect:
- Hinges.
- Frames.
- Door corners.
- Lower edges.
- Locking points.
- Nesting-box access lids.
- Pop doors.
A strong wall is of limited value if a predator can lift a poorly secured door.
Use Secure Latches
Simple hook-and-eye fasteners may be vulnerable to animals capable of manipulating them.
Consider a suitable locking hasp, secured bolt or other robust fastening that cannot be opened easily by an animal pulling or lifting one part.
A two-action or lockable arrangement can provide additional security.
For household safety, remember that the keeper must also be able to open the coop promptly when necessary.
Lock Chickens Up Before Dark
The University of New Hampshire Extension emphasises secure overnight housing because many poultry predators are especially active between dusk and dawn.
Make evening closure a routine.
If using an automatic pop door, check that it closes reliably and cannot trap a bird.
Do not rely on an untested automatic system as the only safeguard.
Step 7: Install Comfortable Roosting Bars
Chickens naturally prefer to perch above floor level when resting.
A roost should support secure, comfortable footing and allow all birds enough room.
What Is the Best Material?
Smooth timber with appropriately rounded edges is a practical choice.
Wooden 2 × 4-inch boards are commonly used, though local timber dimensions and actual finished sizes vary.
Avoid splinters, sharp corners and unstable brackets.
Metal pipes and inappropriate plastic surfaces can be uncomfortable, particularly in cold weather.
The University of Minnesota Extension’s winter poultry guidance recommends wooden roosts and cautions against materials that retain cold.
How High Should Chicken Roosting Bars Be Off the Ground?
A commonly used starting range is approximately 18–36 inches (46–91 cm) above the floor.
But this is not appropriate for every bird.
The University of Minnesota notes that roosts can begin at around 12 inches (30 cm), with the exact design depending on the chickens and housing.
Heavy breeds or birds with mobility limitations may need lower roosts to reduce jumping and landing injuries.
How Much Roosting Space Per Chicken?
Allow roughly 9–12 inches (23–30 cm) per standard bird as an initial guide.
Adjust for the actual breed and body size.
Roosting Checklist
- Stable timber that will not rotate or collapse.
- Smooth, rounded edges.
- Enough length for all chickens.
- Accessible height for the flock.
- Suitable spacing from walls and other fixtures.
- Sufficient room for safe movement.
- Positioning that avoids fouling the nesting boxes.
Higher roosting bars are not always better.
Comfort, safety and access matter more than maximum height.
Step 8: Build Nesting Boxes in a Quiet Location
Laying hens need clean, suitable places to lay their eggs.
A nesting box should provide privacy without creating inaccessible corners that are difficult to clean.
Nesting Box Size
A common starting size for standard hens is approximately:
12 × 12 × 12 inches (30 × 30 × 30 cm).
Larger breeds may require larger boxes.
How Many Nesting Boxes Do You Need?
Penn State Extension recommends two nesting boxes for the first four hens, with another box for every four additional hens.
This is more specific than simply applying one box per four hens to every flock.
For six hens, three well-positioned boxes would be a reasonable planning example using that guidance.
Where Should Nesting Boxes Go?
Choose a relatively quiet area away from busy doorways.
Keep the boxes away from roosting bars so manure does not fall into them.
A nesting box should not become the preferred overnight roost.
Position it with the flock’s roosting preferences and access needs in mind.
What Bedding Should You Use?
Clean, dry and suitable nesting materials may include appropriate pine shavings or other poultry-safe products.
Replace dirty bedding and monitor moisture.
Avoid sharp objects, damp or mouldy material and surfaces that are difficult to sanitise.
Step 9: Ventilate the Coop Without Creating Cold Draughts
Ventilation is essential, even in winter.
Chickens release moisture through breathing, and manure adds humidity to the environment.
Without adequate airflow, condensation and ammonia can accumulate.
Why Ventilation Matters
Poor ventilation may contribute to:
- Damp litter.
- Condensation.
- High ammonia concentrations.
- Irritating air quality.
- Increased frostbite risk in cold, humid conditions.
- Uncomfortable indoor conditions.
The University of Minnesota Extension explains why ventilation helps control moisture and ammonia during cold weather.
How to Ventilate a Chicken Coop Without Draughts
Place suitable ventilation openings high enough to encourage air exchange without directing strong cold airflow onto resting birds.
Possible designs include:
- Protected high-wall vents.
- Secure gable vents.
- Appropriately designed roof vents.
- Adjustable openings that can be managed according to weather conditions.
Cover openings with securely attached small-opening predator-resistant mesh.
Is One Square Foot of Ventilation Per Ten Square Feet of Floor Correct?
This ratio is sometimes given as a general construction rule.
However, no single vent-area calculation is suitable for every poultry house.
Ventilation depends on climate, bird numbers, housing volume, moisture production, wind exposure and the design of the openings.
Use the suggested ratio only as an unverified preliminary planning idea, not as an established engineering requirement.
How Do You Know If More Ventilation Is Needed?
Look for:
- Condensation on windows or walls.
- Persistently damp bedding.
- Strong ammonia smell.
- Stale air.
- Visible moisture accumulation.
Correct these problems by improving ventilation and managing manure and water leaks.
Do not seal the coop completely during winter. Preventing direct draughts is not the same as eliminating air exchange.
Step 10: Design the Chicken Coop for Easy Cleaning
A secure coop is only useful if it can be maintained.
Plan cleaning access before the walls and roof are finished.
Make the Main Door Large Enough
You should be able to reach all areas that require cleaning.
For larger coops, a full-height access door can make maintenance easier.
For smaller structures, a safely secured lifting roof or removable access panel may be appropriate.
All openings need dependable predator-resistant closures.
Install a Droppings Board
A removable board or tray beneath roosting areas may help collect manure where chickens spend the night.
University of Minnesota Extension describes droppings trays as one method of managing manure beneath perches.
Choose a design that can be removed without allowing chickens to escape.
Protect the Floor
Select flooring that tolerates normal cleaning.
Avoid exposed joints where manure and moisture can accumulate.
Any coatings or lining materials must be appropriate for the birds’ environment and safe once installed and cured.
Keep Feed and Water Accessible
Arrange feeders and drinkers so they can be refilled and cleaned without unnecessary disturbance to the flock.
Do not put water containers where constant spills will soak bedding.
Provide Enough Working Space
An attractive coop with unreachable corners may become difficult to maintain.
Design practical access around the litter area, nesting boxes and roosts.
Step 11: Reduce Rodent Access and Food Attractants
Rodents may be drawn to spilled feed, accessible food stores and sheltered spaces around coops.
They can damage housing and contaminate feed.
Store Feed Securely
Use suitable sealed, rodent-resistant storage containers.
Keep food dry and prevent unnecessary spills around the coop.
Remove Clutter
Avoid stacking unused materials against the run.
Clutter can create shelter for rodents and make structural inspections difficult.
Inspect Small Gaps
Rats and other small animals can exploit openings that might not look significant to a person.
Check doors, vents, flooring joints and damaged corners.
The University of New Hampshire Extension’s predator guidance recommends sealing small openings and storing poultry feed securely.
Never Rely Solely on Repellents
Scents, lights and noise devices may have limited usefulness, but they cannot replace a secure physical barrier.
The main strategy should be exclusion, safe food storage and ongoing maintenance.
Step 12: Inspect Every Weak Point Before Moving Chickens In
Complete the structure before introducing birds.
A final inspection should focus on vulnerabilities rather than appearance.
Predator Security Checklist
- Main doors close tightly.
- All latches fasten securely.
- Windows and vents are covered with strong small-opening mesh.
- Mesh edges and seams are firmly attached.
- No vulnerable gaps remain at wall corners or roof junctions.
- The run has suitable overhead protection.
- The ground-level digging barrier is continuous and secure.
- Sharp wire edges and exposed fasteners have been addressed.
- The floor and framing are stable.
- Feed storage is protected from rodents.
- The pop door operates and closes reliably.
Chicken Welfare Checklist
- Indoor space is suitable for the intended flock.
- Outdoor space allows appropriate exercise and normal behaviour.
- Roosts are secure, accessible and comfortable.
- Nesting boxes are clean and appropriately sized.
- Ventilation removes moisture without direct uncomfortable draughts.
- Bedding is dry.
- Food and water containers are accessible.
- The coop can be cleaned safely.
- The structure provides protection against local weather conditions.
A trial operation of doors, latches and cleaning access is useful before chickens move in.
Have the finished structure checked by a competent builder when structural stability or roof loads are uncertain.
Step 13: Maintain Predator Security Throughout the Year
A secure coop can deteriorate.
Timber expands and contracts. Mesh corrodes. Animals dig. Hinges loosen.
Regular inspections help identify problems before they become openings.
Daily
Check that doors and locks are functioning.
Observe the birds and look for obvious damage or evidence of predator activity.
Weekly
Inspect mesh edges, door frames, fasteners and the perimeter.
Check for disturbed soil and new gaps.
Seasonally
Assess weather-related deterioration, roof condition, drainage, corrosion and ground movement.
Replace damaged materials promptly.
After a Predator Attempt
Look for loose panels, disturbed soil, scratches, damaged mesh and shifted barriers.
Do not assume the enclosure remains secure simply because the predator did not enter the first time.
UK Biosecurity and Housing Requirements
Predator security is only one part of keeping chickens safe.
Housing should also support biosecurity.
In Great Britain, official avian-influenza measures may affect whether and how poultry can be kept outdoors at a particular time.
The UK government’s guidance on housing birds safely during avian influenza measures explains how to manage poultry accommodation when relevant restrictions apply.
Government rules and local disease-control zones can change.
Check current requirements before building or altering a run.
A predator-resistant roof does not automatically prevent contact with wild birds, wild-bird droppings or contaminated water.
Feed and drinkers should also be protected as required by applicable biosecurity rules.
Common Mistakes When Building a Chicken Coop
| Construction mistake | Why it is a problem | Better approach |
|---|---|---|
| Using ordinary chicken wire for all barriers | May not withstand predators | Use strong welded mesh in vulnerable areas |
| Leaving the bottom of run fencing unprotected | Predators can dig underneath | Install an appropriate continuous digging barrier |
| Leaving the run uncovered | Allows aerial and climbing access | Provide suitable overhead protection |
| Using weak door latches | Predators may exploit them | Install secure locking mechanisms |
| Building a coop too small | Crowding and welfare risks | Plan space for actual flock size |
| Placing roosts too high for heavy breeds | Increased jumping and landing risk | Match height to bird size and mobility |
| Putting roosts above unprotected nesting areas | Manure contaminates nests | Separate roosts from nesting areas |
| Sealing all ventilation in winter | Traps moisture and ammonia | Maintain protected airflow |
| Building inaccessible cleaning corners | Encourages accumulated waste | Include practical access panels and removable equipment |
| Ignoring drainage | Dampness damages housing and bedding | Use suitable site preparation |
| Failing to maintain mesh and hinges | Security deteriorates over time | Inspect and repair regularly |
| Assuming any design is completely predator-proof | Creates false confidence | Use layered protection and ongoing checks |
Frequently Asked Questions
Build a strong night-time shelter with a secure floor or foundation, protective welded mesh over vulnerable openings, properly fastened doors, suitable digging barriers and a covered run. Include adequate space, ventilation and comfortable roosts.
For predator resistance, strong welded hardware cloth is generally preferable to ordinary light hexagonal chicken wire. The wire gauge, opening size and attachment method must also be suitable.
Penn State Extension recommends burying run fencing at least 12 inches (30 cm) deep, with a 6-inch (15 cm) outward toe. Horizontal mesh aprons are an alternative design and require separate assessment.
University of Minnesota Extension gives approximately 3–5 square feet per bird inside the coop as a general reference. Outdoor-run requirements depend on the birds and management system; more room and enrichment may be necessary than a simple minimum suggests.
A common planning range is 18–36 inches (46–91 cm), but lower roosts may be appropriate for heavy or less mobile birds. Provide secure access and adequate space.
Penn State Extension recommends two boxes for the first four hens and another for each additional four. Three boxes would therefore be a reasonable planning example for six hens.
Use protected, appropriately positioned openings that exchange air and remove moisture without directing uncomfortable cold airflow onto resting chickens. Monitor condensation, ammonia and litter moisture.
Yes. Foxes and other digging predators may tunnel beneath unprotected fencing. A properly secured buried barrier, outward-facing apron or solid foundation is needed.
Not necessarily. Roof strength, wall mesh, seams, fastening, digging barriers and door security all matter. A lightweight cover alone does not make the enclosure secure.
Check obvious problems daily, inspect fasteners and vulnerable areas regularly, and carry out a closer assessment after storms, structural damage or signs of predator activity.
Final Thoughts
Building a predator-resistant chicken coop is a matter of getting the details right.
Ordinary chicken wire alone is not enough. A digging barrier is essential where predators can tunnel. The run needs overhead protection, and every access door must close securely.
At the same time, chickens need more than a sealed wooden box.
A suitable coop provides room to move, secure roosts, clean nesting areas, fresh air and an environment that can be maintained properly.
Build for the predators and weather conditions in your area, inspect the finished structure before introducing birds, and keep checking it as materials age.
The safest chicken coop is a well-designed, carefully constructed and regularly maintained enclosure that protects the flock without compromising its welfare.