The information and calculator data provided in this article are aggregated from peer-reviewed veterinary literature, including the Merck Veterinary Manual and AVMA guidelines. This content is for educational and informational purposes only and is not a substitute for professional veterinary advice, diagnosis, or treatment. Always consult with a licensed veterinarian before administering any medication or altering your pet’s health regimen.
How to arrange a house for a paralyzed dog requires rethinking every surface, access point, and daily routine your dog interacts with, because a home designed for an able-bodied dog becomes a field of hazards for one with hind limb paralysis, partial mobility loss, or degenerative neurological conditions. The floors that provided no obstacle to a healthy dog become slip risks that split weak hind legs and reinjure compromised spines. The couch and bed that a mobile dog jumped onto without thought become drop hazards that jolt arthritic joints and compress vulnerable vertebrae. Even the food bowl at the wrong height can trigger a loss of balance that sends a weak-legged dog face-first into the floor.
How to arrange a house for a paralyzed dog is fundamentally a project of hazard elimination combined with functional support, and it touches nearly every room a dog spends time in. VCA Animal Hospitals’ homecare guide for paralyzed pets confirms that successful home management of a paralyzed dog depends on soft, supportive bedding to prevent pressure sores, consistent bladder management to prevent urinary complications, and careful attention to the surfaces and access points the dog navigates daily. The modifications below are organized by the specific zones of the home where risk concentrates, the exact physical harm each hazard causes, and the structural fix that eliminates it.
Table of contents
- How to Arrange a House for a Paralyzed Dog: The Accessible Home Anatomy Matrix
- Best Flooring for Dogs With Rear Leg Weakness: The Complete Surface Guide
- How to Prevent Pressure Sores in Disabled Dogs: The Complete Protocol
- DIY Dog Ramp for Stairs Indoor Placement: The Complete Build Guide
- DIY dog ramp for stairs indoor placement that maximizes safety without professional installation
- Step 1: Measure the vertical rise and calculate the appropriate length
- Step 2: Select construction materials for stability and weight capacity
- Step 3: Apply a non-slip surface treatment
- Step 4: Add raised side rails for larger or unstable dogs
- Step 5: Secure the ramp at both the top and bottom contact points
- Step 6: Position the ramp along the dog’s natural path of movement
- How to Make a Blind Dog Safe at Home: Overlapping Mobility Considerations
- Expressing a Dog Bladder Schedule for Indoor Management
- Expressing a dog bladder schedule for indoor management as part of complete paralyzed dog care
- Additional Modifications for How to Arrange a House for a Paralyzed Dog
- Frequently Asked Questions About How to Arrange a House for a Paralyzed Dog
How to Arrange a House for a Paralyzed Dog: The Accessible Home Anatomy Matrix
How to Arrange a House for a Paralyzed Dog: Mobility Guide: Senior Pet Care & Comfort Assessment
Caring for senior pets centers on managing chronic pain, preserving mobility, and maintaining cognitive vitality. Veterinary assessments like the HHHHHMM quality of life scale evaluate hurt, hunger, hydration, hygiene, happiness, mobility, and more good days than bad. Proactive environmental modifications ensure daily independence, physical comfort, and dignified golden years.
Track Weekly Quality of Life & Mobility Benchmarks
Caring for a paralyzed dog requires objective, ongoing evaluation of their happiness, hygiene, and daily comfort. Benchmark your pet’s wellbeing scores over time with our pet quality of life assessment calculator.
| Comfort Dimension | Clinical Assessment Criterion | Home Modification Strategy | Veterinary Intervention |
|---|---|---|---|
| Mobility & Traction | Difficulty rising or slipping on smooth floors | Non-slip yoga mats and orthopedic memory beds | Adequan injections and NSAID pain management |
| Hydration & Nutrition | Reduced fluid intake or dental sensitivity | Elevated ceramic bowls and warmed wet food | Subcutaneous fluid therapy if indicated |
| Cognitive Health | Nighttime pacing, vocalizing, or disorientation | Predictable lighting routines and puzzle toys | SAMe, fatty acids, and neuroprotective supplements |
| Hygiene & Cleanliness | Urinary incontinence or grooming challenges | Waterproof washable pads and gentle hygiene wipes | Regular physical exams to prevent pressure sores |
How to arrange a house for a paralyzed dog is best approached systematically rather than piecemeal, because hazards that seem minor in isolation compound into serious injury risk when a dog with compromised mobility encounters them repeatedly throughout a normal day. The Accessible Home Anatomy matrix below identifies the highest-risk zones in a typical home, the specific structural hazard present in each zone, the exact physical mechanism of injury that hazard produces in a paralyzed or weak-legged dog, and the modification that resolves it.
Pets and Their People’s mobility-challenged patient guide confirms that setting up the home environment correctly for a mobility-challenged dog requires addressing flooring, furniture access, feeding stations, and toileting areas as distinct zones each requiring its own targeted intervention rather than a single blanket fix applied throughout the home.
How to arrange a house for a paralyzed dog using a zone-by-zone hazard mapping system
| The Home Zone | The High-Risk Structural Hazard | The Physical Risk to the Dog | The Structural Modification |
|---|---|---|---|
| Main Living Room and Hallway Traffic Lanes | Slick hardwood, polished tile, laminate, or waxed flooring throughout the primary walking route | Splits the hind legs apart on contact; hyperextends already weak hips; risks reinjuring a healing or unstable spine when the dog’s hindquarters slide unpredictably | Lay down high-traction yoga mats, rubber-backed runner rugs, or interlocking foam floor tiles along every walking path the dog uses regularly |
| The Couch and Bed Access Points | Forcing the dog to jump up onto or down from furniture that sits at a height requiring hindquarter propulsion | Severe micro-concussive impact to already compromised joints on landing; spinal compression in dogs with existing disc disease or vertebral instability; risk of a hard fall if the weak hindquarters fail to support the landing | Position a high-density foam ramp or a series of gradual, wide, non-slip steps alongside every piece of furniture the dog is permitted to access |
| Feeding and Water Station | Standard floor-level bowls that require the dog to lean forward and down without adequate front-end or hindquarter support | Causes loss of balance during eating or drinking; can lead to face-plants, buckling front limbs, or the dog avoiding food and water entirely due to the physical difficulty of accessing them | Elevate bowls to a height appropriate to the dog’s shoulder level using a stable, non-slip base, or use a stable low tray for dogs who are more comfortable eating in a recumbent or supported position |
| Staircase Access Points | Open staircases without barriers, allowing an unsupervised attempt at descent or ascent | Catastrophic fall risk resulting in additional spinal trauma, fractures, or worsening of existing paralysis; even a partial stair attempt can cause the hindquarters to buckle mid-flight | Install a secure baby gate or pet gate at the top and bottom of every staircase in the home, with no exceptions for “just this once” supervised access |
| Bathing and Grooming Areas | Slick bathtub or shower surfaces without any grip, combined with the physical challenge of positioning a dog who cannot support its own weight | Risk of sudden collapse during bathing, causing the dog’s head or body to strike the hard tub surface; increased anxiety and resistance to future bathing due to the frightening fall experience | Line the tub or shower floor with a rubber non-slip mat and use a bath sling or towel harness to provide manual support throughout the bathing process |
| Outdoor Transition Points (Doorways, Ramps, Steps) | A single external step or threshold that seems minor to an able-bodied observer but represents an insurmountable or dangerous obstacle to a paralyzed dog | Falls at the threshold transition; abrasion injuries from dragging weak hind legs across rough exterior surfaces; potential for the dog to become stuck partway through the transition | Install a permanent low-incline ramp at every exterior threshold the dog needs to cross for toileting access |
| The Rest and Recovery Bedding Zone | Thin, unsupportive bedding placed directly on a hard floor surface, or bedding in a high-traffic area with frequent disturbance | Development of pressure sores from prolonged contact between bony prominences and an inadequately cushioned surface; disrupted rest due to constant foot traffic and noise | Provide thick memory foam or orthopedic bedding with a washable, moisture-resistant cover, positioned in a low-traffic corner away from the household’s main activity flow |
Best Flooring for Dogs With Rear Leg Weakness: The Complete Surface Guide
Best flooring for dogs with rear leg weakness is arguably the single highest-impact modification within the broader project of how to arrange a house for a paralyzed dog, because flooring is the surface the dog contacts continuously throughout every waking hour. A dog with rear leg weakness relies on friction between paw pads and floor surface to generate the propulsion and stability that compromised muscles and nerves can no longer reliably provide, and a floor that removes that friction removes the dog’s remaining functional mobility along with it.
The Canine Arthritis Resources and Education organization’s home environment modification guide confirms that flooring modification is one of the most impactful interventions veterinary rehabilitation specialists recommend for dogs with mobility impairment, noting that simple modifications to flooring, stairs, bedding, and feeding stations can substantially improve a compromised dog’s quality of life and functional independence.
Best flooring for dogs with rear leg weakness across every room type
The best flooring for dogs with rear leg weakness, ranked by traction quality and practicality:
- Rubber-backed runner rugs: the most reliable traction surface for hallways and primary walking paths; the rubber backing prevents the rug itself from sliding on the hard floor beneath it, while the rug’s textured top surface provides paw grip that hardwood, tile, and laminate cannot offer
- Interlocking foam floor tiles: ideal for creating a defined “safe zone” in a single room, providing both traction and a slightly cushioned surface that reduces impact stress on weak joints during standing and walking
- High-traction yoga mats: an economical, easily repositioned option for spot-treating specific problem areas like the space in front of a food bowl or the landing zone at the bottom of a ramp
- Low-pile, tightly woven carpet: acceptable as a permanent flooring solution in rooms the dog uses consistently, provided the pile is kept clean and is not so deep that it interferes with paw placement
- Non-slip pet-specific traction spray or wax applied to existing hard flooring: a supplementary option for homeowners unable to install rugs or mats throughout, though Charlottesville Dog Training’s accessibility guide notes this should be treated as a supplement to physical traction surfaces rather than a replacement
Flooring types to eliminate entirely from a paralyzed dog’s accessible zones:
- Polished or waxed hardwood, which provides essentially no traction for paws already struggling with weak hindquarter drive
- Ceramic or porcelain tile, particularly when wet from water bowl spills, rain tracked in from outside, or bathing overflow
- Laminate flooring, which combines the slickness of hardwood with a texture too smooth for reliable paw grip
- Any flooring transition point where two different surface types meet at an uneven height, creating a trip hazard independent of the traction quality of either surface
Your home can be beautifully styled and completely safe for your furry family member and you should never have to sacrifice one for the other. Get these stunning, practical ideas for creating a truly pet-friendly home that looks like it belongs in a design magazine while keeping your beloved companion safe, comfortable, and happy every single day.
How to Prevent Pressure Sores in Disabled Dogs: The Complete Protocol
How to prevent pressure sores in disabled dogs is one of the most medically consequential aspects of home care for a paralyzed dog, because pressure sores, also called decubital ulcers or bedsores, develop when sustained pressure on bony prominences cuts off local blood circulation, causing tissue death that can progress from mild redness to deep, infected wounds within days if left unaddressed. A dog that cannot reposition itself independently is entirely dependent on its caregiver’s proactive management to prevent this painful and potentially serious complication.
VCA Animal Hospitals confirms that paralyzed dogs require soft, thick bedding to reduce the risk of pressure sores from lying in one position for extended periods, specifically recommending memory foam or egg-crate style foam bedding over standard flat cushions. The organization further confirms that pressure sores most commonly develop on the hips, elbows, shoulders, and along the spine, precisely the bony areas that bear the most weight when a dog lies recumbent.
Disabled Dog Care’s dedicated pressure sore prevention guide confirms that dogs with degenerative myelopathy and similar progressive mobility conditions face elevated pressure sore risk as their mobility declines, and that early intervention through repositioning and skin monitoring is dramatically more effective and less costly than treating an established sore.
How to prevent pressure sores in disabled dogs through positioning, bedding, and skin monitoring
The complete protocol for how to prevent pressure sores in disabled dogs:
Repositioning schedule:
- Turn or reposition a dog who cannot move independently every 2 to 3 hours throughout the day, alternating which side bears the dog’s weight to distribute pressure across different bony prominences over time
- Set a recurring alarm or reminder system to ensure repositioning happens on schedule even during busy days, as pressure sores can begin developing in as little as a few hours of sustained, unrelieved pressure on vulnerable areas
Bedding selection:
- Use medical-grade memory foam or egg-crate foam bedding that distributes body weight across a larger surface area rather than concentrating pressure at bony contact points
- Add a washable, moisture-wicking cover over the foam bedding to manage the incontinence that frequently accompanies paralysis without compromising the foam’s cushioning properties
- Replace bedding immediately if it becomes compressed, flattened, or loses its cushioning quality, as degraded foam no longer provides adequate pressure distribution
Skin monitoring and hygiene:
- Perform a full-body skin check at least once daily, paying particular attention to the hips, elbows, shoulders, hocks, and any area along the spine that maintains sustained floor or bedding contact
- Look for early warning signs including redness that does not fade quickly when pressure is released, areas of thinning or missing hair, and any skin that feels unusually warm or firm compared to surrounding tissue
- Keep the skin clean and completely dry at all times, particularly for dogs managing urinary or fecal incontinence alongside their mobility impairment, since moisture trapped against the skin dramatically accelerates pressure sore development
Circulation support:
- LinkedIn’s veterinary bedsore management summary confirms that gentle massage of at-risk areas can stimulate blood flow and help prevent sores from developing, alongside the core recommendations of regular position changes and soft bedding
- Incorporate passive range-of-motion exercises as recommended by a veterinary rehabilitation specialist to maintain circulation in paralyzed limbs that cannot move independently
Treatment if a pressure sore develops despite prevention efforts:
- Clean any developing wound with sterile saline solution or a veterinarian-approved pet-safe antiseptic to prevent secondary bacterial infection
- Apply veterinarian-recommended antibacterial treatments, which may include medical-grade honey preparations or topical antibiotic ointments depending on the sore’s severity
- Cover the wound with appropriate medical gauze to protect it from further pressure and contamination while maintaining the moist wound environment that supports healing
- Contact a veterinarian promptly for any sore that appears to be worsening, draining, or showing signs of infection, as pressure sores in immobile dogs can progress rapidly without professional intervention
Milking a pet cow sounds intimidating but with the right technique and a little patience, it becomes one of the most rewarding and wholesome daily rituals you’ll ever share with your animal. Follow this step-by-step guide to milking a pet cow and discover just how satisfying and surprisingly straightforward the journey to fresh, homegrown dairy delights can truly be.
DIY Dog Ramp for Stairs Indoor Placement: The Complete Build Guide
DIY dog ramp for stairs indoor placement solves one of the most common access challenges in how to arrange a house for a paralyzed dog: the vertical transitions between floor levels, furniture heights, and outdoor thresholds that a healthy dog navigates without a second thought but that represent genuine obstacles or outright hazards for a dog with compromised mobility. A well-built ramp restores independent access to key areas of the home while eliminating the jarring impact of jumping or the danger of attempting stairs with unreliable hindquarters.
Pink Power Drill’s pet ramp building guide confirms the core construction principles for a functional DIY dog ramp: the incline should be gradual rather than steep, the surface must provide reliable traction throughout its full length, and the structure must be stable enough that it does not shift, wobble, or flex under the dog’s weight during use. DIY Scraftsy’s collection of dog ramp plans confirms that ramp designs vary considerably based on the specific access point being addressed, whether that is a couch, bed, vehicle, or staircase, and that matching the ramp design to its specific placement significantly improves both safety and the dog’s willingness to use it.
DIY dog ramp for stairs indoor placement that maximizes safety without professional installation
The complete DIY dog ramp for stairs indoor placement build process:
Step 1: Measure the vertical rise and calculate the appropriate length
Measure the exact height from the floor to the target surface, whether that is the top of a bed, a couch cushion, or the top of a staircase. As a general guideline, the ramp’s total length should be approximately four to six times the vertical height to achieve a gradual enough incline for a dog with weak hind legs to navigate safely without excessive strain.
Step 2: Select construction materials for stability and weight capacity
Choose plywood or similar rigid material for the ramp’s structural base, sized appropriately for the dog’s weight, and reinforce the frame with side rails or a supportive understructure to prevent flexing or sagging under repeated use.
Step 3: Apply a non-slip surface treatment
Cover the entire ramp surface with outdoor carpet, rubber matting, or another high-traction material, extending the traction surface completely from top to bottom with no exposed sections of bare wood or slick material anywhere along the incline.
Step 4: Add raised side rails for larger or unstable dogs
Install low side rails along the full length of the ramp for dogs with significant balance impairment, providing a physical boundary that prevents the dog from sliding off the ramp’s edge during ascent or descent.
Step 5: Secure the ramp at both the top and bottom contact points
Attach the ramp securely at its base and, where possible, at its top contact point using brackets, weighted anchors, or a design that wedges the ramp firmly against the target surface, eliminating any shifting or sliding that could cause the ramp to move out from under the dog mid-transit.
Step 6: Position the ramp along the dog’s natural path of movement
Place the completed ramp exactly where the dog already attempts to access the target surface rather than requiring the dog to relearn an unfamiliar route, and introduce the ramp gradually using treats and encouragement rather than forcing immediate use.
Placement priorities for DIY dog ramp for stairs indoor placement throughout the home:
- Bedside ramps for dogs who sleep with their owners and would otherwise attempt to jump on or off the bed unsupervised
- Couch-side ramps in the primary living area where the dog spends waking hours
- Full staircase ramps only in homes where stair access cannot be avoided entirely through gating, and only under close supervision even with a ramp in place
- Exterior threshold ramps at every door the dog uses for outdoor toileting access, since even a single low step can represent a fall hazard for a dog with significant hindquarter weakness
Every accident on your floor is a small reminder that house training takes patience, consistency, and the right approach from the very start. Say goodbye to indoor accidents once and for all with these proven, gentle house training strategies that actually work even for the most strong-willed, free-spirited pets you’ve ever tried to teach.
How to Make a Blind Dog Safe at Home: Overlapping Mobility Considerations
How to make a blind dog safe at home becomes a critical secondary consideration for households managing a dog with both paralysis and vision impairment, a combination that occurs more frequently than many owners expect given that certain neurological conditions and the aging process can affect both mobility and vision simultaneously. The core principles of blind dog home safety complement rather than conflict with paralyzed dog home arrangement, since both conditions benefit from a stable, predictable, obstacle-free environment.
Best Friends Animal Society’s blind pet care guide confirms the foundational principle for how to make a blind dog safe at home: maintaining a consistent floor plan is essential, since a blind dog builds a mental map of the home through repeated navigation, and rearranging furniture or leaving new objects in walking paths eliminates the reliability of that mental map and causes collisions and disorientation.
Dr. Buzby’s Toe Grips comprehensive blind dog care guide confirms additional specific safety measures for how to make a blind dog safe at home: use textured mats or rugs as tactile landmarks near important locations like food and water stations, doorways, and resting areas; pad or cover sharp furniture corners at the dog’s head height to prevent injury during navigation; and install gates at all staircases regardless of whether the dog has previously attempted them, since a blind dog’s spatial awareness can be disrupted by even minor environmental changes.
How to make a blind dog safe at home when paralysis and vision loss occur together
How to make a blind dog safe at home when paralysis and vision loss occur together
ElleVet Sciences’ blind dog caring guide confirms that sound cues, including wind chimes near exterior doors or a water fountain bowl instead of a silent still-water bowl, help a blind dog locate key resources independently, reducing anxiety and the frequency of collisions that occur when a dog searches for resources without adequate sensory guidance.
The complete checklist for how to make a blind dog safe at home when paralysis is also present:
- Keep the floor plan completely static; do not rearrange furniture even temporarily for cleaning or other household needs without returning items to their exact original position
- Use consistent textured rugs or mats at every key location: the feeding station, the resting area, ramp entry and exit points, and any doorway leading outside
- Block every staircase with a secure gate regardless of the dog’s prior familiarity with the layout, since the combination of vision loss and mobility impairment compounds fall risk substantially beyond either condition alone
- Pad sharp furniture corners and table edges at the height where a blind dog’s head would make contact during navigation
- Tape down any loose cords, cables, or rug edges that could catch a paw or cause a trip, which carries elevated risk for a dog already managing hindquarter weakness
- Introduce a consistent sound source, such as a water fountain, near the water bowl to help the dog locate it independently through hearing rather than relying solely on the fixed floor plan memory
Your dog deserves a cozy, weatherproof space they can call entirely their own and building one is so much easier and more rewarding than you might think. Follow this complete DIY dog house guide and build your furry friend a comfortable, loving backyard retreat that gives them the security, shelter, and sense of home they absolutely deserve.
Expressing a Dog Bladder Schedule for Indoor Management
Expressing a dog bladder schedule for indoor management addresses one of the most medically important daily responsibilities in caring for a paralyzed dog, since many spinal cord injuries and neurological conditions that cause hind limb paralysis also disrupt the nerve pathways controlling bladder function, leaving the dog unable to urinate voluntarily. Without a consistent manual bladder expression schedule, urine retention leads to bladder overdistension, urinary tract infections, and in severe cases, permanent bladder damage or kidney complications.
VCA Animal Hospitals confirms that regular bladder emptying is essential for paralyzed dogs who cannot urinate voluntarily, noting that urine allowed to sit in the bladder for extended periods significantly increases the risk of urinary tract infection and other complications, and that owners should be taught the proper manual expression technique directly by their veterinary team rather than relying solely on written instructions.
Expressing a dog bladder schedule for indoor management as part of complete paralyzed dog care
The recommended framework for expressing a dog bladder schedule for indoor management:
- Establish a baseline schedule of bladder expression every 6 to 8 hours as a starting point, adjusting based on your veterinarian’s specific assessment of your dog’s bladder capacity and the nature of their neurological condition
- Increase frequency for dogs showing signs of overdistension between scheduled expressions, including a visibly swollen lower abdomen or discomfort when the bladder area is touched
- Learn the correct manual expression technique directly from your veterinarian or a veterinary technician through hands-on demonstration before attempting the procedure independently, as improper technique can cause bladder trauma or fail to fully empty the bladder
- Perform bladder expression over an easily cleaned surface or outdoors when possible to simplify the cleanup process and reduce indoor odor and moisture accumulation
- Monitor urine color, clarity, and odor at each expression session, since changes can be an early indicator of urinary tract infection requiring veterinary attention
- Keep detailed records of expression timing and any observed changes to share with your veterinary team during follow-up appointments, particularly important for dogs whose neurological condition may be progressing
Integrating bladder management into the broader home layout:
- Position the dog’s primary resting area within reasonably easy reach of the location where bladder expression is performed, minimizing the distance the dog needs to be carried or moved for this frequent daily procedure
- Keep expression supplies, including absorbent pads, cleaning solution, and gloves, stored in a consistent, easily accessible location near the designated expression area
- Use waterproof, washable bedding covers throughout the home to manage the incontinence that frequently accompanies paralysis between scheduled expression sessions
Before your new pet takes a single curious step through your front door, your home needs to be ready for absolutely everything they’ll explore. Follow this complete pet-proofing guide to eliminate every hidden hazard and create a warm, secure haven your furry companion can freely and safely call their very own.
Additional Modifications for How to Arrange a House for a Paralyzed Dog
How to arrange a house for a paralyzed dog often extends beyond structural and surface modifications into the incorporation of mobility support equipment that works alongside the home’s physical layout to maximize the dog’s independence and comfort. These tools do not replace the structural modifications covered above but function as a complementary layer of support.
iHeartDogs’ specially-abled dog home guide confirms that mobility aids including wheelchairs, slings, and harnesses designed for dogs with hind limb paralysis work most effectively when the home environment has already been modified to support their use, noting that a wheelchair is far less useful in a home still full of slick flooring and inaccessible furniture heights than in one already optimized with traction and appropriate access points.
The FCE Dogs recovery home guide confirms that the physical environment directly shapes a dog’s confidence during mobility recovery, noting that the wrong home setup, characterized by slippery floors and inadequate bedding, actively undermines a dog’s willingness to attempt movement, while the right setup gives the dog enough confidence to try taking a step. This underscores that how to arrange a house for a paralyzed dog is not merely about preventing injury but about actively supporting whatever functional mobility the dog retains or is working to regain.
How to arrange a house for a paralyzed dog with mobility aids and support equipment
The complete list of supplementary equipment considerations:
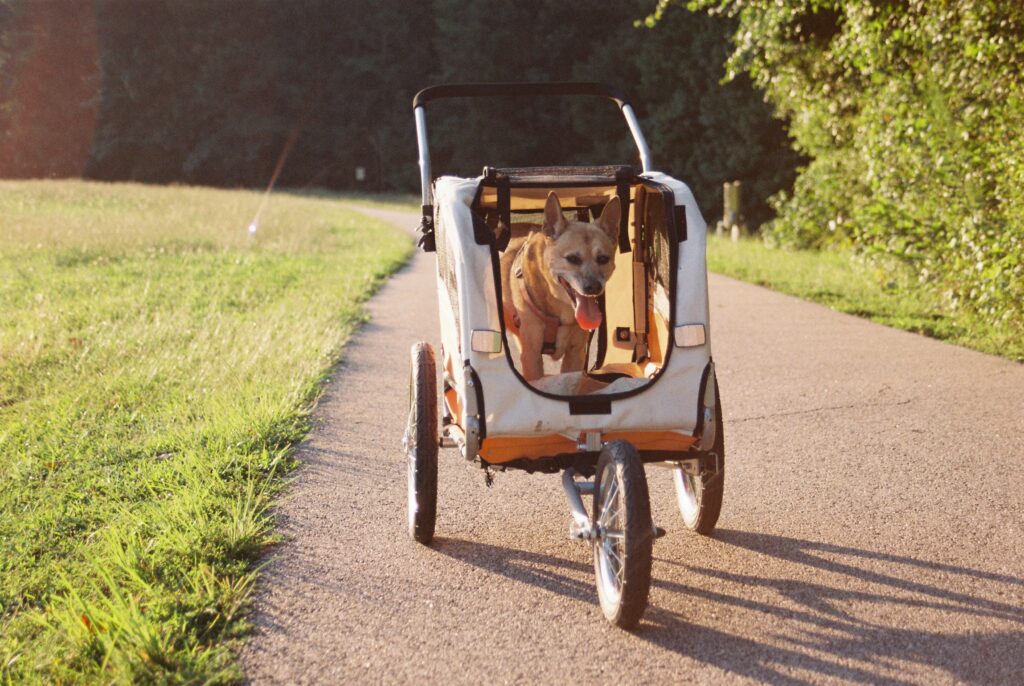
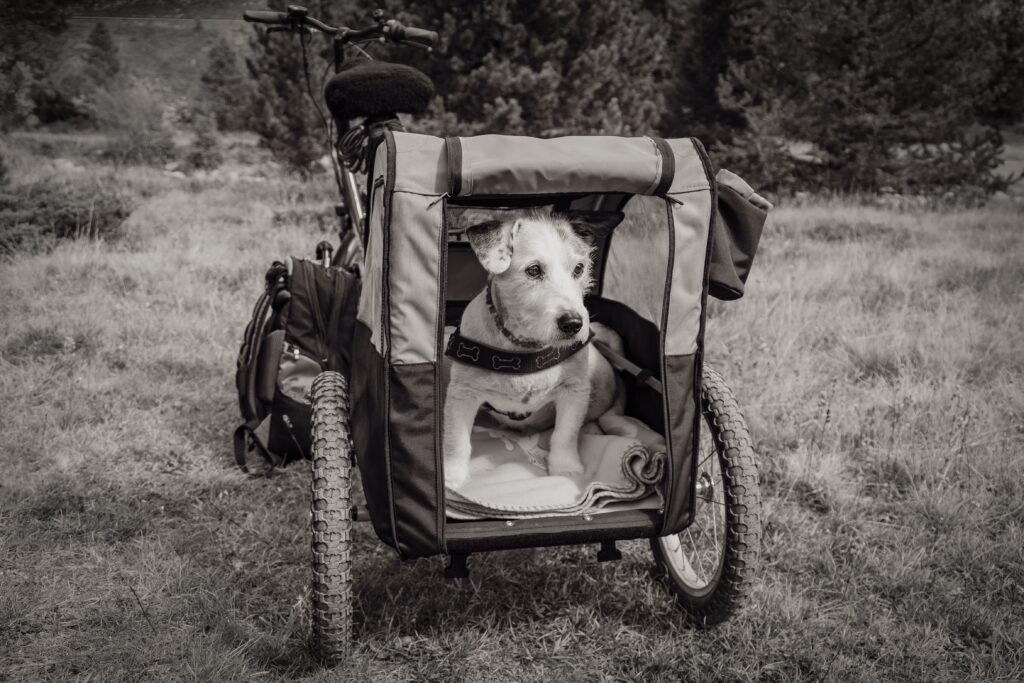
- Dog wheelchairs or carts for hind limb support during exercise and outdoor toileting, sized precisely to the individual dog’s measurements by a veterinary rehabilitation professional
- Support harnesses or slings with rear-lift capability for assisting a dog with partial function during transitions between rooms or over unavoidable thresholds
- Toe grips or paw traction products applied directly to the dog’s nails for additional grip on flooring that cannot be fully covered with mats or rugs
- Waterproof, washable belly bands or diapers for dogs managing incontinence, used in combination with, not as a replacement for, a consistent bladder expression schedule
Frequently Asked Questions About How to Arrange a House for a Paralyzed Dog
The most important first step in how to arrange a house for a paralyzed dog is addressing flooring throughout the dog’s primary walking routes, since traction failure is the most immediate and common cause of falls and reinjury. VCA Animal Hospitals confirms that soft, supportive bedding and non-slip surfaces form the foundation of safe paralyzed dog home care, with pressure sore prevention and bladder management following closely as ongoing daily responsibilities.
How to prevent pressure sores in disabled dogs requires repositioning the dog every 2 to 3 hours if they cannot move independently, using thick memory foam or egg-crate bedding, performing daily full-body skin checks focused on the hips, elbows, shoulders, and spine, and keeping the skin clean and dry at all times. Disabled Dog Care confirms that early intervention through consistent repositioning and monitoring prevents the vast majority of pressure sore cases.
A DIY dog ramp for stairs indoor placement requires measuring the vertical rise, building a gradual incline approximately four to six times that height, covering the entire surface with non-slip traction material, adding side rails for dogs with significant balance impairment, and securing the ramp firmly at both contact points to prevent shifting. Pink Power Drill confirms that stability and consistent traction along the full ramp length are the two most critical safety factors in ramp construction.
📊 Interactive Pet Health & Care Calculators
Plan your pet’s healthcare and daily budget with our free interactive tools:
🐾 Related Resources & Interactive Tools in This Guide:
- Interactive Calculator: Pet Quality of Life Scale & Comfort Checklist — Assess senior pet comfort, pain thresholds, and vitality using the clinical HHHHHMM scale.
- Clinical Resource: Dog Relaxation Techniques: Creating Zen Spaces for You and Your Dog
- Behavior & Training Guide: Pet Stem Cell Therapy: A Revolutionary Guide to Regenerative Medicine for Your Beloved Companion
- Related Expert Guide: The Best Pet Fish for Your Lifestyle
Growth & Immunization Tracking: To predict your puppy’s adult weight based on current breed trajectory, use our interactive Puppy Growth Calculator. For core vaccine timelines and veterinary cost planning, refer to the Puppy Vaccination Schedule Tool.
📚 Related Topic Cluster Guides & Veterinary Tools
Explore our complete Pet Care & Clinical Health Hub for comprehensive guides, veterinary diagnostic checklists, and daily care protocols.
- How to Comfort a Dog in Heat for the First Time: The Complete Guide 2026
- How to Care for a Pregnant Cat at Home (Diet & Labor)
- How to Calm a Male Dog When a Female Is on Heat: The Complete Guide
- How to Calm a Cat in Heat at Home: The Complete 2026 Owner’s Survival Guide
- Interactive Tool: Pet Age to Human Years Conversion Calculator