⚕️ Veterinary Data & Research Notice: The information and calculator data provided in this article are aggregated from peer-reviewed veterinary literature, including the Merck Veterinary Manual and AVMA guidelines. This content is for educational and informational purposes only and is not a substitute for professional veterinary advice, diagnosis, or treatment. Always consult with a licensed veterinarian before administering any medication or altering your pet’s health regimen.
DIY horse bathing tips are an essential component of responsible equine ownership delivering benefits far beyond a clean, gleaming coat. A properly executed bath removes accumulated sweat, dirt, manure, and environmental debris that, if left unchecked, create the warm, moist conditions in which bacterial and fungal skin infections thrive. Per Mad Barn’s 2026 complete bathing guide, “rolling in mud and dust protects horses’ skin but soils their coat proper bathing removes buildup, supports skin health, and keeps horses comfortable.”
DIY horse bathing tips in 2026 have been elevated by the concept of Precision Grooming a trend among equine veterinarians and professional grooms that treats every bath as a complete head-to-toe health scan. Running your hands and eyes methodically over your horse’s entire body while bathing is the single best opportunity to detect heat in a tendon, swelling in a joint, new skin lesions, parasitic activity, or the early crusty patches of rain rot conditions that can be missed entirely under a winter coat or between daily brushing sessions. Bathing is the best time to check your horse’s legs for heat, and top equestrian professionals treat this assessment as non-negotiable.
The complete DIY horse bathing tips guide below covers every phase of equine bathing from equipment assembly and DIY natural formulations through step-by-step technique, post-bath chilling prevention, therapeutic hydrotherapy applications, and equine skin health monitoring at the professional level.
🛑 When to Consult an Equine Veterinarian:
- Skin lesions, open wounds, or raw areas discovered during bathing
- Signs of rain rot, scratches, or ringworm covering large body areas
- Any leg heat, swelling, or lameness detected during post-bath inspection
- Horse shows signs of respiratory distress during or after bathing
- Temperature below 50°F / 10°C without access to hot water and indoor drying
- Any first bath attempt on a horse with unknown water history
Contact your equine vet or the American Association of Equine Practitioners (AAEP) for guidance
Table of contents
- DIY Horse Bathing Tips: How Often Should You Bathe a Horse?
- DIY Horse Bathing Tips: Equipment and Essential Gear
- DIY Horse Bathing Tips: Natural and DIY Solutions
- DIY Horse Bathing Tips: Step-by-Step Bathing Technique
- Setting Up: Non-Slip Wash Stall Flooring Options
- Step-by-Step Horse Bathing for Beginners
- Step 1 Pre-bath dry grooming:
- Step 2 Secure the horse correctly:
- Step 3 Introduce water starting at the feet:
- Step 4 Safe water pressure for horse baths:
- Step 5 Apply shampoo correctly:
- Step 6 How to bathe a horse’s head without panicking them:
- Step 7 Cleaning a horse’s sheath or udder safely:
- Step 8 Complete rinsing:
- DIY Horse Bathing Tips: The 2026 Precision Grooming Health Scan
- Rain Rot, Scratches, and Dermatitis: Identification and Action
- DIY Horse Bathing Tips: Post-Bath Drying and Chilling Prevention
- Post-Bath Drying Techniques: Coolers and Scrapers
- DIY Horse Bathing Tips: Equine Hydrotherapy Benefits
- FAQ About DIY Horse Bathing Tips
- Next Steps: Your Horse’s DIY Bathing Plan
DIY Horse Bathing Tips: How Often Should You Bathe a Horse?
DIY Horse Bathing Tips: Hygiene & Coat Protocol
Proper care for diy horse bathing tips centers on gentle weekly brushing, regular ear and paw inspections, and using species-specific, pH-balanced washes. Routine grooming removes trapped dander, prevents painful matting, and preserves the lipid barrier essential for healthy skin.
| Key Care Dimension | Recommended Standard | Primary Benefit | Management Best Practice |
|---|---|---|---|
| Preventative Veterinary Care | Annual or biannual clinical checkups | Early detection of underlying disease | Maintain up-to-date vaccine and wellness records |
| Species-Appropriate Diet | Formulated to life stage and activity level | Optimal muscle tone and metabolic balance | Measure exact daily feeding portions consistently |
| Environmental Enrichment | Daily mental exercise and physical activity | Prevents boredom and destructive behaviors | Rotate interactive toys and training games weekly |
| Emergency Preparedness | Dedicated pet emergency fund or insurance policy | Guarantees immediate medical care access | Keep 24-hour ER clinic contact readily accessible |
Understanding the correct bathing frequency is the starting point for responsible DIY horse bathing tips because over-bathing is as damaging as neglect.
Finding the Right Bathing Schedule
The natural oils secreted by a horse’s skin sebum produced by sebaceous glands distributed across the coat form the primary barrier against bacterial invasion, moisture intrusion, UV damage, and external temperature fluctuation. Frequent bathing with shampoo strips this oil layer, leaving skin dry, flaky, and vulnerable to infection. Per Farnam Equine’s veterinary-reviewed bathing guide, shampoo should be used sparingly and strategically.
Recommended bathing frequencies:
| Situation | Recommended Frequency |
|---|---|
| Competition preparation | As needed before shows or events |
| Post-intense exercise (summer) | Rinse with water only (no shampoo) after each workout |
| General maintenance (warm months) | Full shampoo bath every 2–4 weeks |
| Post-medical treatment (rain rot, fungal) | Per veterinary prescription schedule |
| Winter (cold weather) | Spot cleaning; full bath only with hot water and indoor drying |
| Mane and tail | Every 1–2 weeks if showing; monthly for maintenance |
Plain water rinses after exercise are not counted as full baths rinsing sweat from a horse’s body after every ride is excellent practice in warm weather and does not strip coat oils. Full shampoo baths should be reserved for genuine cleaning needs.
Bathing a cat sounds like a recipe for chaos but with the right approach, it doesn’t have to be. Discover these practical DIY cat bathing tips that keep your fluffy companion fresh, clean, and surprisingly cooperative without the scratches, the drama, or the soaking wet aftermath.
DIY Horse Bathing Tips: Equipment and Essential Gear
Assembling the complete DIY horse bathing tips toolkit before the horse enters the wash stall prevents rushed handling and ensures a calm, efficient session.
Ergonomic Horse Sweat Scrapers
Ergonomic horse sweat scrapers are one of the most critical tools in DIY horse bathing tips used immediately after rinsing to remove the majority of surface water, dramatically shortening drying time and reducing chilling risk.
Types of sweat scrapers:
- Curved aluminum sweat scraper: Contours to the horse’s body for maximum water removal; standard professional choice
- Flexible rubber sweat scraper: Gentle on bony prominences (spine, hip points, facial bones); better for body-sensitive horses
- HandsOn grooming gloves (silicone nubs): Provide simultaneous scraping and massage function; effective on legs and face where rigid scrapers cannot reach
- Pocket sweat scrapers: Compact design for one-handed use while managing a moving horse
Technique: Work in long, smooth strokes following the direction of hair growth from withers toward hindquarters and shoulder to flank. Use angled pressure to channel water off the coat rather than just moving it around the surface. Always scrape before applying a cooler.
Rubber Curry Combs for Deep Cleaning
Rubber curry combs for deep cleaning are the pre-bath and mid-bath workhorses of DIY horse bathing tips loosening embedded dirt, stimulating skin circulation, and distributing shampoo down to the skin surface.
Types and uses:
- Firm rubber oval curry: Pre-bath dry brushing of muddy coat to break up dried dirt (do not use on bony legs, face, or spine)
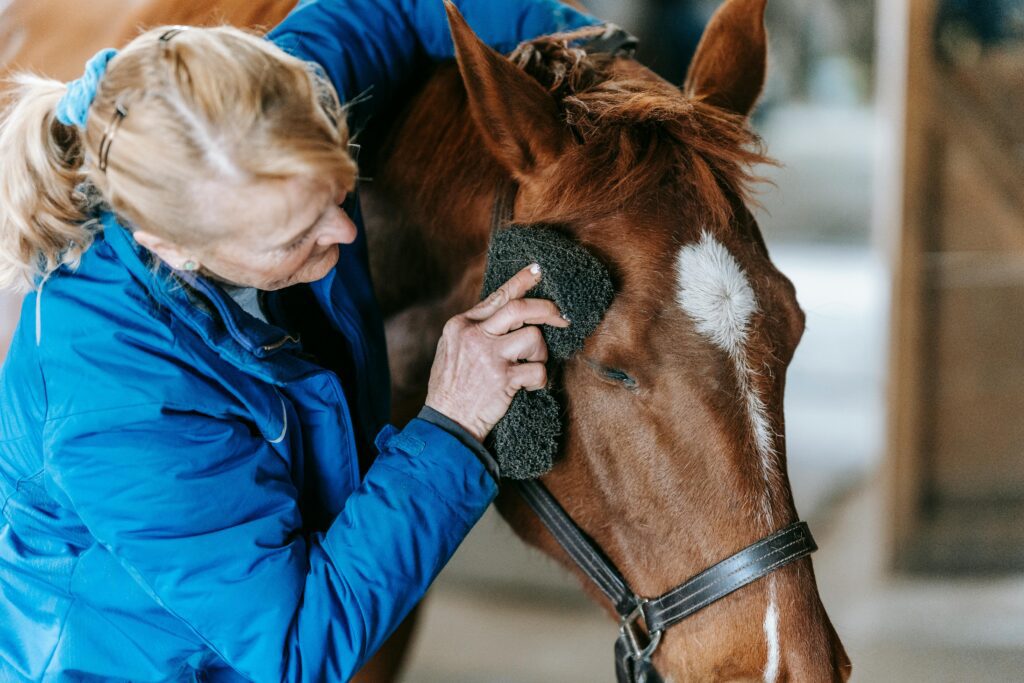
- Soft rubber grooming mitt or glove: Ideal for sensitive areas including face, legs, and belly; safe for hose-wet coat; works shampoo into dense coat effectively
- Flexible rubber scrubbing curry: Wet application during bathing works shampoo down through thick coat to skin level
Per Practical Horseman Magazine’s professional groom bathing guide, thorough pre-bath currying removes loose dirt before water contact this prevents dirty water from embedding debris into the coat rather than lifting it out.
Best Horse Grooming Totes 2026
The best horse grooming totes for DIY horse bathing tips keep every tool organized at the wash stall and prevent the critical error of leaving a horse untied while searching for a missing item.
What a complete 2026 DIY horse bathing tips tote should contain:
- Rubber curry comb (firm and soft)
- Sweat scraper (aluminum)
- Mane and tail comb (wide-tooth)
- Microfiber grooming mitts (2)
- Soft-bristled face brush
- Large sponge for body application (2 minimum one for body, one for genital area)
- Small sponge for face
- Shampoo (1–2 products)
- Conditioner or coat spray
- Apple cider vinegar rinse bottle
- Clean cotton towels (minimum 4)
- Small bucket for diluting shampoo
- Cotton balls for ear protection
2026 recommended tote: Tough 1 Mesh Wash Tote mesh construction allows drainage and drying between uses; multiple external pockets for organized tool access. Dover Saddlery and Riding Warehouse both carry comprehensive bathing kit selections.
Soft-Bristled Face Brushes for Horses
Soft-bristled face brushes for horses are non-negotiable in DIY horse bathing tips because the face requires the gentlest equipment a critical detail that prevents the panic response that leads to head tossing, pulling back, and dangerous behavior at the wash stall.
A quality equine face brush should have:
- Natural soft bristles (goat hair or fine synthetic never stiff bristles)
- Small, hand-fitting brush head that can navigate eye socket, nostril, and ear base contours
- Smooth, non-slip handle for wet conditions
Never use: Standard body brushes on the face; the bristle firmness that effectively removes body dirt causes significant discomfort on a horse’s delicate facial skin, potentially creating lasting aversion to head bathing.
Mane and Tail Detangling Combs
Mane and tail detangling combs for DIY horse bathing tips require specific selection to prevent breakage of the long hairs that take years to grow back to show-ring length.
Recommended tools:
- Wide-tooth comb: For initial detangling of wet mane and tail; work from ends toward roots (never root to tip forces tangles tighter)
- Dandy brush: Light detangling of nearly-tangle-free mane and tail after conditioning
- Fingers only: For severe tangles comb only accelerates breakage when encountering a serious knot; detangle by hand first
Application order: Apply conditioner or DIY coconut oil treatment before combing always detangle lubricated hair, never dry.
Microfiber Grooming Mitts for Horses
Microfiber grooming mitts for horses deliver a versatile, skin-safe application in DIY horse bathing tips that bridges the functions of washing, rinsing, and shine enhancement in a single tool.
How microfiber mitts improve bathing:
- Fine microfiber fibers penetrate the coat to lift and capture dirt without the abrasion of traditional scrubbing tools
- Distribute shampoo more evenly across the coat surface than sponge application
- Final post-rinse buffing with a dry microfiber mitt enhances coat shine by flattening and aligning individual hair cuticles
- Particularly effective for face, lower legs, and other areas where grooming tools must be gentle
Portable Hot Water Horse Washers
Portable hot water horse washers are among the most valuable investments in serious DIY horse bathing tips practice—transforming a stressful cold-water bath into a genuinely comfortable experience that horses accept far more readily.
Why warm water matters in horse bathing:
Cold water is one of the most common reasons horses resist bathing. Per Mad Barn’s equine bathing guide, low water pressure and appropriate temperature are both critical comfort factors cold water startles horses, causes muscle tensing, and creates lasting negative associations with wash stall environments.
2026 leading portable hot water horse washing systems:
Insta-Hot Portable Equine Washing System:
Per Cheshire Horse and Schneiders Saddlery, the Insta-Hot system heats source water up to 40°F warmer at 1.4 gallons per minute, operates on a standard 20 lb propane tank for up to 18 hours of use, requires no electricity, and includes automatic safety shut-off after 20 minutes of non-use. Ideal for barns without hot water plumbing and for use at shows.
Eccotemp L5 Portable Water Heater:
The Eccotemp L5 is a propane-powered tankless hot water heater producing consistent warm water output popular as a permanent or semi-permanent wash stall installation at barns without plumbing infrastructure.
If bath time in your house means hiding, howling, and a completely drenched bathroom floor, something needs to change. Learn how to transform dog bath time into a calm, enjoyable experience that your pup actually welcomes with a wagging tail instead of a dramatic escape attempt.
DIY Horse Bathing Tips: Natural and DIY Solutions
Natural and homemade formulations are some of the most effective and economical tools in DIY horse bathing tips with several well-proven formulas used by professional grooms at the highest levels of competition.
DIY Natural Horse Shampoo Recipes
DIY natural horse shampoo recipes offer safe, effective alternatives to commercial products particularly for horses with sensitive skin or known reactions to artificial fragrances and detergents.
Basic castile soap horse shampoo:
Dr. Bronner’s Castile Soap (liquid) is one of the most widely recommended DIY horse shampoo bases a true soap made from organic plant oils with no synthetic detergents, parabens, or artificial fragrances.
DIY natural horse shampoo recipe (per the Equestrian Life Brand formula):
- 1 cup Dr. Bronner’s liquid castile soap (peppermint or unscented)
- 1 teaspoon jojoba oil (skin-conditioning)
- 1 teaspoon aloe vera gel (soothing; anti-inflammatory)
- 10 drops lavender essential oil (optional calming; mild antimicrobial)
- Dilute entire mixture with 2 cups water before application
Castile soap for sensitive equine skin:
The castile soap formulation is the most appropriate shampoo base for horses with diagnosed sensitive skin, contact dermatitis, or known reactions to commercial shampoo ingredients. Its pH (approximately 9.0) is closer to equine skin pH than most commercial shampoos, making it less disruptive to the skin’s acid mantle.
Apple Cider Vinegar Rinse for Horse Coat Shine
Apple cider vinegar rinse for horse coat shine is one of the most widely validated DIY horse bathing tips in professional equestrian grooming used consistently by competitive grooms at the Grand Prix level.
Per Horse Sport Magazine’s grooming hacks guide, “try using one part apple cider vinegar with three parts water after a bath to rinse and condition the coat, mane, and tail not only will the vinegar completely rinse out any remaining shampoo, it will also give the hair a beautiful shine.”
Why apple cider vinegar works:
- pH balancing: ACV’s mild acidity neutralizes the slightly alkaline residue left by soap, closing the hair cuticle and producing the smooth, light-reflective surface that gives a coat its “mirror” shine
- Shampoo residue removal: Dissolves soap minerals and calcium deposits that dull coat appearance after rinsing in hard water areas
- Antimicrobial properties: ACV with “the mother” contains antibacterial compounds that provide mild protection against surface bacterial overgrowth
- Conditioning proteins: Per Equine Exchange Store’s 2026 ACV guide, ACV contains vitamins and proteins that act as natural conditioners unlike white vinegar
Standard formula: 1 cup apple cider vinegar (raw, unfiltered, with “the mother”) per 3 cups warm water. Apply as a final rinse after shampoo rinse is complete no need to rinse out again.
Leave-in conditioner spray: 2 tablespoons argan oil + 1 cup ACV + 2 cups water in a spray bottle. Shake well before each use. Apply to mane and tail after detangling; provides conditioning and shine enhancement between baths.
Homemade Whitening Shampoo for Gray Horses
Homemade whitening shampoo for gray horses is a specialized DIY horse bathing tips application for owners of grey, cremello, or white-coated horses where yellow staining from manure, urine, and oxidation is a constant grooming challenge.
DIY whitening formula:
- 1 cup white castile soap (unscented)
- 2 tablespoons baking soda (mild abrasive + whitening agent)
- 2 tablespoons white vinegar (brightening)
- 1 tablespoon lemon juice (natural bleaching use sparingly and rinse thoroughly)
- 2 cups warm water
Application protocol:
Apply specifically to stained areas (tail, lower legs, belly); leave on for 3–5 minutes; scrub with soft brush; rinse thoroughly. Do not use lemon juice-containing formulations in direct sunlight photosensitization can cause skin irritation on light-pigmented skin. Apply in shade or covered wash stall only.
Commercial complement: Purple or blue optical brighteners in commercial whitening shampoos (e.g., Cowboy Magic, Quic Silver) work by depositing violet light-absorbing pigments that counteract yellow tones optically a useful addition to the DIY regimen for competition preparation.
DIY Mane and Tail Conditioners With Coconut Oil
DIY mane and tail conditioners with coconut oil are one of the most effective natural DIY horse bathing tips treatments for dry, brittle, or heavily tangled mane and tail hair.
Why coconut oil works:
Cold-pressed coconut oil contains lauric acid a medium-chain fatty acid with an unusually small molecular size that enables genuine penetration into the hair shaft (most conditioning agents coat the outside only). This provides both surface lubrication (detangling) and internal conditioning (reduced breakage), per Equestrian Life Brand’s DIY coat conditioner research.
DIY coconut oil mane and tail treatment:
- Warm 2 tablespoons cold-pressed coconut oil in your hands until liquid
- Work through thoroughly wet mane and tail from mid-shaft to ends (avoid root area can reduce grip of fine-braided show plaits)
- Use wide-tooth comb to distribute evenly
- Leave 5–10 minutes; rinse with warm water
- Follow with ACV rinse for maximum shine
Alternative formula (leave-in between baths):
Mix 1 tablespoon coconut oil + 1 tablespoon argan oil + 1 cup warm water in a spray bottle. Shake well; apply lightly to mane and tail for daily tangle prevention.
Essential Oils Safe for Horses
Using essential oils safely for horses is an important qualification in DIY horse bathing tips because several commonly used essential oils are genuinely toxic to equines, while others provide proven benefits.
Safe and beneficial essential oils for horses:
| Essential Oil | Application | Benefit |
|---|---|---|
| Lavender | Diluted 0.5% in carrier oil; diffused in wash stall | Calming; mild antimicrobial; reduces bathing stress |
| Chamomile (Roman) | Diluted 0.5% in water rinse | Anti-inflammatory; skin soothing for sensitive horses |
| Frankincense | Diluted in carrier oil for topical application | Skin healing; anti-inflammatory |
| Peppermint | Very low dilution (0.1%) in liniment or rinse | Cooling; stimulating circulation post-bath |
Tea tree oil for horses important caution:
Tea tree oil (Melaleuca alternifolia) is frequently recommended in online DIY horse bathing tips for its antifungal properties. While it does have genuine antifungal activity, it must be used at very low dilution only (0.5–1% maximum) and never near the face, mucous membranes, or open wounds. Concentrated tea tree oil is cytotoxic at higher concentrations and should not be applied to broken skin. Always consult your equine veterinarian before using any essential oil treatment on diagnosed skin conditions.
Essential oils to NEVER use on horses:
- Birch or wintergreen (high methyl salicylate systemic toxicity risk)
- Clove, cinnamon, or oregano (caustic to equine skin at any concentration)
- Pennyroyal (toxic)
- Eucalyptus near face or eyes
Per the AAEP guidelines, all topical applications on horses with diagnosed skin conditions should be reviewed by your equine veterinarian before implementation.
Removing Grass and Manure Stains Naturally
Removing grass and manure stains naturally is one of the most practically relevant DIY horse bathing tips for owners who deal with white-legged, grey, or light-colored horses.
Natural stain removal toolkit:
For green grass stains:
- White vinegar undiluted applied directly to stain; allow 2–3 minute dwell time; scrub with soft brush; rinse
- Hydrogen peroxide 3% (pharmacy grade) diluted 50/50 with water: apply to stain; allow 5 minutes; rinse thoroughly (do not use on dark coats lightening effect)
For manure and urine stains:
- ACV (full strength) + baking soda paste applied directly to yellow staining on white legs or tails; scrub and rinse thoroughly
- Commercial enzyme-based stain removers (Cowboy Magic Greenspot Remover, Absorbine ShowSheen Stain Remover) for stubborn staining
Prevention strategy:
Apply a light coat of baby powder, corn starch, or commercial chalk (for show preparation) to white legs after bathing and drying creates a barrier that reduces stain penetration and makes the next cleaning significantly easier.
Behind every champion horse is a carefully crafted nutrition plan that fuels their power, stamina, and brilliance. Explore the fascinating art and science of horse nutrition and discover what it truly takes to nourish these magnificent animals to their absolute peak performance.
DIY Horse Bathing Tips: Step-by-Step Bathing Technique
The actual bathing sequence is the most skill-dependent aspect of DIY horse bathing tips particularly for beginners working with horses new to the wash stall.
Setting Up: Non-Slip Wash Stall Flooring Options
Non-slip wash stall flooring is a foundational safety requirement in DIY horse bathing tips a horse slipping on wet concrete is a life-threatening emergency for both horse and handler.
Recommended non-slip surfaces:
- Rubber mat tiles (interlocking): Most professional choice; permanent installation; 3/4 inch minimum thickness; fully drainable
- Rubber wash stall mat (single piece): Easier to clean than tile; effective grip surface
- Anti-fatigue rubber grid mat: Excellent drainage; superior grip even in heavy water flow
- Temporary non-slip options: Commercial rubber-backed bath mats for occasional use; must be secured to prevent sliding
What to avoid:
- Bare concrete (near-zero grip when wet)
- Wooden boards (rot, splinters, unpredictable grip when wet)
- Gravel or stone (unstable footing; risk of picking up stones in hooves)
Per Mad Barn’s equine bathing safety guidelines, a prepared wash stall environment including secure footing, good lighting, and a secure tie ring at appropriate height is as important as the bathing technique itself for safe DIY horse bathing tips execution.
Step-by-Step Horse Bathing for Beginners
Step-by-step horse bathing for beginners requires a systematic approach that respects the horse’s sensitivity to novel stimulation while delivering a thorough clean the core skill of DIY horse bathing tips.
Step 1 Pre-bath dry grooming:
Curry comb the entire body (except face and lower legs) to break up dried sweat and loose dirt before water contact. Use a dandy brush to remove loosened material from the coat surface. This prevents dirty water from pushing debris into the coat during wetting. Pick all four feet and check each for heat or soreness before bathing begins (Precision Grooming pre-bath assessment).
Step 2 Secure the horse correctly:
Cross-tie in the wash stall or have a handler hold the lead rope. Never attempt to bathe a horse completely untied unexpected reactions to water require immediate handling ability. For horses new to bathing, have an experienced handler present for the first several sessions per Mad Barn’s introductory bathing protocol.
Step 3 Introduce water starting at the feet:
Per Practical Horseman Magazine’s professional groom Laurie Pitts and EQUUS Magazine’s bathing guide, “use the hose to wet all of your horse’s body except his head.” Begin at the lower legs and feet allowing the horse to feel and accept the temperature and sensation before water moves to the body then move to neck, shoulder, barrel, hindquarters, belly, and between the legs. Keep water pressure low throughout; sudden pressure increases are a primary cause of bathing panic.
Step 4 Safe water pressure for horse baths:
Safe water pressure for horse baths is low and constant never use a high-pressure spray anywhere on the horse. Professional recommendation: use a soft spray or shower attachment rather than a direct stream. The goal is a soaking, penetrating wet rather than a blasting rinse. High pressure near the face, ears, genital area, or wound sites causes pain and lasting fear.
Step 5 Apply shampoo correctly:
Per Farnam Equine’s bathing protocol, “mix a couple of gallons of water in a bucket with a couple of ounces of shampoo apply the suds with a big sponge, starting at the poll and working down.” Never pour shampoo concentrate directly onto the horse’s coat this concentrates product contact, can cause skin irritation, and is difficult to rinse thoroughly.
Application order:
- Mane (apply shampoo directly to wet mane; work to root level)
- Tail (dunk tail in shampoo bucket; work shampoo from root to tip)
- Body (apply diluted shampoo sponge from withers back; include belly and between legs)
- Genital area and dock (separate sponge; gentle strokes)
- Legs (soft rubber mitt or sponge; include between the pasterns)
- Face (addressed separately see below)
Work shampoo into each section thoroughly with a rubber grooming mitt ensuring product reaches skin level, not just coat surface. Per Horse & Hound’s step-by-step bathing guide, some owners prefer to rinse each section after shampooing to prevent soap from drying on the skin while subsequent sections are washed an excellent practice for hot, sunny conditions where evaporation accelerates.
Step 6 How to bathe a horse’s head without panicking them:
The head is the most sensitive area in DIY horse bathing tips and the source of most bathing injuries when handled incorrectly.
Safe head bathing technique:
- Remove halter or loosen and slide back from the face
- Use a small, wrung-out sponge with a small amount of diluted shampoo not the hose
- Apply sponge with gentle strokes from forehead to muzzle direction, avoiding eyes and ears
- Rinse with a clean water-dampened sponge (wring thoroughly to prevent water running into eyes or nostrils)
- Use a separate rinse sponge for the nostril area; wipe gently
- Avoid the ear canal entirely water in the ear canal causes profound distress and can lead to head shaking or ear infections
- For horses particularly sensitive to head contact: use a dampened microfiber cloth rather than a sponge; less water volume and more control
Per EQUUS Magazine’s professional bathing guide, “taking the soapy sponge and wringing it out to minimize dripping, follow the same path over the face, once again avoiding the eyes rinse the face with a clean sponge dipped in fresh, warm water.”
Step 7 Cleaning a horse’s sheath or udder safely:
Cleaning a horse’s sheath or udder is the DIY horse bathing tips task owners feel least confident about and the one most often avoided, to the horse’s detriment.
Frequency: Sheaths require cleaning 1–2 times annually in most geldings (more frequently in geldings that accumulate smegma quickly); mares’ udders when visibly dirty.
Products: Use a dedicated, pH-balanced equine sheath cleaner (Excalibur Sheath Cleaner, Nolvasan, or plain warm water for maintenance cleaning). Never use harsh soaps, betadine undiluted, or human hygiene products. Wear examination gloves.
Technique: Apply warm water and cleaner gradually; allow the horse to relax the sheath; clean gently with gloved fingers or a soft cloth; remove accumulated smegma from the sheath pouch and the “bean” (accumulation in the fossa glandis). Work calmly and slowly horses that object initially often accept once they realize the cleaning relieves discomfort.
Step 8 Complete rinsing:
Incomplete rinsing is the most common technical error in DIY horse bathing tips residual shampoo causes skin irritation, dandruff, and dull coat appearance post-bath.
- Rinse until water running off every area of the body runs completely clear with no suds
- Rinse from poll downward (water and shampoo run down, not up)
- Pay specific attention to the belly, between legs, mane root, tail root, and between pasterns areas where shampoo pools and is last to rinse away
- Use a final ACV rinse (1 part ACV : 3 parts water) applied with a sponge as the absolute final step before scraping
There is so much more happening during a dog grooming session than a fresh haircut and a good smell. Uncover the genuinely surprising health benefits of regular dog grooming that make it one of the most important and impactful things you can do for your dog’s overall wellbeing.
DIY Horse Bathing Tips: The 2026 Precision Grooming Health Scan
DIY horse bathing tips in 2026 are inseparable from Precision Grooming the practice of using bath time as a systematic, full-body equine skin health monitoring assessment.
Identifying Skin Conditions While Grooming
Identifying skin conditions while grooming is the highest-value habit in DIY horse bathing tips because early detection transforms treatable minor conditions into prevented major ones.
The Precision Grooming bath protocol: What to look and feel for:
Legs and lower limbs:
Run both hands down all four legs immediately after the pre-rinse. Bathing is the best time to check your horse’s legs for heat wet skin with slightly cooled surface temperature makes heat differentials between normal and inflamed areas far more detectable than through a dry coat. Any area warmer than surrounding tissue requires investigation. Simultaneously assess:
- Swelling or “filling” in the fetlock, pastern, or cannon bone area
- Scratches (bacterial infection at the pastern): early crusty formation, cracked skin, or hair loss at the back of the pastern
- Wounds, cuts, or abrasions masked by mud or debris
Back, rump, and shoulder:
Per EQUUS Magazine’s equine skin conditions guide, rain rot most commonly appears on “the croup, back, and legs along runoff lines of the flanks.” During wetting and shampooing, run fingertips firmly over the back and rump, feeling for:
- Matted, ruffled coat patches (early rain rot: hair follicles standing slightly on end)
- Crusty scabs that lift away with hair attached (established rain rot: Dermatophilus congolensis infection)
- Warm, sensitive skin under the hand horses with active rain rot often flinch at back pressure
Body and barrel:
- Lumps, bumps, or swellings newly appeared since the last bath
- Patches of hair loss suggesting ringworm (circular lesion with central clearing)
- Insect bite reactions or hives (urticaria) multiple raised welts requiring veterinary assessment if widespread
- Areas of muscle asymmetry or atrophy suggesting injury or neurological changes
Rain Rot, Scratches, and Dermatitis: Identification and Action
Scratches, Rain Rot and dermatitis are the three most common equine skin conditions identified during DIY horse bathing tips Precision Grooming assessments.
Rain rot (Dermatophilosis):
Per Revival Animal Health’s comprehensive rain rot guide, “rain rot is a bacterial infection of the epidermis which causes matted scabs containing hair clusters.” Signs include:
- Matted tufts of hair that lift away from skin leaving raw, moist lesions underneath
- Most common on back, hindquarters, and flanks (areas where rain runs down)
- More prevalent in horses with compromised immune systems or prolonged wet coat exposure
Bathing treatment for rain rot:
Per EQUUS Magazine, “a full bath with a medicated, antidandruff shampoo followed by a long spell in the warm sun will help clear up rainrot.” Use 2-in-1 antimicrobial/antifungal shampoo (Betadine-based or selenium sulfide shampoo); allow 5-minute dwell time before rinsing. Softened scabs can be gently removed during shampooing do not forcibly remove dry scabs as this traumatizes the skin beneath.
Scratches (Pastern dermatitis):
Per EQUUS Magazine, “if you see signs of scratches, wash the affected area with an anti-bacterial shampoo, then rinse and dry it completely.” The complete drying step is critical moisture perpetuates the wet-skin bacterial cycle that causes scratches. Apply a zinc oxide or petroleum jelly barrier product after thorough drying to protect the skin during healing.
Equine skin health monitoring log:
Professional grooms maintain a written record of any skin findings at each bath. Tracking location, appearance, and progression of any lesion provides essential timeline data for the veterinarian if treatment becomes necessary.
The foundation of a truly great dog starts with what happens in those very first weeks and months of puppyhood. This comprehensive puppy training 101 guide gives you every tool, technique, and confidence boost you need to raise a happy, well-behaved dog you’ll be proud of for life.
DIY Horse Bathing Tips: Post-Bath Drying and Chilling Prevention
Post-bath care is the most safety-critical phase of DIY horse bathing tips a wet, cold horse experiences genuine physiological distress and faces serious health risks.
Preventing Chilling in Horses After a Bath
Preventing chilling in horses after a bath is the most urgent safety priority in DIY horse bathing tips particularly in cool, windy, or overcast conditions.
Temperature guidelines for bathing:
Per Petzooli’s veterinary review of cold-weather horse bathing, the general rule is that horses should only be fully bathed when ambient temperature is 50°F (10°C) or above, with wind protection and drying facilities available. Without hot water and indoor drying infrastructure, full baths in cooler temperatures risk:
- Muscle cramping and stiffness from rapid body cooling
- Increased susceptibility to respiratory illness
- “Tying up” (exertional rhabdomyolysis) in horses bathed after intensive exercise in cool conditions
Temperature-adjusted bathing protocol:
| Ambient Temperature | Approach |
|---|---|
| Above 70°F (21°C) | Full shampoo bath; outdoor drying acceptable |
| 60–70°F (15–21°C) | Full bath with immediate cooler application; move to sun |
| 50–60°F (10–15°C) | Warm water only; section bathing; aggressive drying required |
| Below 50°F (10°C) | Spot cleaning and waterless shampoo only |
Post-Bath Drying Techniques: Coolers and Scrapers
Post-bath drying techniques using coolers and scrapers form the complete drying protocol in DIY horse bathing tips a sequence that, if skipped or rushed, undermines the entire bathing effort.
The complete post-bath drying sequence:
Step 1 Scrape immediately:
Use an ergonomic sweat scraper to remove maximum surface water from the entire body before moisture penetrates to the skin layer. Work in long strokes following the hair direction. Scrape 2–3 times from different angles over each body section. Address legs with gentle downward strokes; use a mitt or towel on the face.
Step 2 Apply a cooler:
Per Practical Horseman Magazine’s chilly weather bathing guide, “outfit your horse in a wool or fleece cooler to accelerate the final drying process—coolers are designed to wick moisture away from the skin to help prevent horses from getting chilled.” A properly fitted cooler:
- Should be wool or fleece (not waterproof, waterproof materials trap moisture against skin)
- Sits from poll to dock, covering the entire body
- Allows air circulation (wicking mechanism requires airflow)
Step 3 Hand-walk or supervise drying:
Per Practical Horseman, “if possible, hand-walk your horse in the sun or stall aisles until he’s completely dry.” Movement generates body heat, accelerates skin surface drying, and prevents the muscle stiffness that can develop when a wet horse stands stationary in any breeze. Walk for 15–30 minutes under the cooler.
Step 4 Check thoroughly before stalling:
Before returning to a stall, run your hand under the cooler across the back, hindquarters, and neck. If any dampness remains particularly in the mane root, tail root, or belly continue walking or add dry hay in the stall to generate additional body heat. Per Dover Saddlery’s bathing tips, “if the temperature begins to cool, be sure to place a cooler or Irish knit sheet on immediately and begin to walk the horse.”
Never: Blanket a damp horse blankets trap moisture against skin and prevent the wicking action that coolers are designed to perform. Per Practical Horseman, “do not put his sheet or blanket on until you are certain his coat is completely dry.”
DIY Horse Bathing Tips: Equine Hydrotherapy Benefits
DIY horse bathing tips in 2026 include a growing therapeutic dimension using water intentionally as a healing and recovery modality beyond basic cleaning.
Equine Hydrotherapy for Sore Muscles
Equine hydrotherapy for sore muscles extends DIY horse bathing tips from cosmetic grooming into evidence-based sports medicine accessible at home for horses in regular work.
Per Hudson Aquatic’s equine hydrotherapy research summary, hydrotherapy is defined as “the use of water for the treatment of medical conditions,” producing three primary physiological effects:
- Analgesia: Reduced pain through decreased nerve conduction velocity cold water slows electrical pain signals from injury site to the central nervous system
- Anti-inflammatory action: Cold temperature decreases vascular permeability, reducing the fluid accumulation that causes swelling and edema
- Cellular metabolic reduction: Tissues need less oxygen, reducing hypoxic secondary damage in acute injury
Cold hosing protocol for home use:
Per Equine Natural Therapy’s hydrotherapy guidelines, “cold hosing is one of the simplest forms of hydrotherapy a new injury can benefit from being cold-hosed for about 20 minutes at a time, as many times a day as possible shorter periods aren’t as beneficial, as they don’t give the blood vessels enough time to react fully.”
Standard home cold water therapy protocol:
- Apply cold water (ideally below 55°F / 13°C) to the affected limb
- Duration: 20 minutes per session
- Frequency: 2–4 times daily for acute injuries (first 72 hours)
- Application method: gentle, constant hose stream directed at the lower leg; avoid high pressure directly on wounds
Per SOAK Equine’s cold salt hydrotherapy overview, cold salt water therapy “can provide several benefits for horses, including reduced inflammation, pain relief, improved circulation, faster recovery, injury prevention, and the rehabilitation of various conditions” achievable at home by adding Epsom salt to cold water in a boot or bucket.
Cooling Down a Horse After Intense Summer Exercise
Cooling down a horse after intense summer exercise is one of the most important practical applications of DIY horse bathing tips where the bathing and hydrotherapy functions overlap directly.
Per SmartPak Equine’s post-exercise cooling guidance, “cooling your horse’s legs (and body) with water is one of the best tools to beat heat stress.” The post-exercise cool-down bath sequence:
- Walk the horse for 5–10 minutes post-work (allows initial heart rate reduction before water application)
- Begin hosing at the legs and hooves (largest surface area blood flow vessels)
- Progress to neck, chest, and barrel focusing on major vessel areas: jugular vein (neck), axillary vessels (armpits), and femoral vessels (groin)
- Apply water in sheets, not fine spray sheet application transfers heat most efficiently
- Use scraper to remove warmed water before reapplying warmed surface water no longer cools; must be replaced with fresh cold water
- Monitor rectal temperature if possible: target below 101°F (38.3°C) before completing cool-down
- Continue until horse’s skin feels cool (not just dry) under the hand
Preventing exercise-induced heatstroke:
Never leave a post-exercise horse standing in full sun without cooling in temperatures above 85°F core temperature above 104°F (40°C) constitutes a veterinary emergency. Contact your equine vet or AAEP emergency resources immediately if a horse shows signs of heat stress (rapid breathing, elevated heart rate, no sweating despite heat, stumbling).
Therapeutic Liniments for Post-Bath Massage
Therapeutic liniments for post-bath massage extend the therapeutic dimension of DIY horse bathing tips into targeted muscle recovery.
Evidence-based liniment applications:
- Absorbine Veterinary Liniment: Classic eucalyptus and iodine base; applied by massage or sponge to sore muscles post-bath; promotes localized warming and vasodilation
- Sore-No-More Performance Liniment: Arnica and herbal base; anti-inflammatory topical; well-regarded in competition equine care
- Witch hazel and peppermint DIY liniment: 1 cup witch hazel + 5 drops peppermint essential oil + 5 drops lavender essential oil; cooling sensation; mild analgesic effect
Application technique:
Apply liniment to a sponge or cloth after scraping never to completely wet coat (dilutes too much). Massage in firm circular motions over major muscle groups (back, gluteals, shoulders, hamstrings). Allows 5–10 minutes of massage contact before cooler application.
Medicated Horse Shampoos for Fungal Infections
Medicated horse shampoos for fungal infections address the therapeutic bathing needs that arise from skin conditions identified during Precision Grooming assessments an important category of DIY horse bathing tips for horses in high-humidity environments.
Conditions requiring medicated shampoo:
- Rain rot (Dermatophilus congolensis bacterial): Antimicrobial shampoos (Betadine scrub, chlorhexidine-based products)
- Ringworm (dermatophyte fungi): Antifungal shampoos (selenium sulfide, ketoconazole-based products)
- Seborrhea: Antidandruff/keratolytic shampoos (selenium sulfide, coal tar use strictly as directed)
- Dermatitis: Medicated/hypoallergenic shampoos per veterinary prescription
Critical protocol note: Always consult your equine veterinarian before beginning any medicated shampoo treatment for a diagnosed skin condition. Many fungal and bacterial conditions look similar externally; misidentification leads to incorrect treatment, wasted time, and potential condition progression.
Promoting Healthy Coat Oils Through Regular Grooming
Promoting healthy coat oils through regular grooming is the sustainable, long-term dimension of DIY horse bathing tips that makes each bath more effective and less frequently needed.
Regular daily grooming curry combing and brushing distributes sebum (the skin’s naturally produced protective oil) from the follicle throughout the coat length. This maintains the oil barrier that protects against bacteria, UV damage, and moisture intrusion, and produces the natural gloss that distinguishes a well-cared-for coat from a merely clean one.
Daily grooming protocol between baths:
- Rubber curry comb (firm): Major muscle masses in circular motion
- Dandy brush (stiff): Remove loosened dirt and debris
- Body brush (medium): Work through coat with short, angled strokes to distribute oil
- Finishing brush (soft natural bristle): Final buffing to enhance shine
- Microfiber grooming mitt: Final wipe-down to complete oil distribution and coat alignment
Per Practical Horseman, consistent daily grooming between baths is what produces the “beautiful shine” that bathing alone cannot achieve bathing removes debris while daily brushing builds and maintains coat quality.
FAQ About DIY Horse Bathing Tips
Full shampoo baths should be limited to every 2–4 weeks during active work seasons and for specific needs such as show preparation, medical treatment, or significant soiling. Per Farnam Equine, over-shampooing strips natural coat oils, causing dry skin, dandruff, and dull coat. Plain water rinse-downs after exercise are excellent practice and not counted as full baths from a coat-oil perspective.
Use lukewarm water approximately body temperature (around 98°F / 37°C) where hot water is available via an Insta-Hot system or barn plumbing. Per Mad Barn and Petzooli, never use genuinely cold water when the ambient temperature is below 60°F (15°C). In summer, cool water is acceptable for post-exercise cooling but lukewarm water is always preferred for full shampoo baths.
Begin with gradual desensitization use a damp cloth only on the face initially; reward calm acceptance with scratches or treats. Progress to a wrung-out sponge with clean water; then add mild shampoo only once the horse accepts sponge contact without resistance. Per Mad Barn’s bathing desensitization protocol, “introduce the hose gradually, starting with just the sound and feel on the legs” the same progressive approach applies specifically to head bathing. Never hold a horse’s head still by force during water application this creates lasting fear and physical danger.
Next Steps: Your Horse’s DIY Bathing Plan
This Week:
- Assemble a complete bathing tote with all essential tools per the checklist above
- Inspect your wash stall floor for non-slip safety install rubber mats if needed before attempting a bath
- Begin desensitization training if your horse is new to bathing: introduce hose to lower legs only; reward calm behavior
- Make a batch of ACV rinse (1 cup ACV to 3 cups water in a spray bottle) and have it ready for post-shampoo application
This Month:
- Perform your first Precision Grooming health scan during bathing document any findings in writing
- Invest in portable hot water (Insta-Hot or Eccotemp L5) if your barn lacks hot water plumbing the behavioral improvement in bath-resistant horses is typically immediate
- Try the coconut oil mane and tail treatment and assess detangling improvement at the following bath
- Check all four legs for heat during and after each bath establish your personal baseline for each leg so changes are detectable early
Long-Term:
- Establish a regular bathing schedule appropriate to your horse’s work level and breed requirements
- Learn to identify rain rot and scratches early so treatment begins before lesions spread
- Incorporate cold water leg therapy into your post-competition or post-intensive-exercise protocol per Hudson Aquatic hydrotherapy guidelines
- Partner with your equine vet at annual wellness visits to review any skin conditions detected during Precision Grooming sessions building a documented skin health history is one of the most undervalued long-term benefits of consistent DIY horse bathing tips practice
🐾 Related Resources & Interactive Tools in This Guide:
- Interactive Calculator: Dog OTC Medication Dosage Calculator — Calculate safe, vet-approved doses of Benadryl, Zyrtec, Pepcid, and Melatonin by body weight.
- Clinical Resource: Dealing with Dog Matting and Tangles: Untangling the Knots
- Behavior & Training Guide: Nourishing Your Dog Coat: The 2026 Guide
- Related Expert Guide: Professional Cat Grooming vs. DIY: Pros and Cons
Growth & Immunization Tracking: To predict your puppy’s adult weight based on current breed trajectory, use our interactive Puppy Growth Calculator. For core vaccine timelines and veterinary cost planning, refer to the Puppy Vaccination Schedule Tool.
📚 Related Topic Cluster Guides & Veterinary Tools
Explore our complete Pet Grooming & Hygiene Guide Hub for comprehensive guides, veterinary diagnostic checklists, and daily care protocols.
- DIY Cat Bathing Tips: Keeping Fluffy Fresh and Clean
- Is Your Pet Actually Clean? 7 Common Pet Grooming Mistakes Vets Want You to Stop
- Professional Dog Grooming vs. DIY: Which is Best for Your Dog?
- How to Treat a Horse with Skin Allergies: Soothing Tips
- Interactive Tool: Instant Pet Poison & Toxicity Risk Estimator