
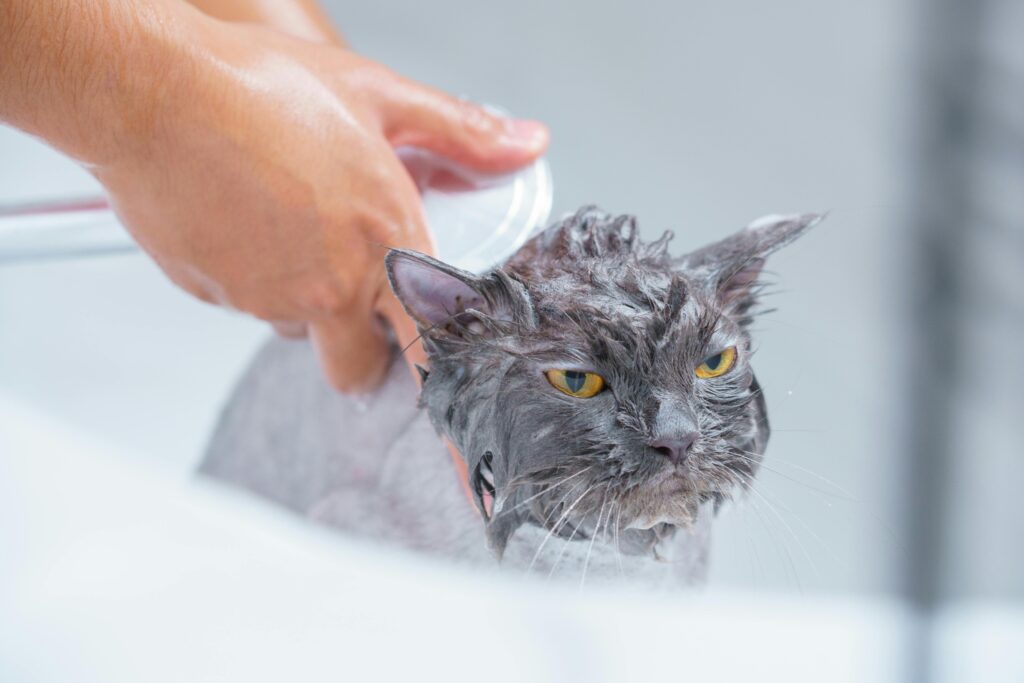
DIY cat bathing tips are among the most searched pet grooming topics online—and among the most misunderstood. Cats are meticulous self-groomers whose tongues function as sophisticated cleaning tools: backward-facing papillae (tiny keratin spines) distribute saliva deep into the coat, remove debris, and stimulate skin oils naturally. The American Society for the Prevention of Cruelty to Animals (ASPCA) states that bathing is only necessary “when the cat is unable to clean itself or has a skin condition requiring it,” and VCA Animal Hospitals recommends bathing no more than every 4–6 weeks for cats that genuinely need it.
Yet there are real situations where DIY cat bathing tips become essential knowledge—when a cat gets into grease, chemicals, or toxic substances; when flea or ringworm treatment requires medicated shampoo; when a senior or higher weight cat can no longer self-groom effectively; or when hairless breeds like the Sphynx need weekly oil management. In 2026, the gold standard is no longer just “how to bathe a cat”—it is how to bathe a cat using Low-Stress Handling and desensitization principles that protect both the cat’s emotional welfare and your skin.
This complete guide provides veterinarian-backed DIY cat bathing tips from preparation and desensitization training through step-by-step technique, drying methods, and waterless alternatives for cats that cannot tolerate full immersion.
🛑 When to See a Vet Instead of Bathing at Home:
- Your cat has open wounds, skin infections, or severe matting
- You need medicated shampoo prescribed for a specific condition
- Your cat becomes so distressed it poses bite or scratch injury risk
- Your cat has been exposed to a genuinely toxic chemical (call ASPCA Animal Poison Control first: 888-426-4435)
- Your senior cat has cardiovascular or respiratory conditions
Table of contents
- DIY Cat Bathing Tips: Do Cats Actually Need Baths?
- DIY Cat Bathing Tips: Low-Stress Handling and Desensitization
- Desensitization Training: Week-by-Week Protocol
- Calming Pheromones for Cat Grooming
- DIY Cat Bathing Tips: Pre-Bath Preparation
- DIY Cat Grooming Kit Essentials
- Digital Thermometer for Pet Bath Water
- Using Cotton Balls for Cat Ear Protection
- Creating a Non-Slip Bath Surface for Cats
- DIY Cat Bathing Tips: Safe Shampoo Selection
- DIY Cat Bathing Tips: Step-by-Step Bathing Technique
- DIY Cat Bathing Tips: Drying Techniques
- DIY Cat Bathing Tips: Waterless and No-Rinse Alternatives
- DIY Cat Bathing Tips: Maintaining a Clean Coat Between Baths
- FAQ About DIY Cat Bathing Tips
- What water temperature is safe for bathing a cat?
- How do I dry a cat completely after a bath?
- Next Steps: Your Cat’s DIY Bathing Plan
DIY Cat Bathing Tips: Do Cats Actually Need Baths?
Understanding when DIY cat bathing tips apply prevents unnecessary stress—for both the cat and the owner.
When Bathing Is Genuinely Necessary
Most healthy adult cats with normal mobility never need a bath. However, the following situations make DIY cat bathing tips practically essential:
Medical situations:
- Flea infestation requiring insecticidal shampoo treatment
- Ringworm (dermatophytosis) requiring antifungal medicated shampoo
- Skin conditions causing seborrhea or excess oil production
- Allergist-recommended bathing to reduce allergen load on coat
- Substance contamination (grease, oil, paint, toxic chemicals)
Physical limitations:
- Senior cats with arthritis preventing grooming reach
- Heavier cats unable to reach hindquarters and base of tail
- Neurological conditions affecting grooming behavior
Breed-specific needs:
- Sphynx and hairless breeds: Weekly baths required—without fur to absorb skin oils, buildup causes skin irritation
- Persian and long-haired breeds: Every 4–6 weeks to prevent matting and oil buildup
- Short-haired cats: Rarely—only situationally, per VCA Animal Hospitals guidelines
How often to bathe when bathing is needed:
The National Cat Groomers Institute of America recommends no more than every 4–6 weeks for cats requiring regular bathing. More frequent bathing strips natural coat oils, causing dry, flaky, irritated skin and damaged coat texture.
DIY Cat Bathing Tips: Low-Stress Handling and Desensitization
The most important evolution in DIY cat bathing tips for 2026 is the shift from restraint-focused bathing to desensitization training—the Fear Free approach that reduces fear, anxiety, and stress before the bath ever begins.
Why Stress-Free Cat Bathing Techniques Change Everything
Stress-free cat bathing techniques are grounded in the science-based Low-Stress Handling framework developed by veterinary behaviorist Dr. Sophia Yin, now championed by Fear Free Pets and the VCA Fear Free for Cats program—recognizing that forceful restraint during grooming creates negative associations that make every subsequent bath progressively worse.
The cortisol cycle problem:
When cats are forcefully restrained for bathing, cortisol (stress hormone) levels spike dramatically. The cat encodes the entire bathing environment as threatening—the bathroom, water sounds, towels, and your handling approach all become stress triggers. Each subsequent bath starts at a higher baseline anxiety level, making effective DIY cat bathing tips impossible without first addressing the emotional state.
The desensitization solution:
By systematically and gradually exposing the cat to bathing elements at sub-threshold intensity—below the level that triggers fear—and pairing each exposure with high-value rewards, the cat builds neutral or positive associations. This is the core of modern DIY cat bathing tips philosophy.
Desensitization Training: Week-by-Week Protocol
Per Dr. Marty Becker’s Fear Free bathing guidelines, this 2–4 week protocol transforms a bath-resistant cat into a manageable one:
Week 1 — The Bathroom:
- Bring cat into bathroom with no water running; place on non-slip mat in dry sink or tub
- Feed high-value treats (chicken, tuna, squeeze treats)
- Session length: 2–3 minutes; repeat daily
- Goal: Cat enters bathroom without stress signs
2 — Water Sounds:
- Run water in sink at low pressure while cat is outside the bathroom
- Feed treats continuously during water sound exposure
- Gradually move cat closer to the water sound over several sessions
- Goal: Cat hears running water without fleeing or showing distress
Week 3 — Touch and Handling:
- Practice the holds and handling you will use during bathing—without water
- Gently touch paws, ears, scruff area; pair every touch with treats
- Run a damp washcloth over the coat in a dry environment
- Goal: Cat tolerates bathing-type handling without resistance
Last Week — Water Introduction:
- Drip a small amount of warm water on one paw; reward immediately
- Use a damp washcloth on one coat section; reward
- Progress to a brief water-cup pour over the back; reward
- Goal: Cat tolerates water contact without panic
Signs to stop and not progress:
- Pupils dilated (fear response)
- Tail lashing or coat puffed
- Ears flattened against head
- Attempting to escape
- Hissing or vocalizing
Only progress when the cat remains relaxed enough to accept and eat treats—food acceptance is the gold standard indicator of emotional state in Fear Free protocol per VCA Animal Hospitals.
Calming Pheromones for Cat Grooming
Calming pheromones for cat grooming provide a chemical head start on anxiety reduction before DIY cat bathing tips begin.
Feliway Classic:
Feliway is a synthetic analogue of the F3 facial pheromone—the “comfort marker” cats deposit when they rub their face on safe objects. Feliway’s peer-reviewed clinical research shows it reduces stress behaviors in the majority of cats when used correctly.
How to use Feliway for bathing:
- Spray Feliway Classic on the towel, non-slip mat, and bathing area walls 15–30 minutes before bathing (pheromones need time to activate—do not spray directly on cat)
- Do NOT spray on the cat directly
- Use a Feliway diffuser in the bathroom for 7–10 days before planned bathing for cumulative effect
Additional calming tools:
- Classical music played softly: Creates a calming environment associated with reduced stress in cats per Fear Free protocols
- Thundershirt for cats: Gentle pressure wrap reduces general anxiety in some cats during handling
- Lickable treat dispensers: Keeps the cat’s focus on food reward rather than bathing process
DIY Cat Bathing Tips: Pre-Bath Preparation
Thorough preparation is what separates successful DIY cat bathing tips from disaster—everything assembled in advance means less time in water for the cat.
Trimming Cat Nails Before Bathing
Trimming cat nails before bathing is the single most important physical preparation step in DIY cat bathing tips—for your safety and the cat’s.
Why nails first:
A stressed cat will scratch. Full-length claws cause deep lacerations. Trimmed claws cause only surface scratches. This distinction matters significantly when a wet, anxious cat decides to escape by climbing you. The Cornell Feline Health Center recommends regular nail trimming as part of a complete cat care routine—not just before bathing.
How to trim cat nails safely:
- Use sharp, purpose-designed cat nail trimmers (scissor or guillotine style—avoid human nail clippers)
- Press gently on the paw pad to extend the claw
- Identify the pink “quick” (blood vessel)—cut 2mm beyond the pink area only
- Trim front claws only (rear claws less likely to cause serious injury during bathing)
- If the cat resists, trim one or two claws at a time across multiple sessions rather than forcing all at once
Timing: Trim nails 24 hours before bathing—gives any mild sensitivity at cut edges time to resolve and avoids stacking stressors on the same day.
How to Tire Out a Cat Before a Bath
How to tire out a cat before a bath is a clever pre-bathing strategy in DIY cat bathing tips—a physically tired cat has less energy and lower arousal for resistance.
Pre-bath play session:
- Use a wand toy or laser pointer for 10–15 minutes of active play immediately before bath preparation
- End the play session with a small food reward (stimulates post-hunt eating behavior, creates positive mood state)
- Proceed to the bath while the cat is in a calm, satiated state
Important: Do not feed a large meal immediately before bathing—a full stomach combined with water stress can cause vomiting. Small treat-sized rewards during bathing are ideal.
DIY Cat Grooming Kit Essentials
Assembling a complete DIY cat bathing tips kit before the cat enters the bathroom prevents the scenario where you’re searching for shampoo with one hand while restraining a wet cat with the other.
Essential supplies checklist:
- Cat-specific pH-balanced shampoo (never human shampoo—pH incompatible with cat skin)
- Non-slip bath mat for sink or tub base
- Two plastic cups or pitchers (one for wetting, one for rinsing)
- Cotton balls (for ear protection during bathing)
- Warm water already run to correct temperature before cat enters
- Washcloth for safe face and whisker cleaning
- Multiple large absorbent towels (pre-warmed in dryer = extra calming)
- High-value treats (lickable squeeze treats work best—cat eats without freeing your hands)
- Digital thermometer for pet bath water
- Cat-safe conditioner (optional—for long-haired breeds)
- Feliway-sprayed environment already prepared
Digital Thermometer for Pet Bath Water
Using a digital thermometer for pet bath water is a professional-level DIY cat bathing tips practice that prevents the most common bathing error: water too hot or too cold.
Correct temperature:
- Target range: 99–103°F (37–39°C)—matching a cat’s normal body temperature
- PetMD recommends testing temperature on your inner wrist as a secondary check—it should feel comfortably warm, not hot
- Cold water triggers immediate panic response; hot water causes skin burns and profound distress
Using Cotton Balls for Cat Ear Protection
Using cotton balls for cat ear protection prevents water entry into the ear canal—one of the most distressing and medically risky aspects of cat bathing.
Gently place a small cotton ball at the entrance to each ear canal before wetting begins. Water in the ear canal is deeply distressing for cats and can cause secondary ear infections and otitis media. Remove cotton balls immediately after bathing is complete and gently dry the outer ear with a fresh dry cotton ball. Never push cotton balls deeply into the ear canal.
Creating a Non-Slip Bath Surface for Cats
Creating a non-slip bath surface for cats addresses one of the most common panic triggers in bathing—slipping feet.
Per Fear Free bathing guidelines, many cats who appear to “hate water” are actually reacting to the terrifying experience of their feet slipping on a smooth wet surface. Stable footing dramatically reduces stress response intensity in DIY cat bathing tips practice.
Options:
- Rubber bath mat or yoga mat: Most effective; provides confident grip
- Wet folded towel: Placed in sink or tub base; provides both grip and cushioning
- Suction-cup bath mats: Commercial anti-slip mats designed for bathtubs work well for cats
DIY Cat Bathing Tips: Safe Shampoo Selection
Correct shampoo selection is non-negotiable in DIY cat bathing tips—the wrong product causes chemical burns, systemic toxicity, or life-threatening reactions.
Why Human Shampoo Is Never Safe for Cats
Human shampoo—including baby shampoo—should never be used in DIY cat bathing tips. Human skin pH is 5.5 (acidic); cat skin pH is 6.2–7.2 (near neutral). It is disrupts the feline skin’s acid mantle, destroying the protective barrier against bacteria and fungi per veterinary dermatology guidelines.
Additionally, many human shampoos contain:
- Fragrances: Toxic aromatic compounds (cats lack liver enzymes to process)
- Essential oils (tea tree, eucalyptus, peppermint): Directly toxic to cats per ASPCA Poison Control
- Zinc compounds: Toxic to cats
- Salicylates: Toxic to cats
DIY Cat Shampoo Recipe With Dawn Dish Soap
A DIY cat shampoo recipe with Dawn dish soap is widely circulated—and requires important qualification in responsible DIY cat bathing tips guidance.
When original blue Dawn is acceptable:
- Emergency degreasing (cat has gotten into grease, oil, or motor oil)
- Emergency flea treatment when veterinary shampoo is completely unavailable
- Strictly one-time or very rare use only
Why Dawn should not be a regular shampoo:
Dawn is a degreasing agent designed to strip oils—it removes the skin’s natural protective oil layer far more aggressively than cat-specific shampoo. Regular use causes dry, flaky, irritated skin and coat damage per PetMD veterinary review. It is an emergency measure only, not a routine DIY cat bathing tips product.
Safe Dilution Ratios for Cat Soap
Safe dilution ratios for cat soap make application easier and reduce intensity of shampoo contact on sensitive feline skin.
Standard dilution guide:
- Standard cat shampoo concentrate: 1 part shampoo to 4–10 parts water (follow specific product label)
- Dawn dish soap for emergency use: 1 teaspoon per 1 cup warm water maximum
- Medicated shampoos: Follow exact veterinary prescription ratios—never self-adjust
Pre-dilute all shampoos in a plastic bottle or bowl before applying to the cat. This distributes product more evenly, reduces the risk of concentrated product contact, and minimizes application time.
Homemade Oatmeal Shampoo for Cats With Sensitive Skin
Homemade oatmeal shampoo for cats with sensitive skin is a gentle supplemental rinse for cats with mild skin irritation—one of the safer DIY cat bathing tips home formulas validated by dermatological science.
Simple oatmeal rinse formula:
- Blend 1/4 cup unflavored colloidal oatmeal (or plain oats blended to fine powder) in 2 cups warm water
- Strain through fine mesh to remove large particles
- Pour over cat’s coat after the initial cleaning rinse
- Massage gently into coat with fingertips for 2–3 minutes
- Rinse thoroughly with clean warm water
Why oatmeal works:
Colloidal oatmeal contains avenanthramides—anti-inflammatory compounds that reduce itch, calm irritated skin, and form a mild protective film on the skin surface. It is the active ingredient in several commercial veterinary sensitive-skin shampoos. This is a supplemental rinse, not a cleansing shampoo—use a pH-balanced cat-specific shampoo for cleaning, then the oatmeal rinse afterward.
DIY Cat Bathing Tips: Step-by-Step Bathing Technique
With preparation complete, the actual DIY cat bathing tips bathing sequence follows a clear, efficient order designed to minimize time in water while maximizing thoroughness.
How to Bathe a Cat Without Getting Scratched
How to bathe a cat without getting scratched is the most searched sub-topic in DIY cat bathing tips—achievable through preparation, correct body positioning, and calm technique.
Protective preparation:
- Long-sleeved shirt and optional thin gloves for first attempts with resistant cats
- Nails already trimmed 24 hours prior
- Feliway and calming environment already activated
- High-value lickable treats in reach before starting
Body positioning technique:
Per Purina’s veterinarian-reviewed bathing guidelines, position the cat with their back toward you—this reduces face-scratch risk and keeps teeth pointing away. Support the chest with one hand and hindquarters with the other throughout the process.
The two-basin method recommended by veterinary grooming professionals:
- Basin 1: Warm water for wetting and shampooing
- Basin 2: Clean warm water for rinsing
- Minimizes time running the tap (noise stress trigger) once the cat is in the bath
How to Rinse a Cat Thoroughly at Home
Knowing how to rinse a cat thoroughly at home is one of the most critical DIY cat bathing tips because residual shampoo causes skin irritation, excessive self-grooming, and GI upset when the cat licks its coat after bathing.
Complete step-by-step bathing process:
Step 1 — Place and settle:
Gently lower cat onto the non-slip mat in the pre-filled warm basin (no running tap). Offer a lickable treat immediately upon placement. Speak in calm, low tones throughout the entire session.
Step 2 — Wet the coat:
Using a plastic cup, pour warm water gently from the back of the neck downward—never over the head. Wet coat thoroughly including underside and legs, avoiding face and ears. Work rear-to-front to avoid cornering the cat psychologically.
Step 3 — Apply shampoo:
Apply pre-diluted cat shampoo from neck to tail base. Massage gently with fingertips (not nails) into coat. Include underside, legs, and between toes. Continue offering treats if the cat accepts them—food acceptance confirms acceptable stress level.
Step 4 — Safe ways to clean a cat’s face and whiskers:
Never pour water over the cat’s face. Use a warm, damp washcloth only:
- Wipe gently from the inside corner of each eye outward (separate stroke per eye to prevent cross-contamination)
- Wipe the muzzle and chin area gently
- Wipe the base of ears (outer ear flap only—never insert washcloth into ear canal)
- Whiskers are extremely sensitive sensory organs—wipe gently along their direction only, never against
Step 5 — Thorough rinsing:
Use the second clean basin or pour multiple cups of clean warm water:
- Rinse until all water running off the coat runs completely clear
- Part the coat with fingers to rinse down to skin level, especially on long-haired cats
- Pay particular attention to armpits, groin, and between toes where shampoo collects
- Consider this the most important step—incomplete rinsing causes more post-bath skin problems than any other error
Step 6 — Wiping cat paws for indoor hygiene:
Before removing from the basin, use a damp washcloth to clean individual paw pads and between toe pads. This removes litter, debris, and residual shampoo from the area most frequently licked post-bath—an important hygiene detail often missed in standard DIY cat bathing tips.
Sponge Bathing vs Full Immersion for Cats
Sponge bathing vs full immersion is a genuine and important decision in DIY cat bathing tips—not every situation requires full body wet immersion.
When sponge bathing is preferable:
- Spot cleaning of a small soiled area
- Senior or arthritic cats who cannot comfortably stand in water
- Cats in early desensitization stages (sponge bathing as an intermediate step)
- Mild coat freshening between full baths
- Cleaning a cat with a damp washcloth as the primary method
Sponge bathing technique:
Work section by section (back, sides, belly, legs) with a warm water and diluted cat shampoo sponge, followed immediately by a clean warm-water rinse sponge of the same sections. Most effective for spot cleaning rather than full coat degreasing.
When full immersion is required:
- Flea treatment (requires complete coat saturation and shampoo contact time)
- Toxic substance contamination of the full coat
- Full body soiling
- Medicated shampoo requiring full coat coverage and dwell time
DIY Cat Bathing Tips: Drying Techniques
Effective drying is as important as the bath itself in DIY cat bathing tips—a wet, cold cat develops hypothermia risk and prolonged distress from dampness.
The Towel Burrito Drying Method
The Towel Burrito drying method is the most widely recommended technique in DIY cat bathing tips for safe, efficient post-bath cat drying.
How to perform the Towel Burrito:
- Have a large, pre-warmed towel ready (30 seconds in a warm dryer—not hot)
- Lift cat from bath and immediately wrap firmly but gently in the towel, enclosing all four legs and tail
- Hold the “burrito” snugly against your body—the wrap mimics swaddling and reduces the panic scramble response
- Gently blot and squeeze the towel against the coat (do not rub—rubbing tangles the coat and causes discomfort)
- Switch to a second dry towel when the first is saturated
- Continue until the cat is damp rather than soaking wet
Benefits of the Towel Burrito:
- Controls movement without forceful physical restraint
- Prevents the dangerous “wet cat scramble” that causes falls and injury
- Maintains body warmth (wet cats lose heat rapidly per PetMD)
- Mimics gentle pressure used in Fear Free handling protocols
Using a Hair Dryer on Cats
Hair dryer use requires specific cautions in DIY cat bathing tips:
- Use cool or low-warm setting only—never hot; cat skin burns at temperatures well below what humans perceive as hot
- Keep the dryer moving constantly—never focus heat on one area
- Maintain minimum 12-inch distance from the coat at all times
- Desensitize to the sound first: Dryer running in another room with treats given builds tolerance before applying to wet cat
- Stop immediately if the cat shows distress—towel drying or room air-drying is always preferable to adding a new fear trigger
For most cats: towel burrito + air-drying in a warm room above 70°F (21°C) is sufficient and significantly lower stress than forced hair drying.
DIY Cat Bathing Tips: Waterless and No-Rinse Alternatives
Cat bathing tips in 2026 include a strong toolkit of waterless alternatives that provide genuine cleaning benefit for cats who cannot or should not be fully bathed.
DIY Waterless Cat Shampoo Using Baking Soda
DIY waterless cat shampoo using baking soda is the most accessible no-water DIY cat bathing tips maintenance option.
Simple baking soda dry shampoo method:
- Sprinkle a small amount of pure plain baking soda (sodium bicarbonate—no additives) onto coat sections
- Massage gently through the coat with fingertips
- Leave for 2–3 minutes (absorbs oils and mild odors)
- Brush out thoroughly with a soft slicker brush
When to use:
- Between full baths for coat freshening
- Senior cats for whom full bathing creates unacceptable stress
- Mild coat odor or minor surface dirt
- Cats in early desensitization training (introduces grooming contact with no water stress)
Limitations: Baking soda dry shampoo freshens but does not deep-clean. It cannot remove grease, treat fleas, or manage medicated skin conditions—these require appropriate wet bathing per ASPCA grooming guidelines.
Best Cat Grooming Wipes for Spot Cleaning
Best cat grooming wipes for spot cleaning are one of the most practical DIY cat bathing tips tools for maintaining hygiene between full baths.
What to look for in cat grooming wipes:
- pH-balanced for cats (6.2–7.2 range)
- Fragrance-free or exclusively cat-safe fragrance
- No alcohol (causes skin drying and pain on any minor abrasion)
- Hypoallergenic formulation
- No tea tree oil, phenols, or benzalkonium chloride
Recommended commercially available options:
- Pet MD Chlorhexidine Wipes: Antiseptic; excellent for paws and perianal hygiene
- Burt’s Bees Natural Grooming Wipes for Cats: pH-balanced, naturally derived formula
- Vetnique Labs Glandex Wipes: Specifically formulated for anal area hygiene
DIY grooming wipe alternative:
Plain warm water on a soft cotton cloth effectively removes surface dirt from most body areas. For added gentle cleaning, dilute 1 teaspoon of plain unflavored aloe vera gel in 1 cup warm water for a gentle homemade wipe solution.
No-Rinse Foam Shampoo for Cats
No-rinse foam shampoo for cats provides deeper cleaning than wipes or dry shampoo while still avoiding full immersion—an important middle ground in DIY cat bathing tips.
How no-rinse foam shampoo works:
Applied directly to coat sections, massaged through, then towel-blotted off. Surfactants in the foam lift oils and debris; toweling removes the foam along with the dirt—no water required.
Best for:
- Cats who medically cannot be fully bathed
- Light soiling requiring more than wipes but not full immersion
- Between-bath maintenance for long-haired breeds
- Senior cats requiring regular coat maintenance
Critical safety check: Always verify the specific product is labeled safe for cats—some foam shampoos contain ingredients toxic to felines including tea tree oil, phenol compounds, and benzalkonium chloride per ASPCA Poison Control.
Dry Shampoo for Senior Cats
Dry shampoo for senior cats deserves specific focus in DIY cat bathing tips because senior cats who can no longer fully self-groom need frequent bathing assistance while being the most vulnerable to bathing stress.
Special senior cat grooming considerations:
- Place the non-slip mat on all grooming surfaces (arthritic cats fall from standard surfaces)
- Keep all sessions very short—5–10 minutes maximum
- Warm the room to at least 75°F before beginning (senior cats lose body heat rapidly)
- Never fully submerge arthritic cats—sponge bathing or waterless methods are first-line approaches
- Baking soda dry shampoo, grooming wipes, and cleaning a cat with a damp washcloth are the primary techniques
- Reserve full bathing for genuine medical necessity only, ideally with veterinary guidance
DIY Cat Bathing Tips: Maintaining a Clean Coat Between Baths
The most sustainable DIY cat bathing tips strategy builds a regular coat maintenance routine that reduces the need for full bathing—keeping the cat cleaner, calmer, and healthier long-term.
Regular Brushing: The Foundation of Coat Health
Regular brushing is the most impactful single habit for maintaining a clean coat between DIY cat bathing tips sessions.
Benefits of regular brushing:
- Distributes natural skin oils evenly through the coat
- Removes loose hair, debris, and dander
- Prevents mat formation that eventually requires bathing to address
- Provides daily health assessment opportunity (skin issues, parasites, and lumps detected early)
Brushing frequency:
- Short-haired cats: 1–2 times weekly
- Long-haired cats: Daily to prevent matting
- Senior cats: Daily (reduced self-grooming requires owner assistance)
Introducing brushing to reluctant cats:
Apply identical desensitization principles as bathing—brush near cat without touching, reward with treats, then progress to brief gentle strokes, extending duration gradually per Cornell Feline Health Center grooming guidance.
Positive Reinforcement Grooming for Cats
Positive reinforcement grooming for cats transforms every grooming session—bathing, brushing, nail trimming—into a trust-building experience that makes all future DIY cat bathing tips progressively easier.
Core principles:
- End every session on a positive note—even if you didn’t accomplish everything planned. Stopping while the cat is still relaxed builds positive association
- Never attempt to “power through” a highly distressed cat—this creates trauma, not training
- Use the highest-value treats the individual cat responds to (squeeze treats, plain tuna, small chicken pieces)
- Keep sessions short (2–5 minutes for bath-resistant cats) and increase duration gradually as trust builds
Per Fear Free Pets, the most common owner error in cat grooming is attempting too much too fast—trying to complete the entire bath in one session before the cat is conditioned for it. Building trust through short, consistently positive sessions across multiple weeks is a genuine investment that permanently improves the grooming relationship and makes every future DIY cat bathing tips session more successful.
FAQ About DIY Cat Bathing Tips
Most healthy cats never need bathing—their self-grooming is entirely sufficient. For cats that do need bathing (long-haired breeds, senior cats with limited mobility, Sphynx cats, or specific medical conditions), VCA Animal Hospitals and the National Cat Groomers Institute recommend no more than every 4–6 weeks. Bathing more frequently strips natural skin oils and causes skin irritation, dryness, and coat damage. Effective DIY cat bathing tips always start with confirming bathing is actually necessary.
Original blue Dawn is acceptable as a one-time emergency degreasing agent—when a cat has gotten into motor oil, grease, or when no cat shampoo is available for urgent flea removal. It should never be used as a regular shampoo because it aggressively strips skin oils, causing dryness, irritation, and coat damage per PetMD. Always follow an emergency Dawn bath with thorough rinsing and a cat-safe conditioner if available.
Start with the 2–4 week desensitization protocol outlined above—bathroom familiarity, water sounds, handling, then water contact—with high-value treats at every stage. Use Feliway spray in the bathing area 20–30 minutes before each session. Never force a panicking cat into a full bath—this creates trauma that makes future bathing increasingly impossible. For genuinely bath-resistant cats, use waterless alternatives (baking soda dry shampoo, best cat grooming wipes, no-rinse foam shampoo) as primary cleaning methods per Fear Free guidelines.
What water temperature is safe for bathing a cat?
Target 99–103°F (37–39°C)—matching the cat’s normal body temperature. Use a digital thermometer for pet bath water for precision, or test on your inner wrist as a secondary check (should feel comfortably warm, never hot). Cold water triggers an immediate panic response; hot water causes skin burns and intense distress. Pre-fill the basin to the correct temperature before introducing the cat—this eliminates running water noise once the cat is placed.
How do I dry a cat completely after a bath?
Use the Towel Burrito method with pre-warmed towels—wrap the cat completely, hold snugly against your body, and gently blot (never rub) through the towel. Switch to a second dry towel when the first is saturated. For cats that tolerate it, finish with a hair dryer on cool/low setting kept 12+ inches away and constantly moving. Allow the cat to air-dry in a warm room (70°F+). Never allow a wet cat outdoors—wet coats lose heat rapidly, and cold conditions create genuine hypothermia risk.
Next Steps: Your Cat’s DIY Bathing Plan
This Week:
- Assess whether bathing is actually needed: Evaluate coat condition, mobility, and any medical reasons per ASPCA cat care guidelines
- Begin bathroom desensitization: Treats in the dry bathroom for 5 minutes daily
- Assemble your grooming kit: Cat shampoo, non-slip mat, cups, cotton balls, pre-warmed towels, treats, digital thermometer
- Trim nails at least 24 hours before the planned first bath
This Month:
- Progress through desensitization stages: Water sounds → handling → damp cloth → water contact
- Try waterless options first for minor soiling (grooming wipes, baking soda dry shampoo)
- Apply Feliway to bathing environment for 7–10 days before the first full bath
- Practice the Towel Burrito on a dry cat to build mutual familiarity before bathing
Long-Term:
- Maintain regular brushing to reduce bathing frequency and need
- Build on positive experiences—each successful low-stress session makes the next easier
- Reassess technique if your cat’s stress level increases rather than decreases over time
- Consult a Fear Free certified groomer if home bathing remains consistently unmanageable—professional Low-Stress Handling techniques may be the breakthrough needed


