
You’ve probably heard the word. Maybe you’ve even seen someone using a small plastic device with their dog at the park.
But here’s what most people don’t realize: clicker training isn’t just a trick. It’s one of the most powerful, science-validated communication tools ever developed for the human-animal relationship.
And the best part? You don’t need to be a professional trainer to use it effectively.
In this guide, you’ll learn exactly how clicker training works, what the science says about why it’s so effective, how to get started today, and what 2026’s cutting-edge techniques look like. Whether you have a new puppy or a five-year-old rescue dog, this approach can transform how your dog learns—and how much they enjoy it.
Let’s start with the science, because understanding why this works makes you a dramatically better trainer.
⚠️ Disclaimer: This article is for educational purposes only and does not constitute professional veterinary or behavioral advice. For dogs with severe anxiety, aggression, or fear-based behaviors, consult a certified professional dog trainer (CPDT-KA) or veterinary behaviorist.
Table of contents
- The Science of Clicker Training: Operant Conditioning for Dogs 101
- Charging the Clicker: The Pavlovian Foundation of Clicker Training
- Building the “Bridge” Signal: The Architecture of Clicker Training
- Core Clicker Training Techniques Every Dog Owner Should Know
- The 5-Day Clicker Foundation Plan for New Puppies
- Variable Ratio Reinforcement: The Secret to Reliable Behaviors
- 2026 Innovation: AI-Assisted Clicker Training and Smart Training Tech
- The 2026 Micro-Marker: The Biggest Innovation in Modern Clicker Training
- Cooperative Care and Husbandry: Clicker Training for Real Life
- Behavioral Problem Solving with Clicker Training
- Clicker Training for Reliable Recall: The Most Important Behavior You’ll Ever Teach
- Frequently Asked Questions About Clicker Training
The Science of Clicker Training: Operant Conditioning for Dogs 101
How Your Dog’s Brain Learns: The Operant Conditioning Framework
Every behavior your dog offers—sit, stay, jump, bark, chew—is shaped by its consequences.
That’s the foundation of operant conditioning, a learning theory developed by psychologist B.F. Skinner in the mid-20th century. According to the Association of Professional Dog Trainers (APDT), operant conditioning describes four quadrants of behavior modification:
- Positive reinforcement adding something good to increase a behavior
- Negative reinforcement removing something unpleasant to increase a behavior
- Positive punishment adding something unpleasant to decrease a behavior
- Negative punishment removing something good to decrease a behavior
Clicker training lives squarely in the positive reinforcement quadrant.
When your dog does something you want—and you click and reward it—you’re literally rewiring their neural pathways. The behavior becomes associated with good things, and your dog will naturally offer it more often.
That’s not magic. That’s neuroscience.
Positive Reinforcement vs. Balanced Training: What the Research Actually Shows
You might have seen trainers who use a mix of rewards and corrections. That’s called “balanced training.” It’s not evil, but it’s also not optimal.
A 2023 study published in Applied Animal Behaviour Science found that dogs trained using positive reinforcement methods showed significantly lower cortisol levels—a biological marker of stress—compared to dogs trained with aversive techniques. They also showed faster acquisition of new behaviors and stronger retention over time.
Modern training science is clear: when you train without fear and without pain, dogs learn faster, retain more, and enjoy the process.
That doesn’t mean your dog will never make a mistake. It means you respond to mistakes with information (the absence of a click) rather than with punishment.
The Conditioned Emotional Response: Why the Click Becomes Magic
Here’s something fascinating about clicker training that most articles skip over.
The click itself doesn’t start with meaning. It’s a neutral sound. But through a process called Pavlovian conditioning—yes, the same science behind Pavlov’s famous dogs—the click becomes emotionally meaningful.
Every time you click and immediately deliver a treat, your dog’s brain forms an association: click = something wonderful is coming. Over time, the click itself triggers a small burst of dopamine—the brain’s reward chemical.
This is called the Conditioned Emotional Response (CER), and it’s documented in research from the Karen Pryor Clicker Training Academy. The CER is why, after proper conditioning, even the sound of the click causes your dog’s ears to perk up and their tail to wag.
The click stops being just a sound. It becomes a message your dog loves to hear.
Charging the Clicker: The Pavlovian Foundation of Clicker Training
How to Load the Clicker Before You Train Anything
Before you can teach a single command, you need to teach your dog what the click means.
This is called “charging the clicker”—and it only takes about 10–15 minutes spread across a couple of short sessions.
Here’s exactly how to do it:
Step 1: Have 20–30 small, high-value treats ready (pea-sized pieces of chicken, cheese, or commercial training treats work well).
Step 2: Click once. Immediately—within half a second—deliver a treat. Don’t ask your dog to do anything. Just click, then treat.
Step 3: Repeat 20 times in a row. Keep sessions to 2–3 minutes maximum.
Step 4: Test the association. Click once when your dog isn’t looking at you. If their head snaps toward you with anticipation, the clicker is charged.
That’s it. Your clicker is now a communication tool with genuine emotional weight.
Howdy Fox Tip: If your dog is noise-sensitive or startled by the click, muffle it by clicking inside your pocket or through a thick cloth. You can also transition to a marker word (more on that below) as your primary bridge signal.
Marker Words vs. Physical Clickers: Which Is Right for Your Dog?
The click is the most popular bridge signal, but it’s not the only one.
A marker word—a short, distinct word like “Yes!” delivered in a consistent tone—functions identically to a clicker when properly conditioned. The American Kennel Club (AKC) notes that both physical clickers and verbal markers are effective when used with precise timing.
Choose a clicker if:
- You have reliable timing (clickers are faster than words)
- Your hands are free during training
- Your dog has normal hearing
Choose a marker word if:
- Your dog is sensitive to sharp sounds
- You often have treats in your clicking hand
- You want to train in situations where a clicker isn’t accessible
Many experienced trainers use both—a clicker for precision shaping work and a verbal marker for everyday reinforcement throughout the day.
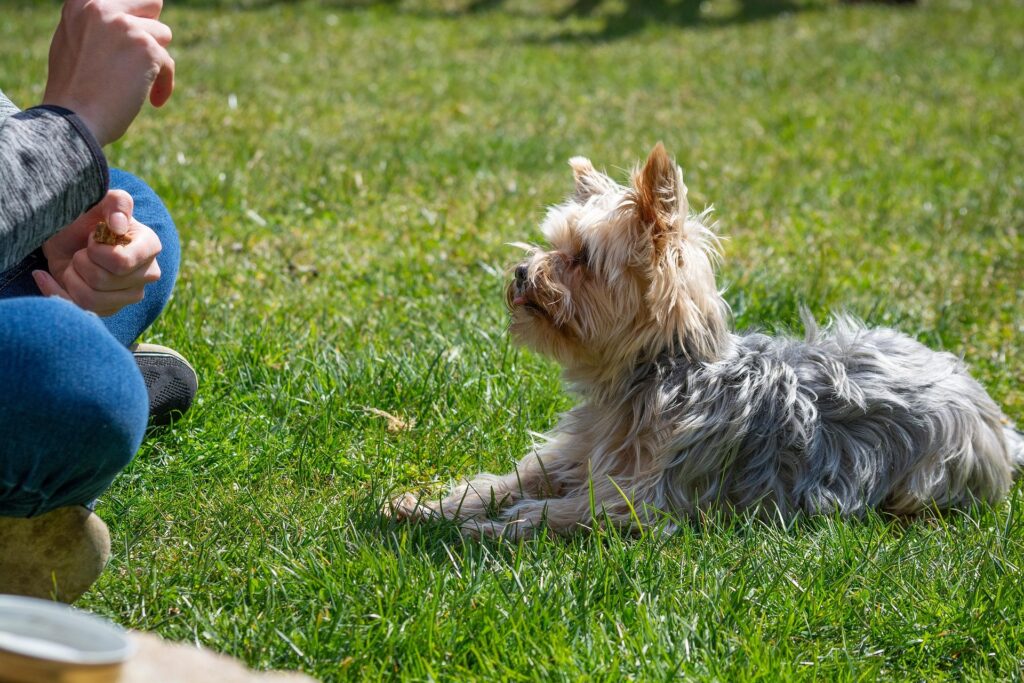
One small click can completely transform the way your pet learns and responds to you. Dive into the fundamentals of clicker training and discover why this simple, science-backed technique is one of the most powerful training tools every pet parent should have in their toolkit.
Building the “Bridge” Signal: The Architecture of Clicker Training
What a Bridge Signal Actually Does in Dog Training
The term “bridge signal” comes from exactly what it does: it bridges the gap between the moment your dog performs the correct behavior and the moment they receive their reward.
This is critical. Dogs live in a world of milliseconds when it comes to learning. A reward delivered three seconds after a behavior is less effective than one delivered immediately after.
The click solves this problem elegantly. You can click the precise instant your dog’s bottom touches the ground in a sit—even if it takes you two seconds to reach into your treat pouch. The click has already told your dog: That. Right there. That’s what earned the reward.
According to Animal Training International, a well-timed bridge signal can increase the rate of learning by up to 50% compared to untimed reward delivery. That efficiency compounds over hundreds of training repetitions.
The 0.5-Second Timing Rule: The 2026 Critical Training Standard
Timing is the single variable that separates good clicker training from great clicker training.
Current trainer consensus—and the standard adopted by leading certification bodies in 2025-2026—is the 0.5-second rule: your click should happen within half a second of the behavior you want to mark.
Miss that window and you risk marking the wrong thing entirely.
Here’s a classic example: you’re teaching “sit.” Your dog’s bottom touches the ground (the behavior you want to mark). But you click a half-second too late right when they’re beginning to stand back up. You’ve just accidentally reinforced standing up from a sit, not the sit itself.
The 0.5-Second Timing Drill: How to Sharpen Your Skills
Professional trainers use this drill regularly, and you can do it at home:
- Grab a tennis ball and drop it from waist height
- Try to click the moment it hits the ground not before, not after
- Repeat 20 times and notice how often you’re early or late
- Once consistent with a drop, try it with bouncing or rolling
This drill isolates your timing skill from your dog entirely. Most people discover their timing is off by a full second or more when they first test themselves. With 5–10 minutes of daily practice, the improvement is dramatic within a week.
Core Clicker Training Techniques Every Dog Owner Should Know
Free Shaping for Canine Problem Solving
Free shaping is the most intellectually demanding and most rewarding form of clicker training.
Here’s the concept: you set up a situation with a novel object (a box, a cone, a platform) and simply wait. You don’t lure. You just click and reward any movement your dog makes toward or around the object.
Then you raise the bar. Once your dog is reliably touching the box, you only click for putting a paw on it. Then for stepping into it. Then for sitting in it.
This is called successive approximations breaking a complex final behavior into a series of smaller, achievable steps, each one slightly closer to the end goal.
Free shaping builds remarkable problem-solving confidence in dogs. The Karen Pryor Academy describes this as developing “an animal that thinks” a dog who actively tries new behaviors because trying has always been rewarding rather than risky.
Target Stick Training for Precision Movement
A target stick a small wand with a distinct end gives your dog a specific physical point to touch with their nose or paw.
Target training is used to:
- Guide dogs through agility courses without physical contact
- Teach dogs to go to a specific spot
- Help dogs who struggle with luring (some find food lures distracting)
- Train precise heel position without leash pressure
The technique is simple: present the target, click the moment your dog touches it, reward. Gradually move the target farther away, to different positions, and through new environments.
Target sticks are particularly valuable for teaching voluntary veterinary exams—a concept we’ll explore in depth in the cooperative care section below.
Luring vs. Capturing Behaviors: When to Use Each
Two other core clicker training techniques round out your foundational toolkit.
Luring uses a treat in your hand to guide your dog into position. It’s fast and effective for getting behaviors quickly especially with puppies. The risk is that some dogs become dependent on seeing the lure and stop offering behaviors independently. Always fade the lure early by transitioning to an empty hand with the same motion.
Capturing means clicking behaviors your dog offers naturally. Does your dog sit spontaneously? Click it. Do they naturally lie down to rest? Click it. Capturing is powerful because it reinforces behaviors the dog is already motivated to do you’re simply adding a cue and strengthening the behavior through reinforcement.
Most trainers use a combination: lure to introduce new behaviors quickly, capture to reinforce natural tendencies, and shape to build complexity over time.
The 5-Day Clicker Foundation Plan for New Puppies
Getting started with a new puppy? Here’s a structured five-day plan used by professional trainers to build a rock-solid clicker training foundation.
Day 1: Charge the Clicker + Name Recognition
- Morning: 2-minute charging session (click/treat, no behavior required) × 2 sessions
- Afternoon: Begin name recognition say your puppy’s name once, click the moment they look at you, treat
- Evening: Repeat name game, 10 repetitions
2nd Day : Sit and Watch Me
- Morning: Introduce “Sit” lure with treat over the nose, click the moment bottom touches the ground
- Afternoon: Practice “Watch Me” hold a treat near your eye, click when puppy makes eye contact
- Evening: Mix sit and watch me in short 3-minute sessions
Day 3: Down and Stay Introduction
- Morning: Introduce “Down” lure from sit position, click the moment elbows touch the ground
- Afternoon: Begin “Stay” ask for a sit, pause one second before clicking, gradually extend duration
- Evening: Review all three behaviors
4th Day : Come and Leave It
- Morning: Practice recall in a small space get puppy’s attention, back away, click when they reach you
- Afternoon: Introduce “Leave It” present a closed fist with a treat, click when puppy pulls back from your hand
- Evening: Light session reviewing favorites
Day 5: Integration and Play
- All sessions today: String 2–3 behaviors together in sequence before rewarding
- End with: Free play and bonding time no formal training
- Goal: Puppy is engaged, optimistic, and eager to train
Important: Keep all sessions under 5 minutes for puppies under 12 weeks. Their attention spans are short, and ending before they’re tired keeps them wanting more.
A bored dog is a destructive dog and your furniture knows it all too well. Try these interactive brain games for dogs that actually work to channel that restless energy into something fun, stimulating, and genuinely good for their mental health.
Variable Ratio Reinforcement: The Secret to Reliable Behaviors
Why You Should Stop Clicking Every Single Repetition
Once your dog reliably performs a behavior, something counterintuitive happens: clicking and rewarding every single repetition actually makes the behavior less reliable over time.
Instead, the most powerful reinforcement schedule for maintaining learned behaviors is the Variable Ratio of Reinforcement (VRR) the same psychological principle that makes slot machines so compelling.
On a variable ratio schedule, your dog doesn’t know which repetition will earn the click. Sometimes it’s the first sit. Sometimes it’s the fifth. That unpredictability creates a dog who keeps trying because the reward might be coming on the very next rep.
According to the International Association of Animal Behavior Consultants (IAABC), variable ratio schedules produce the highest response rates and the greatest resistance to extinction (meaning behaviors learned this way hold up even when rewards become infrequent).
How to transition to VRR:
- Once your dog performs a behavior reliably 8 out of 10 times, begin randomizing reinforcement
- Start with reinforcing roughly every other repetition
- Gradually make the schedule more unpredictable
- Always maintain enough reinforcement that your dog stays motivated
A bored dog is a destructive dog and your furniture knows it all too well. Try these interactive brain games for dogs that actually work to channel that restless energy into something fun, stimulating, and genuinely good for their mental health.
2026 Innovation: AI-Assisted Clicker Training and Smart Training Tech
How Technology Is Changing Clicker Training in 2026
The clicker training landscape looks dramatically different in 2026 than it did five years ago.
AI and wearable technology have entered the training space in meaningful ways not to replace skilled trainers, but to give everyday pet parents better data and real-time feedback.
Here’s what’s currently available or in active development:
AI-Assisted Clicker Timing Feedback
Several training apps now use your smartphone’s camera to analyze your timing in real time. The AI tracks your dog’s behavior, marks the moment the target behavior occurs, and compares it to when you clicked giving you a precise timing gap.
Early results from beta users suggest that AI timing feedback reduces average click latency from 1.2 seconds to under 0.4 seconds within two weeks of use. That’s a significant improvement that would otherwise take months of practice with a human coach.
Haptic Vibration Collars for Deaf Dog Clicker Training
For deaf dogs, a tactile marker a specific vibration pattern delivered via a haptic collar functions identically to the auditory click.
The vibration is conditioned the same way as a clicker: vibrate, immediately reward. Over multiple sessions, the vibration takes on the same emotional significance as the click does for hearing dogs.
The Deaf Dog Education Action Fund (DDEAF) provides extensive resources on adapting clicker training techniques for deaf dogs, including haptic marker protocols validated by certified trainers.
Smart Collars with Heart Rate Monitoring for Stress Detection
Some premium training collars now include biometric sensors that monitor heart rate variability a reliable indicator of emotional arousal and stress in dogs.
This is genuinely exciting for clicker training practitioners. A dog whose heart rate spikes during a training session is showing you, in real time, that the difficulty level is too high or the environment is too distracting. You can adjust before the dog shuts down or disengages.
Biometric-linked training logs pair this data with your session notes to show patterns over time: which behaviors cause stress, which environments are challenging, and when your dog is at peak learning readiness.
Virtual AI Dog Training Coaches
AI coaching platforms can now watch your training session via video upload or live streaming and provide specific, behavior-by-behavior feedback. These systems identify not just timing errors but also body language patterns are you leaning forward (which many dogs find pressure-ful)? Are you delivering treats at the correct height for the behavior you’re building?
This doesn’t replace in-person work with a certified trainer for complex cases. But for basic clicker training foundations, virtual AI coaching dramatically lowers the barrier to getting high-quality feedback.
Precision Treat Dispensers with Remote Markers
For dogs working at a distance in sport training, distance recalls, or agility foundations precision treat dispensers can be triggered by a remote marker signal. The dog performs a behavior at 20 feet away, you click, and the dispenser drops a treat at the dog’s location.
This solves one of the most persistent challenges in distance training: the reward arriving at your location rather than where the behavior occurred, which pulls the dog toward you rather than reinforcing position.
The 2026 Micro-Marker: The Biggest Innovation in Modern Clicker Training
What Is Sustained Behavior Marking?
Here’s the innovation that’s reshaping professional clicker training in 2026 and it’s something most pet parents haven’t heard of yet.
Traditional clicker training uses a single, crisp click to mark the completion of a behavior. Your dog sits, you click, done. That’s terminal marking marking the end of a behavior.
Micro-Markers take a fundamentally different approach. Instead of one click for a finished behavior, trainers use softer, rapid-fire click sequences or specific haptic pulse patterns for deaf dogs to mark intermediate effort and sustained behavior quality.
This is called Sustained Behavior Marking, and it’s being adopted by competitive dog sport trainers, veterinary behavior teams, and cooperative care specialists across the country.
Why Micro-Markers Matter: The Science Behind Sustained Behavior Marking
Think about what happens when you’re teaching a “Stay.”
Traditional approach: ask for a stay, wait five seconds, click once, treat. Your dog learns: stay until I hear the click.
Micro-Marker approach: ask for a stay, and as your dog holds the position, deliver soft, brief click-touches every 1–2 seconds without breaking the behavior. Reward at the end.
The difference is enormous. The dog learns: staying earns continuous reinforcement. The longer I stay and the calmer I am, the more markers I receive.
This creates:
- Faster duration building dogs hold behaviors longer because reinforcement is arriving continuously, not as a single end-point reward
- Higher quality positions dogs maintain correct posture because any drift away from correct position results in a pause in markers
- Better frustration tolerance dogs learn to sustain effort under difficulty because effort itself is being reinforced, not just the outcome
How to Apply Micro-Markers in Your Training Sessions
Micro-Markers require a slightly different mechanical skill than traditional clicking. Here’s how to introduce them:
Step 1: Use a softer pressing motion with your clicker rather than a sharp snap. You’re creating a gentler, less startling sound.
Step 2: Begin with “Down-Stay.” Ask for a down, and every two seconds your dog holds the position calmly, deliver a soft micro-click.
Step 3: At the end of the stay duration, give your terminal click (the full, crisp click) followed by a jackpot reward.
Step 4: Gradually decrease the interval between micro-clicks as you build duration training your dog to sustain effort for longer with fewer intermediate markers.
This approach is particularly powerful for:
- Loose-leash walking marking each step of correct heel position
- Settle and place training building genuine calm on a mat
- Cooperative care behaviors reinforcing stillness during nail trims or ear cleaning
- Clicker training for separation anxiety foundations reinforcing calm, settled behavior incrementally
When a female is in heat, your male dog’s world turns completely upside down. Here’s your practical, calming guide to helping your male dog through those intense, restless days so both of you can get through it with a little more peace and a lot less stress.
Cooperative Care and Husbandry: Clicker Training for Real Life
Why Cooperative Care Is the Future of Veterinary Handling
Picture this: your dog calmly offers their paw for a nail trim, holds still for ear drops, and allows a full physical examination without restraint.
That’s not a fantasy. That’s cooperative care a cooperative care framework developed through clicker training principles that gives dogs genuine agency in their own medical and grooming procedures.
The Fear Free Pets organization, founded by veterinarian Dr. Marty Becker, has documented that fear and stress during veterinary visits are among the most significant barriers to regular veterinary care in the United States. Pets who associate the vet with fear receive less care and their health suffers for it.
Cooperative care changes that equation.
The Chin Rest: Your Foundation Behavior for Medical Handling
The chin rest is the single most valuable cooperative care behavior you can teach.
Here’s why: when your dog voluntarily rests their chin in your palm (or on a surface), they’re communicating I’m ready, I’m comfortable, and I’m choosing to participate. It’s a consent cue and it transforms veterinary exams from something that happens to your dog into something your dog participates in.
Teaching the Chin Rest:
- Present your open palm near your dog’s nose
- Click and reward the moment their chin makes contact with your hand
- Gradually increase the duration of contact before clicking
- Introduce gentle touches to the body (ears, paws, neck) while the chin rest is held
- Any time your dog lifts their chin, stop touching they’ve communicated they need a break
This process takes most dogs 2–3 weeks of short daily sessions. The result is a dog who can signal discomfort, take breaks, and re-engage voluntarily exactly what Fear Free Veterinary Medicine practices are designed to support.
The Bucket Game for Fearful Dogs
Developed by trainer Chirag Patel, the Bucket Game is a consent-based training tool particularly valuable for cooperative care for fearful dogs.
The concept: your dog looks at a “bucket” (any container or target point) to signal consent for handling. When they look away, all handling stops immediately.
This creates a crystal-clear communication system that works even for dogs with significant fear histories. The dog is never forced into anything they remain in control at all times.
The protocol has been validated in clinical settings, with Chirag Patel’s Domesticated Manners providing free video resources for trainers and pet parents.
Desensitizing Dogs to Nail Clippers with a Clicker
Nail trims are one of the most consistently stressful procedures for domestic dogs. Here’s a step-by-step clicker training desensitization protocol:
Week 1 — Introduction:
- Show your dog the nail clippers at a distance
- Click and treat for looking at them calmly
- Gradually move the clippers closer over multiple sessions
2nd Week — Touch:
- Touch the clippers to your dog’s paw (don’t clip anything)
- Click and treat for tolerating the touch without pulling away
- Practice each paw separately
Week 3 — Sound:
- Clip a dry piece of spaghetti near your dog’s paw to simulate the sound
- Click and treat for calm responses to the sound
Week 4 — First Clip:
- Clip only the very tip of one nail just the clear portion
- Click and treat immediately
- Stop there for the session and repeat the next day
This protocol typically takes 4–6 weeks for dogs with existing nail-trim anxiety. Dogs introduced to clippers this way as puppies rarely develop the aversion at all.
Clicker Training for Ear Cleaning and Eye Drops
The same desensitization principles apply to ear cleaning and eye drops two procedures many dogs resist strongly.
For ear cleaning, begin by touching the outside of the ear (click/treat), then the inner flap, then introduce the sensation of gentle pressure, and finally the bottle itself (without liquid at first).
For eye drops, teach your dog to hold a chin rest while you bring your hand near their eye click the moment they hold still. Progress gradually to touching around the eye, then to the sensation of drops.
Always use the chin rest as your consent cue. If your dog breaks the chin rest, stop and give them space before trying again. Forcing the procedure undoes days of careful conditioning work.
Behavioral Problem Solving with Clicker Training
Managing Leash Reactivity with Marker Training
Leash reactivity barking, lunging, and spinning at other dogs, people, or vehicles on leash is one of the most common behavioral challenges in pet dogs.
Clicker training approaches it as a two-phase process:
Phase 1: Counter-conditioning. Change your dog’s emotional response to the trigger. When they see another dog, immediately deliver high-value treats before they react. You’re building a new association: other dog = good things happen.
Phase 2: Marker-based behavior replacement. Once your dog can see a trigger without immediate reaction, begin clicking and treating eye contact with you near the trigger. You’re rewarding the behavior you want (engagement with you) rather than waiting to punish the behavior you don’t want (lunging).
This approach is supported by research from Tufts University’s Cummings School of Veterinary Medicine, which found counter-conditioning paired with positive reinforcement to be significantly more effective for reactive behavior than leash corrections or punishment-based protocols.
Progress with reactive dogs is rarely linear. Go at your dog’s pace, keep distance from triggers, and celebrate small wins.
Clicker Training for Dog Separation Anxiety
Clicker training for dog separation anxiety works by building independence and calm through very gradual, positively reinforced departures a protocol often called “systematic desensitization.”
Begin by clicking and treating your dog for tolerating you moving toward the door. Not through it just toward it. Build up to touching the doorknob. Then opening the door briefly. Then stepping outside for two seconds.
The process is slower than most owners expect, but it works because you’re never pushing past your dog’s threshold. Every session ends with your dog in a calm, positive emotional state.
For moderate to severe separation anxiety, clicker training works best as a complement to professional guidance. The Malena DeMartini Institute is considered the gold standard for separation anxiety protocol training and offers certified specialist referrals.
Impulse Control Games for High-Energy Breeds
High-drive breeds Border Collies, Australian Shepherds, Belgian Malinois, Weimaraners need impulse control training just as much as they need physical exercise.
It’s Yer Choice, developed by Susan Garrett, is one of the most effective clicker-compatible impulse control games available:
- Place treats in your closed fist
- Present your fist to your dog
- Wait click and reward the moment your dog pulls back or looks away from your fist
- Gradually open your hand, clicking for any restraint your dog shows
This game builds the neural habit of pausing and deferring to you, which transfers to real-world situations: waiting at doorways, sitting before meals, checking in off-leash.
Redirecting Demand Barking with a Clicker
Demand barking your dog barking at you to get food, attention, or play responds well to a simple but counterintuitive approach: click and reward silence.
Here’s the exact protocol:
- When your dog barks at you for attention, completely ignore them (look away, no eye contact, no talking)
- The moment there is a break in barking even one second of quiet click that silence and reward
- Gradually extend the duration of quiet required before clicking
The key is consistency. Every family member must participate. Any single instance of giving in to demand barking reinforces the barking and resets your progress.
Stopping Door Dashing with Boundary Markers
Door dashing bolting out the front door is genuinely dangerous. Here’s a clicker training protocol that teaches a reliable boundary:
- Practice approaching the door with your dog on leash; click and treat them for sitting before you touch the handle
- Open the door slightly; click and treat for staying behind the threshold
- Gradually open the door wider while reinforcing the sit-stay at the threshold
- Add a release cue (“Free!”) so your dog learns they can only cross when explicitly released
Practice this 10–15 times daily for two weeks. The behavior becomes a habit one that could save your dog’s life.
Counter-Conditioning for Resource Guarding
Resource guarding growling, snapping, or stiffening over food, toys, or spaces is best addressed through counter-conditioning, not through punishment or dominance-based approaches.
The goal is to change the emotional association: a person approaching my resource = good things happen, rather than a person approaching = threat.
Approach slowly while tossing high-value treats near your dog’s bowl. Never reach in or take food away initially. Build a history of approach → good things.
For any dog who has snapped or bitten in a resource guarding context, this protocol should be implemented with the guidance of a certified applied animal behaviorist (CAAB) or veterinary behaviorist. Safety first, always.
Clicker Training for Reliable Recall: The Most Important Behavior You’ll Ever Teach
A dog who comes when called is a dog who can be trusted off-leash and in genuine emergencies a dog who can be kept safe.
Here’s how to build it with clicker training:
Step 1: Choose a recall cue you’ll only use for this purpose. Many trainers use a whistle or a distinct word like “Here!” never the dog’s name alone, which gets overused.
Step 2: Begin in a small, low-distraction space. Say your cue once, back up rapidly (movement triggers chase instinct), and click the moment your dog reaches you. Reward lavishly.
Step 3: Practice in progressively more distracting environments. The rule: if your dog doesn’t come reliably in the backyard, they’re not ready for the park.
Step 4: Never punish a dog for coming to you even if they took forever, even if you’re frustrated. Punishment after recall poisons the recall cue. Every return gets celebrated.
According to The Association of Professional Dog Trainers (APDT), a recall cue should be practiced at least 3–5 times daily in varying environments throughout your dog’s life. Reliable recall isn’t trained once it’s maintained.
Frequently Asked Questions About Clicker Training
No. Once a behavior is well-learned, you can fade the clicker and maintain the behavior with intermittent verbal praise and occasional treats. Many trainers use the clicker during the learning phase and transition to a variable reinforcement schedule using praise and life rewards (leash on = walkies!) during the maintenance phase.
Some dogs are less food-motivated than others, especially in distracting environments. Try higher-value rewards real meat, cheese, or freeze-dried liver rather than dry kibble. Alternatively, identify what your dog is motivated by: a favorite toy, a game of tug, a quick sniff of something interesting. Rewards don’t have to be food. They just have to be something your dog genuinely wants.
Short and frequent beats long and occasional every time. Aim for 3–5 minute sessions, 3–5 times per day. This keeps your dog engaged, prevents mental fatigue, and creates more reinforcement opportunities across the day. End sessions while your dog is still enthusiastic always leave them wanting more.
Muffle it first by clicking inside your pocket or wrapping tape around it. If the sound still causes distress, switch to a verbal marker (“Yes!”) or use a softer-sounding button clicker rather than a box clicker. Never force a sound-sensitive dog to tolerate a noise they find aversive it defeats the entire purpose of building positive associations.
Yes and it’s highly recommended. A quality puppy class will already use positive reinforcement methods compatible with clicker training. Ask your instructor if they use marker-based training. Classes offer the additional benefit of socialization in a controlled environment, which is one of the most important investments you can make in your puppy’s behavioral future, according to the American Veterinary Society of Animal Behavior (AVSAB).
Your Clicker Training Action Plan: Next Steps
You now have everything you need to get started.
Today:
- Get a clicker (or choose your marker word) and gather high-value treats
- Run your first charging session click 20 times, treat 20 times
This Week:
- Complete the 5-Day Clicker Foundation Plan if you have a new puppy
- Practice the 0.5-Second Timing Drill daily with a tennis ball
This Month:
- Work through “Sit,” “Down,” “Stay,” “Come,” and “Leave It”
- Begin the chin rest for cooperative care foundations
- Explore free shaping with a cardboard box
Ongoing:
- Practice 3–5 minute sessions 3–5 times daily
- Transition to variable ratio reinforcement for mastered behaviors
- Consider a session with a CPDT-KA certified trainer if you hit a plateau
Clicker training isn’t just about teaching commands. It’s about building a relationship where your dog understands how to communicate with you, trusts that trying new things is safe, and genuinely enjoys the learning process.
That’s the bond worth building.


