
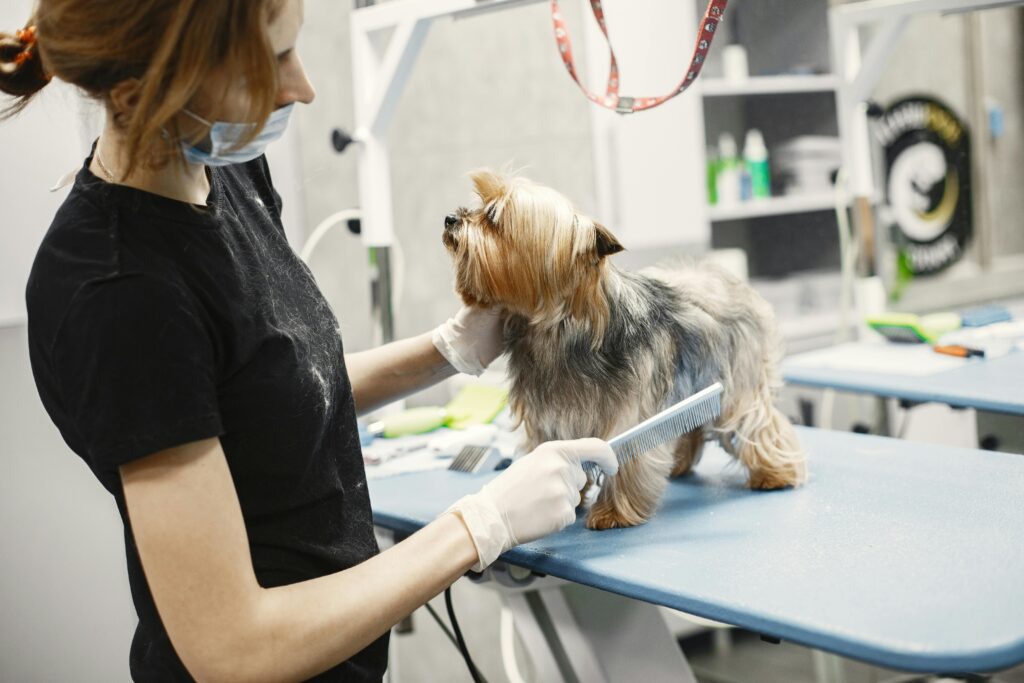
You bathe your dog regularly, brush their coat, and trim their nails—so why does your vet keep finding skin infections, ear problems, and matted fur during checkups? Here’s the uncomfortable truth: most pet parents unknowingly make common pet grooming mistakes that compromise their pet’s health, comfort, and hygiene.
These aren’t small oversights. Common pet grooming mistakes like using human shampoo, shaving double-coated breeds, or bathing too frequently can cause skin damage, heat regulation problems, and chronic irritation. Your grooming routine might actually be making your pet dirtier, not cleaner—perpetuating some of the most damaging common pet grooming mistakes veterinarians encounter daily.
This guide reveals the seven most frequent common pet grooming mistakes veterinarians see—and more importantly, how to fix them. By the end, you’ll know exactly what’s safe, what’s harmful, and how to groom your pet the way professionals do. Whether you have a dog, cat, or other furry companion, these insights will transform your grooming routine from well-intentioned to genuinely effective, helping you avoid the common pet grooming mistakes that lead to expensive vet visits.
Proper hygiene does more than just make them shine; it boosts immunity and prevents disease. Discover why in our deep dive: [Is Dog Grooming Just for Looks? The Surprising Health Benefits].
💡 Howdy Note: While this article focuses primarily on dogs (since they have the most grooming needs and highest volume of owner questions), many of these common pet grooming mistakes apply to cats and other pets. We’ll note species-specific differences where they matter.
Table of contents
- Mistake #1: Using Human Shampoo on Your Dog (The Shampoo Confusion)
- Mistake #2: Shaving a Double Coated Dog (The Coat Disaster)
- Mistake #3: Cutting the Quick (How to Cut Black Dog Nails Safely)
- Mistake #4: Bathing Too Often (Or Not Enough)
- Mistake #5: Skipping Ear Cleaning (Until It’s an Infection)
- Mistake #6: Ignoring Dental Care (The Hidden Health Crisis)
- Mistake #7: Forgetting About Anal Glands (The Uncomfortable Truth)
- The Complete Grooming Routine: Putting It All Together
- Common Pet Grooming Mistakes: Quick Reference Checklist
- When to Call a Professional Groomer (Or Your Vet)
- Frequently Asked Questions
Mistake #1: Using Human Shampoo on Your Dog (The Shampoo Confusion)
Can I Use Human Shampoo on My Dog?
The short answer: No—and this is one of the most frequently asked questions about common pet grooming mistakes veterinarians encounter. Even “gentle” formulas like baby shampoo can disrupt your dog’s skin barrier over time, making this one of the most damaging common pet grooming mistakes for long-term skin health.
Why human shampoo is wrong for dogs:
According to the American Kennel Club’s grooming guidelines, dogs have a skin pH of 6.5-7.5 (neutral to slightly alkaline), while human skin is more acidic at 4.5-5.5. Human shampoos are formulated for our acidic pH, which means they’re too harsh for your dog’s protective acid mantle—the thin layer that keeps bacteria, viruses, and allergens out.
What happens when you use human shampoo:
- Strips natural oils that protect against infection
- Disrupts skin pH balance, allowing harmful bacteria to multiply
- Causes dryness, flaking, and itching
- Makes skin more vulnerable to environmental allergens
- Can trigger contact dermatitis with repeated use
This common pet grooming mistake affects millions of dogs annually because owners assume “gentle” human products are safe alternatives.
Is Baby Shampoo Safe for Dogs?
Baby shampoo is marginally better than adult formulas because it’s “tear-free” and gentler, but it’s still formulated for human pH levels—making it one of the common pet grooming mistakes that seems harmless but causes cumulative damage. According to veterinary dermatologists at VCA Hospitals, baby shampoo should only be used as an emergency one-time solution—never as your regular dog shampoo.
When baby shampoo might be acceptable:
- Emergency bath when you’re completely out of dog shampoo
- One-time use only (purchase proper dog shampoo within 24-48 hours)
- Your dog has no existing skin conditions
Repeatedly using baby shampoo ranks among the top common pet grooming mistakes because it gives owners false confidence that they’re using a “safe” product.
Best Homemade Dog Shampoo for Itchy Skin
If your dog has itchy skin, homemade solutions might seem appealing—but they’re risky without veterinary guidance and represent one of the common pet grooming mistakes that can worsen underlying conditions. Most DIY recipes lack preservatives and can harbor bacteria, plus they’re not pH-balanced for canine skin.
Vet-recommended alternatives to human shampoo:
- Oatmeal-based dog shampoos: Colloidal oatmeal soothes inflammation naturally
- Hypoallergenic dog shampoos: Fragrance-free, dye-free formulations for sensitive skin
- Medicated shampoos: Veterinary-prescribed formulas with chlorhexidine or ketoconazole for infections
- DIY emergency rinse (vet-approved): Mix 1 cup plain oatmeal (ground to powder) with warm water—rinse thoroughly after 5-10 minutes (no soap action, but provides temporary relief)
According to the American Veterinary Medical Association, selecting species-appropriate shampoo is essential for avoiding common pet grooming mistakes related to skin health.
Never use on dogs:
- Dish soap (extremely harsh and degreasing)
- Human dandruff shampoo
- Scented body washes
- Hair dye or bleach products
📋 THE FIX: Shampoo Selection
For healthy skin: Choose pH-balanced dog shampoo (look for pH 6.5-7.5 on the label)
For itchy skin: Try oatmeal-based or hypoallergenic formulas
For skin infections: Consult your vet for medicated shampoo prescriptions
Emergency only: Baby shampoo once, then buy proper dog shampoo immediately
Mistake #2: Shaving a Double Coated Dog (The Coat Disaster)
Shaving a Double Coated Dog: Why Vets Say Stop
Shaving a double coated dog is one of the most damaging common pet grooming mistakes, yet owners do it every summer thinking they’re helping their pet stay cool. The opposite is true—you’re destroying their natural temperature regulation system, making this one of the most counterproductive common pet grooming mistakes.
What is a double coat?
Double-coated breeds (German Shepherds, Golden Retrievers, Huskies, Australian Shepherds, Pomeranians, Corgis) have two layers:
- Undercoat: Soft, fluffy insulation that traps air to regulate temperature (keeps warm in winter, cool in summer)
- Guard hairs (topcoat): Longer, coarser hairs that repel water, dirt, and UV rays
Why shaving a double coated dog causes permanent damage:
According to PetMD’s veterinary dermatology experts, this common pet grooming mistake causes:
- Destroys thermoregulation: The undercoat insulates against heat AND cold. Removing it means your dog overheats in summer and freezes in winter.
- Exposes skin to sunburn: Guard hairs protect skin from UV radiation. Shaved dogs get sunburned easily, increasing skin cancer risk.
- Coat regrowth problems: Double coats often grow back patchy, with coarse texture, or in the wrong proportion (too much undercoat, not enough guard hairs). This is called “coat funk” and can be permanent.
- Increases shedding: Contrary to myth, shaving doesn’t reduce shedding—it creates shorter hair fragments that stick to everything.
- Traps heat: Without proper coat structure, hot air sits against skin instead of circulating away.
This common pet grooming mistake affects thousands of dogs annually, with many suffering permanent coat damage that never fully recovers.
Double-coated breeds you should NEVER shave:
- Siberian Husky
- Alaskan Malamute
- Golden Retriever
- German Shepherd
- Australian Shepherd
- Border Collie
- Bernese Mountain Dog
- Samoyed
- Chow Chow
- Pomeranian
- Corgi (Pembroke and Cardigan)
- Sheltie (Shetland Sheepdog)
Using the wrong brush can damage the coat just as much as shaving. Ensure you have the correct kit by checking our guide on [Pet Grooming Supplies: Must-Haves for a Well-Groomed Pet].
How to Remove Mats from Dog Hair (Without Shaving)
Matting is the most common reason owners resort to shaving a double coated dog—one of the preventable common pet grooming mistakes. Here’s how to address mats without destroying the coat:
For minor mats (less than 1 inch, not tight to skin):
- Apply detangling spray or leave-in conditioner
- Use your fingers to gently separate the mat
- Work from the outside edges toward the center
- Use a slicker brush or mat splitter tool (not scissors—too risky near skin)
- Comb through with a metal comb to verify mat is gone
For severe mats (tight to skin, covering large areas):
- Do NOT attempt at home—you’ll cut your dog’s skin
- Take to professional groomer or vet for safe removal
- May require partial shaving only in affected areas
- Sedation sometimes necessary if mats are painful
Preventing mats (better than fixing them):
- Brush thoroughly 2-3 times per week minimum (daily during shedding season)
- Pay extra attention to friction areas: behind ears, armpits, under collar, hindquarters
- Always brush before bathing (water makes mats tighten and worse)
- Use proper tools: slicker brush + undercoat rake + metal comb combo
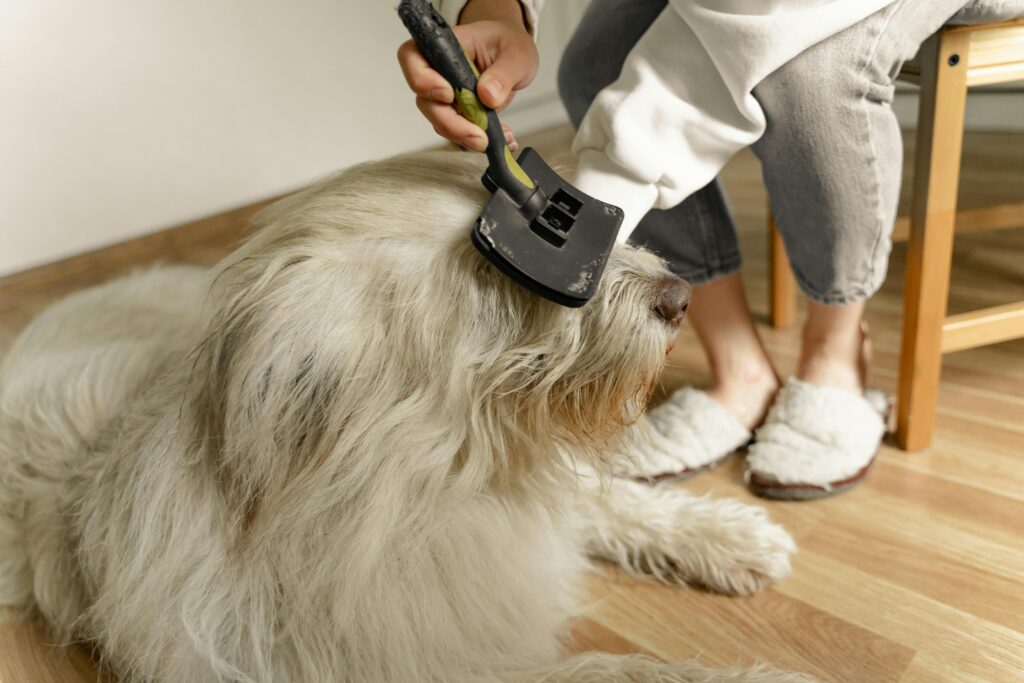
Deshedding Tools for Dogs: What Actually Works
Instead of committing one of the worst common pet grooming mistakes by shaving a double coated dog, invest in proper deshedding tools that remove dead undercoat without damaging guard hairs:
Best deshedding tools (in order of effectiveness):
- Undercoat rake: Metal teeth pull out loose undercoat while leaving guard hairs intact (use 2-3 times weekly during shedding season)
- Slicker brush: Fine wire bristles remove loose fur and prevent mats (daily use safe)
- Deshedding blade (shedding loop): Metal loop removes massive amounts of undercoat quickly (use carefully—can over-thin if used too aggressively)
- Furminator-style tools: Effective but use sparingly (once per week max)—can damage coat if overused
- High-velocity dryer: Professional groomers use these to blow out dead undercoat after bathing (expensive but most effective)
The American Society for the Prevention of Cruelty to Animals (ASPCA) recommends regular deshedding as the proper alternative to shaving, helping pet owners avoid this damaging common pet grooming mistake.
Deshedding routine to avoid shaving:
- Spring/Fall shedding season: Daily brushing with slicker brush + undercoat rake 3x per week
- Summer/Winter: Slicker brush 2-3x per week + undercoat rake 1x per week
- After every bath: Thorough blow-dry with high-velocity dryer to remove loosened undercoat
📋 THE FIX: Double Coat Care
Never shave double-coated breeds (see list above)
Instead: Invest in proper deshedding tools (undercoat rake + slicker brush)
Brush thoroughly 2-3x per week minimum, daily during shedding seasons
Professional grooming: Schedule “deshedding treatments” at groomer every 6-8 weeks
For cooling: Provide shade, water, air conditioning—not shaving
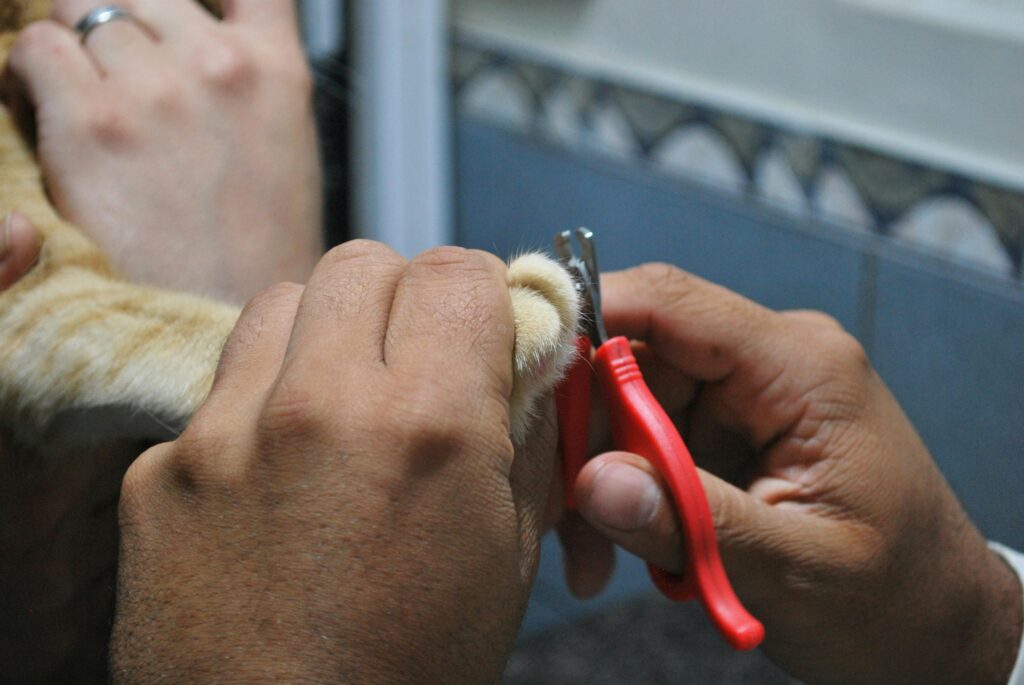
Mistake #3: Cutting the Quick (How to Cut Black Dog Nails Safely)
How to Cut Black Dog Nails Without Hitting the Quick
Cutting nails too short is one of the most anxiety-inducing common pet grooming mistakes for owners—and one of the most painful for dogs. Black nails are especially challenging because you can’t see the quick (the blood vessel and nerve inside the nail), making this one of the common pet grooming mistakes that causes both physical pain and psychological fear.
Why this matters:
The quick supplies blood to the nail and contains nerve endings. Cutting into it causes:
- Sharp, immediate pain
- Bleeding (can be significant)
- Fear and nail-trimming avoidance behavior in your dog
- Risk of infection if exposed quick isn’t properly cared for
This common pet grooming mistake creates long-lasting anxiety in dogs, making future nail trims exponentially more difficult.
How to cut black dog nails safely (veterinary technique):
According to guidance from Cornell University College of Veterinary Medicine, proper nail trimming technique prevents this common pet grooming mistake:
- Position properly: Hold paw firmly but gently, isolate one nail at a time
- Use the right tool: Sharp guillotine-style or scissor-style nail clippers (dull clippers crush the nail, increasing pain)
- Look for the chalky white ring: When you look at the cut surface after trimming, you’ll see:
- Outer ring: Hard, dry nail (safe to continue)
- Chalky white/gray center: Getting close to quick (make smaller cuts)
- Small black dot in center: STOP—this is the quick approaching
- Cut at 45-degree angle: Trim from underneath at an angle, following the natural curve
- Take off tiny amounts: Multiple small cuts are safer than one aggressive cut
- Check after each cut: Examine the cut surface before continuing
- Stop at the chalky ring: When you see the white/gray ring filling more of the nail’s center, you’re within 2mm of the quick—stop there
Professional tip for black nails:
Use a nail grinder (Dremel-style tool) instead of clippers. Grinding allows you to gradually shorten the nail while watching for the quick to appear as a small dark circle in the center. It also smooths edges and many dogs tolerate it better than clipping—helping you avoid this common pet grooming mistake entirely.
Dog Nail Bleeding Home Remedy (And How to Stop Dog Nail Bleeding)
Even experienced groomers occasionally cut the quick—this common pet grooming mistake happens to professionals too. Here’s what to do:
Immediate steps to stop dog nail bleeding:
- Stay calm: Your dog feeds off your anxiety—act confident even if you feel terrible about making this common pet grooming mistake
- Apply styptic powder: Press styptic powder (or cornstarch/flour if you don’t have it) directly onto the bleeding nail tip
- Hold pressure: Keep firm pressure with your thumb for 2-3 minutes without checking (checking restarts bleeding)
- Distract your dog: Give treats while holding pressure so they don’t pull away
- Bar soap method: Press the nail into a bar of soap as an alternative—the soap plugs the vessel
- Verify bleeding stopped: After 3 minutes, check carefully. If still bleeding, reapply powder and hold another 2-3 minutes
When to call your vet about nail bleeding:
- Bleeding doesn’t stop after 10 minutes of pressure
- Your dog is on blood-thinning medications
- Nail was ripped or torn (not just cut too short)
- Signs of infection develop (swelling, heat, pus, limping after 24 hours)
Preventing quick cuts (avoiding this common pet grooming mistake):
- Trim nails every 2-3 weeks (frequent small trims keep the quick receded)
- If nails are overgrown, trim weekly in tiny increments—the quick recedes over time
- Use a nail grinder for more control
- Positive reinforcement training: reward your dog heavily for tolerating nail trims
- Consider professional grooming if you’re too anxious (your fear transfers to your dog)
📋 THE FIX: Nail Trimming
For black nails: Look for chalky white ring on cut surface—stop when ring fills center
Better tool: Try nail grinder instead of clippers for more control
Frequency: Every 2-3 weeks prevents overgrowth and keeps quick receded
Keep styptic powder: Always have it ready before starting nail trims
If you cut quick: Apply styptic powder, hold pressure 3 minutes, stay calm
Mistake #4: Bathing Too Often (Or Not Enough)
How Often Should I Bathe My Dog?
There’s no universal answer—and that’s why bath frequency is one of the most common pet grooming mistakes. Some owners bathe weekly (too often for most dogs), while others bathe once a year (too infrequent for most lifestyles). Finding the right balance prevents this common pet grooming mistake that affects skin health.
General guidelines by coat type:
| Coat Type | Bathing Frequency | Examples |
|---|---|---|
| Short, smooth coat | Every 2-3 months | Beagle, Boxer, Doberman, Greyhound |
| Short, double coat | Every 2-3 months (more during shedding) | Labrador, Husky, German Shepherd |
| Medium coat | Every 4-6 weeks | Border Collie, Australian Shepherd, Cocker Spaniel |
| Long, flowing coat | Every 4-6 weeks | Golden Retriever, Afghan Hound, Yorkshire Terrier |
| Curly/non-shedding | Every 3-4 weeks | Poodle, Bichon Frise, Doodle mixes |
| Wire coat | Every 6-8 weeks | Terriers, Schnauzers |
| Hairless breeds | Every 1-2 weeks | Chinese Crested, Xoloitzcuintli |
Factors that increase bathing frequency:
- Rolls in something disgusting (immediate bath needed)
- Skin allergies or infections (medicated baths prescribed by vet may be weekly)
- Swimming in chlorinated pools or salt water (rinse after each swim)
- Very active outdoor lifestyle
- Lives in dusty or muddy environment
Signs you’re committing the common pet grooming mistake of bathing too often:
- Dry, flaky skin
- Dull, brittle coat
- Increased itching (paradoxically)
- Coat loses its water-repellent quality
- Skin produces excess oil to compensate (making dog smell worse faster)
Signs you’re not bathing enough:
- Persistent odor even after brushing
- Visible dirt or grease in coat
- Skin infections developing
- Excessive scratching
- Guests comment on your dog’s smell
The Humane Society of the United States provides additional guidance on avoiding common pet grooming mistakes related to bathing frequency.
Those clicking sounds on your hardwood floors? That’s your pet’s way of begging for a nail trim — and we’ve got the gentle, stress-free technique to make it easy.
Why Does My Dog Smell After a Bath?
You just gave your dog a thorough bath with expensive shampoo, but hours later they smell worse than before. This frustrating phenomenon reveals one of several hidden common pet grooming mistakes:
Reason #1: You didn’t rinse thoroughly enough
Leftover shampoo residue traps dirt, oils, and bacteria, creating a musty smell—one of the most overlooked common pet grooming mistakes. It takes 2-3 times longer to rinse than to shampoo.
Fix: Rinse for at least 5 minutes, until water runs completely clear and coat feels “squeaky” when you run fingers through it. Pay extra attention to undercoat and hard-to-reach areas (armpits, belly, under collar area).
Reason #2: The coat didn’t dry completely
Damp undercoat breeds bacteria and yeast, creating that distinct “wet dog” smell that never goes away—another common pet grooming mistake.
Fix:
- Use high-velocity dryer or regular hair dryer on cool setting
- Brush while drying to expose all layers
- Don’t let dog air-dry if they have thick coat
- Check undercoat with your fingers—if it feels damp to touch, keep drying
Reason #3: Underlying skin infection
Yeast infections (malassezia dermatitis) and bacterial infections create foul odors that bathing can’t eliminate—what seems like a grooming issue is actually a medical problem being mistaken for common pet grooming mistakes.
Signs of skin infection:
- Musty, corn chip, or yeasty smell
- Redness or inflammation
- Excessive scratching or licking
- Darkened skin or hair loss
- Greasy feel to coat
Fix: Schedule vet appointment. Infections require medicated shampoos (chlorhexidine or ketoconazole) or oral medications.
Reason #4: Anal gland issues
That fishy smell might not be coat-related at all—it could be full or infected anal glands (see “Mistake #7” below).
Reason #5: You’re using wrong shampoo
Cheap shampoos contain heavy fragrances that mask odor temporarily but don’t actually clean—contributing to common pet grooming mistakes related to product selection. Once fragrance fades, the dirt and oil remain.
Fix: Invest in quality dog shampoo with actual cleansing ingredients, not just fragrance. Look for ingredients like coconut-based surfactants, not parfum/fragrance as first ingredient.
📋 THE FIX: Bath Frequency
Most dogs: Every 4-8 weeks depending on coat type and lifestyle
Never more than: Once per week (except for medicated baths prescribed by vet)
After bath: Rinse 2-3x longer than shampooing time
Dry completely: Use high-velocity dryer for thick/double coats
Still smells? Check for skin infection or anal gland issues (see vet)
Once you have the bathing schedule down, you can focus on aesthetics. Learn how to achieve that salon-fresh look at home with our tips for [Styling Your Dog: Tips for a Well-Groomed Pooch].
Mistake #5: Skipping Ear Cleaning (Until It’s an Infection)
How to Clean Dog Ears at Home (The Safe Way)
Ear infections are one of the top five reasons dogs visit the vet—and most are preventable with proper ear cleaning. Yet many owners skip this grooming step entirely until their dog is already shaking their head and scratching frantically, making this one of the most consequential common pet grooming mistakes.
Why ear cleaning matters:
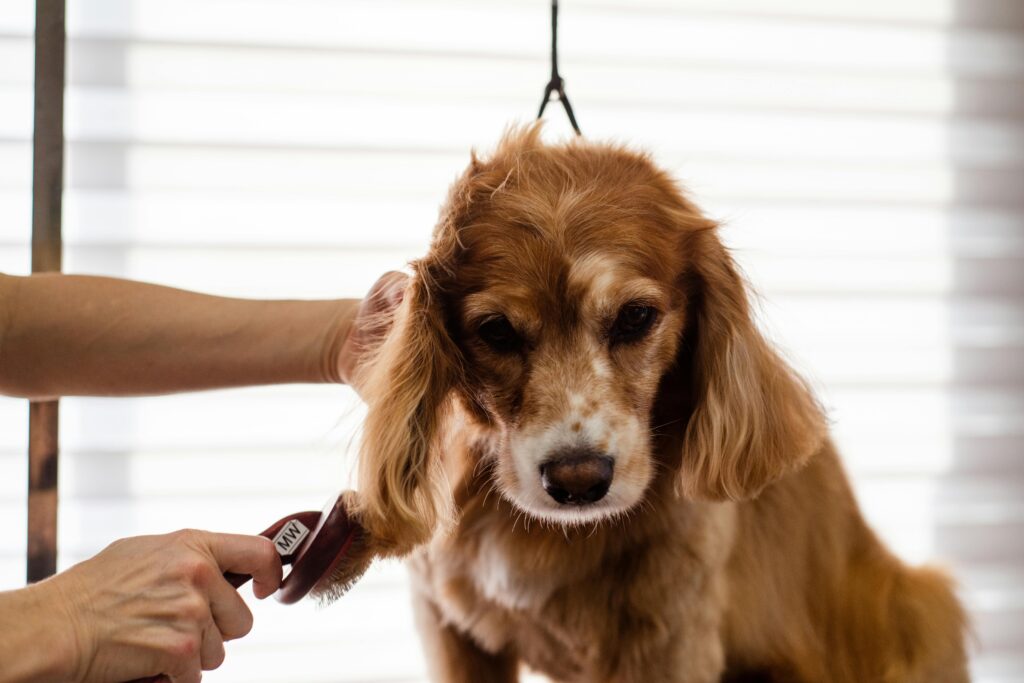
Dogs with floppy ears (Cocker Spaniels, Basset Hounds, Golden Retrievers) or allergies are prone to ear infections because moisture, wax, and debris build up in the ear canal, creating perfect conditions for bacteria and yeast growth. Neglecting ear care is one of the preventable common pet grooming mistakes that leads to painful, expensive infections.
How to clean dog ears at home safely:
What you’ll need:
- Veterinary ear cleaning solution (never use water, hydrogen peroxide, or alcohol)
- Cotton balls or gauze pads (never Q-tips—they push debris deeper)
- Treats for positive reinforcement
Step-by-step process:
- Inspect first: Look inside the ear flap. If you see redness, swelling, thick discharge, or smell a foul odor, STOP—your dog needs a vet, not home cleaning.
- Fill ear canal: Lift ear flap and squeeze cleaning solution into the ear canal until it’s full (more than you think you need—it should be overflowing slightly).
- Massage the base: Gently massage the base of the ear (you’ll hear a squishing sound) for 20-30 seconds. This loosens debris.
- Let them shake: Stand back and let your dog shake their head vigorously—this brings debris up and out.
- Wipe outer ear: Use cotton ball or gauze to wipe away debris from outer ear and ear flap. Never insert anything into the ear canal.
- Repeat if very dirty: If cotton ball comes away brown/black, repeat process on that ear.
- Reward heavily: Give treats throughout to make this a positive experience.

According to Banfield Pet Hospital’s veterinary care guidelines, proper ear cleaning technique prevents one of the most common pet grooming mistakes leading to infections.
How often to clean ears:
- Floppy-eared breeds: Once per week
- Upright ears (healthy): Every 2-4 weeks or after swimming
- Dogs with chronic ear issues: As directed by vet (may be multiple times weekly with medicated solution)
Never clean ears if you see:
- Red, inflamed ear canal
- Thick yellow, green, or brown discharge
- Foul smell
- Dog cries or pulls away when you touch ear
- Visible sores or wounds
These indicate infection requiring veterinary treatment, not home cleaning. Attempting to clean an infected ear is one of the dangerous common pet grooming mistakes that worsens the condition.
Dog Ear Infection Symptoms (When DIY Cleaning Isn’t Enough)
Recognizing infection early prevents serious complications like ruptured eardrums or chronic ear disease—conditions that result when common pet grooming mistakes go unaddressed.
Signs your dog has an ear infection:
Behavioral changes:
- Head shaking or tilting
- Scratching at ears constantly
- Rubbing ear on carpet or furniture
- Crying when ear is touched
- Loss of balance or walking in circles (inner ear infection—emergency)
Physical symptoms:
- Redness or swelling inside ear
- Thick discharge (yellow, brown, or green)
- Crusty buildup on ear flap
- Foul smell (yeasty or rotten)
- Excessive wax buildup
- Hearing loss
- Pain when mouth opens (ear canal connects near jaw)
Types of ear infections:
- Yeast infection (malassezia): Brown, waxy discharge with sweet/musty smell
- Bacterial infection: Yellow/green discharge with foul odor
- Ear mites: Dark, coffee-ground-like discharge (more common in puppies and cats)
- Allergic inflammation: Red, itchy ears without heavy discharge
When to see your vet immediately:
- Symptoms appear suddenly and severely
- Dog’s head is tilted and they can’t walk straight
- Ear canal is swollen shut
- Fever or lethargy accompanies ear symptoms
- Previous ear infections keep recurring
Why you can’t just clean away an infection:
Active infections require prescription medications (antibiotic or antifungal ear drops) to eliminate the underlying bacteria or yeast. Home cleaning with regular solution will not cure an infection and may make it worse by pushing infected material deeper—transforming neglected ear cleaning (a common pet grooming mistake) into a medical emergency.
📋 THE FIX: Ear Care
Prevention: Clean ears weekly (floppy ears) or bi-weekly (upright ears)
Use: Veterinary ear cleaning solution only (never water or hydrogen peroxide)
Never use: Q-tips or insert anything into ear canal
After swimming: Always clean ears to remove moisture
If infection develops: See vet for prescription treatment—don’t try to clean it away
Cat Owners: Felines suffer from unique ear issues that require specific care. If your cat is scratching, read our dedicated guide on [Feline Otitis Externa: 5 Solutions for Ear Relief].
Mistake #6: Ignoring Dental Care (The Hidden Health Crisis)
Why Dental Grooming Is Critical (Not Optional)
Most pet parents groom their dog’s coat religiously but completely ignore their teeth—one of the most damaging common pet grooming mistakes with serious health consequences that extend far beyond bad breath.
The dental disease progression:
- Plaque forms: Bacteria + saliva + food particles create sticky film on teeth within 24 hours
- Plaque hardens to tartar: Within 3-5 days, plaque mineralizes into hard tartar (calculus) that can’t be brushed away
- Gingivitis develops: Tartar buildup irritates gums, causing inflammation, redness, bleeding
- Periodontal disease: Bacteria invade below the gum line, destroying bone and tissue around tooth roots
- Systemic infection: Bacteria enter bloodstream through diseased gums, damaging heart, liver, and kidneys
By age 3, 80% of dogs have some form of dental disease—making this one of the most common preventable health problems and one of the most overlooked common pet grooming mistakes.
According to the American Veterinary Dental College, neglecting dental care is among the top common pet grooming mistakes that lead to life-threatening systemic infections.
Signs your dog has dental disease:
- Bad breath (beyond normal “dog breath”)
- Yellow or brown buildup on teeth
- Red, swollen, or bleeding gums
- Difficulty eating or dropping food
- Pawing at mouth
- Drooling excessively
- Loose or missing teeth
- Reluctance to have face touched
Why dental care is grooming, not just veterinary care:
Just like you don’t only visit the dentist when you have a cavity, your dog needs ongoing dental hygiene between professional cleanings. Treating dental care as optional is one of the common pet grooming mistakes with the most serious long-term health consequences.
Three-tier dental care approach:
Tier 1: Daily brushing (gold standard)
- Use dog toothpaste (never human—fluoride and xylitol are toxic)
- Use dog toothbrush or finger brush
- Brush for 30 seconds, focusing on outer surfaces of teeth
- Build up gradually: start by letting dog lick toothpaste, then rub teeth with finger, then introduce brush
Tier 2: Dental chews and additives (supplemental)
- VOHC-approved dental chews (Veterinary Oral Health Council seal)
- Water additives that reduce plaque
- Dental wipes for dogs who won’t tolerate brushing
- Note: These supplement but don’t replace brushing
Tier 3: Professional cleaning (annual or as needed)
- Performed under anesthesia at vet clinic
- Removes tartar below gum line (only place that matters)
- Polishes teeth to slow future plaque buildup
- Allows examination for cracked teeth, tumors, etc.
Why “anesthesia-free dentals” are a common pet grooming mistake:
Some groomers offer “anesthesia-free” teeth cleaning, but veterinarians warn this is one of the dangerous common pet grooming mistakes:
- Can only clean visible surface (doesn’t address disease below gum line)
- Stressful and painful for dogs without sedation
- Doesn’t allow X-rays to detect problems
- Creates false sense of security while disease progresses
💡 Howdy Note: Cat owners—this applies to you too. Cats are even more prone to dental disease and develop painful tooth resorptions that go unnoticed. Ignoring feline dental care is one of the common pet grooming mistakes that leads to severe health problems. Annual dental exams are essential for felines.
📋 THE FIX: Dental Grooming
Daily: Brush teeth with dog toothpaste and toothbrush
Supplemental: VOHC-approved dental chews
Annually: Professional cleaning under anesthesia at vet
Never: Human toothpaste or anesthesia-free “cosmetic” cleanings
Start now: Even older dogs benefit from starting dental care today
Mistake #7: Forgetting About Anal Glands (The Uncomfortable Truth)
Anal Gland Expression Dogs: What You Need to Know
This is the grooming task everyone wants to ignore—but anal gland issues cause significant discomfort and can lead to serious infections requiring surgery. Neglecting anal gland monitoring is one of the common pet grooming mistakes that causes unnecessary pain and expensive veterinary emergencies.
What are anal glands?
Dogs (and cats) have two small sacs located at 4 o’clock and 8 o’clock positions around the anus. These glands produce a fishy-smelling secretion that’s normally expelled in small amounts when your dog poops. It’s how dogs identify each other (why they sniff butts).
When anal glands become a grooming issue:
In healthy dogs, anal glands empty naturally. But many dogs—especially small breeds, overweight dogs, and those with soft stools—don’t produce enough pressure during bowel movements to empty the glands. This creates one of the common pet grooming mistakes where owners don’t realize monitoring is necessary until problems develop:
- Impaction: Glands fill and become uncomfortable
- Infection: Backed-up fluid becomes infected (sacculitis)
- Abscess: Infected gland ruptures, creating open wound
- Chronic issues: Some dogs require monthly expression indefinitely
Signs your dog needs anal glands expressed:
- Scooting: Dragging bottom across floor (classic sign)
- Excessive licking: Constantly licking or biting at base of tail
- Fishy smell: Strong, unpleasant odor that persists after bathing
- Difficulty pooping: Straining or crying during defecation
- Tail chasing: More than playful spinning
- Visible swelling: One or both sides of anus appear swollen or red
Ignoring these signs is one of the common pet grooming mistakes that escalates from minor discomfort to surgical emergency.
Happy paws mean a happy pup — discover 10 pawsome ways to keep your dog’s feet fit and healthy all year long.”
Should you express anal glands yourself?
Most vets say no to routine home expression unless specifically trained. Here’s why attempting DIY anal gland expression is one of the risky common pet grooming mistakes:
- Risk of injury: It’s easy to push too hard and cause trauma
- Incomplete expression: External expression (what owners do) only empties part of the gland
- May worsen problem: Over-expressing causes inflammation and more frequent filling
- Difficult to tell if infected: Vets check fluid color/consistency for signs of infection
Who should express anal glands:
- Veterinarian: If infection is suspected or dog has chronic issues
- Veterinary technician: Internal expression (more thorough) during office visit
- Professional groomer: External expression during routine grooming (many include this automatically)
According to BluePearl Veterinary Partners, proper anal gland care prevents one of the common pet grooming mistakes that leads to emergency surgery.
Frequency:
- Most dogs: Never need manual expression
- Dogs with issues: Every 4-8 weeks, or as symptoms appear
- Never: “Preventively” if your dog shows no symptoms
When to see your vet about anal glands:
- Blood or pus in anal gland discharge
- Visible swelling or abscess
- Dog is in obvious pain
- Scooting continues after expression
- Foul smell persists despite expression
- Recurrent issues requiring expression more than monthly
Long-term solutions for chronic problems:
- Dietary changes: Add fiber to create firmer stools (consult vet for amount)
- Weight loss: Overweight dogs have more anal gland issues
- Surgical removal: If infections are recurrent and severe (last resort)
💡 Howdy Note: Not all scooting means anal glands. Dogs also scoot when they have tapeworms, rectal irritation, or simply an itchy bottom. If expression doesn’t resolve scooting, see your vet for proper diagnosis. Assuming all scooting is anal glands is one of the diagnostic common pet grooming mistakes.
📋 THE FIX: Anal Gland Care
Prevention: High-fiber diet creates firm stools that express glands naturally
Professional care: Let vet or groomer handle expression (not DIY)
Frequency: Only when symptoms appear (scooting, licking, fishy smell)
Never: Express “preventively” if your dog shows no symptoms
If recurring: Ask vet about dietary changes or consider surgical removal
The Complete Grooming Routine: Putting It All Together
Now that you know the seven most damaging common pet grooming mistakes to avoid, here’s what a proper grooming routine looks like when you eliminate these common pet grooming mistakes:
Daily Tasks (5 minutes)
- Brush teeth with dog toothpaste
- Quick brush through coat (prevents mats)
- Check eyes for discharge
- Wipe facial wrinkles if applicable (Bulldogs, Pugs, Shar Peis)
Weekly Tasks (15-20 minutes)
- Thorough brushing session
- Ear cleaning (floppy-eared breeds)
- Check paws for cuts, foreign objects
- Trim hair between paw pads if overgrown
Bi-Weekly Tasks (10 minutes)
- Nail trim or grinding
- Ear cleaning (upright-eared breeds)
Monthly Tasks (30-45 minutes)
- Full bath (unless coat type requires more/less frequent)
- Sanitary trim (hair around genitals/anus)
- Check anal glands if your dog has history of issues
Quarterly Tasks
- Professional grooming appointment
- Reassess grooming product effectiveness
Annual Tasks
- Professional dental cleaning under anesthesia
- Veterinary skin and coat evaluation
Following this schedule helps you systematically avoid the common pet grooming mistakes that compromise your pet’s health.
Common Pet Grooming Mistakes: Quick Reference Checklist
Use this checklist to audit your current grooming routine and identify which common pet grooming mistakes you might be making:
❌ STOP These Common Pet Grooming Mistakes:
- Using human shampoo or baby shampoo regularly
- Shaving double-coated breeds
- Cutting black dog nails without checking for quick
- Bathing more than once per week (without vet instruction)
- Not rinsing thoroughly after shampooing
- Letting thick coats air-dry
- Ignoring ear cleaning until infection develops
- Using Q-tips inside ear canal
- Never brushing teeth
- Forgetting about anal gland health
✅ START These Correct Practices (Avoiding Common Pet Grooming Mistakes):
- pH-balanced dog shampoo only
- Deshedding tools instead of shaving double coats
- Styptic powder ready before nail trims
- Bathing every 4-8 weeks based on coat type
- Thorough rinsing (5+ minutes)
- Complete drying with high-velocity dryer for thick coats
- Weekly/bi-weekly ear cleaning
- Daily teeth brushing with dog toothpaste
- Professional dental cleanings annually
- Monitoring for anal gland symptoms

When to Call a Professional Groomer (Or Your Vet)
Sometimes avoiding common pet grooming mistakes means recognizing when professional help is needed:
See a professional groomer when:
- You’re physically unable to complete grooming tasks
- Your dog has severe matting that can’t be brushed out
- You need breed-specific cuts (Poodles, Schnauzers, Terriers)
- Your dog has severe grooming anxiety
- You need deshedding treatments for heavy shedders
- Nail grinding or anal gland expression needed
See your veterinarian when:
- Skin infections, hot spots, or persistent itching develop
- Ears are red, swollen, or have thick discharge
- Dental disease is present (tartar, bleeding gums, bad breath)
- Anal glands are infected or abscess develops
- You cut the quick and bleeding won’t stop
- Your dog shows pain during grooming
- Lumps, bumps, or skin changes appear
According to the American Animal Hospital Association, recognizing when DIY grooming isn’t sufficient prevents common pet grooming mistakes from escalating into medical emergencies.
Warning signs during grooming that need immediate vet attention:
- Sudden aggression or crying when touched in specific area
- Visible wounds or bleeding that won’t stop
- Swelling or heat in any body part
- Discharge from eyes, ears, or skin
- Difficulty breathing during bath or grooming
Grooming isn’t the only area where well-intentioned owners stumble. If you have a multi-pet household, ensure you aren’t making critical errors in their social life either—read our guide on [Big vs. Small Dogs: 10 Intro Mistakes to Avoid].
Frequently Asked Questions
The most damaging common pet grooming mistakes are using human shampoo (disrupts skin pH leading to infections), shaving double-coated dogs (destroys thermoregulation and causes permanent coat damage), skipping dental care (leads to systemic infections affecting heart and kidneys), and ignoring ear cleaning until infections develop. These common pet grooming mistakes account for thousands of preventable vet visits annually. According to veterinary dermatologists, pH imbalance from human shampoo is one of the most frequent common pet grooming mistakes they diagnose.
Baby shampoo should only be used once in an emergency when you’re completely out of dog shampoo. While gentler than adult human shampoo, baby shampoo is still formulated for human skin pH (4.5-5.5) rather than dogs’ neutral pH (6.5-7.5). Repeated use strips protective oils and disrupts the skin barrier, making this one of the most common pet grooming mistakes. Purchase proper pH-balanced dog shampoo within 24-48 hours to avoid this common pet grooming mistake that causes cumulative skin damage.
Most dogs need bathing every 4-8 weeks depending on coat type and lifestyle. Bathing more than once per week (unless using medicated shampoo prescribed by your vet) is one of the frequent common pet grooming mistakes that causes dry skin and oil overproduction. Short-coated breeds can go 2-3 months between baths, while curly non-shedding breeds need bathing every 3-4 weeks. Adjust based on your dog’s odor, coat condition, and activity level—both over-bathing and under-bathing are common pet grooming mistakes.
When learning how to cut black dog nails safely and avoid this painful common pet grooming mistake, make small cuts and examine the cut surface after each trim. Look for a chalky white or gray ring filling the center of the nail—this indicates you’re within 2mm of the quick and should stop. Using a nail grinder instead of clippers gives you more control and allows you to gradually approach the quick while watching for it to appear as a small dark circle. Keep styptic powder ready in case you accidentally make this common pet grooming mistake.
If your dog smells after a bath, you’re likely making one of these common pet grooming mistakes: incomplete rinsing (leftover shampoo traps bacteria), incomplete drying (damp undercoat breeds yeast and bacteria), underlying skin infections (require medicated treatment), or anal gland issues (produce fishy smell). Avoid these common pet grooming mistakes by rinsing for 5+ minutes until water runs clear, drying completely with a high-velocity dryer, and having your vet check for infections if odor persists despite proper bathing technique.
Shaving a double coated dog is one of the most damaging common pet grooming mistakes and should be avoided except for medical necessity (severe skin infections requiring topical treatment, pre-surgery preparation, or matting so severe it causes pain). The double coat provides temperature regulation, UV protection, and water resistance. Once shaved, coats often grow back patchy or with wrong texture permanently—making this one of the common pet grooming mistakes with irreversible consequences. Instead, invest in proper deshedding tools like undercoat rakes and schedule professional deshedding treatments every 6-8 weeks to avoid this common pet grooming mistake.
Signs of ear infection requiring veterinary treatment (not just routine cleaning) include: red or swollen ear canal, thick yellow/green/brown discharge, foul smell, pain when ear is touched, head tilting, or loss of balance. These indicate active infection needing prescription medication—attempting to clean an infected ear is one of the dangerous common pet grooming mistakes that worsens the condition. Regular ear cleaning is preventive maintenance for healthy ears, but if you see infection symptoms, stop home cleaning attempts and schedule a vet appointment immediately to avoid this common pet grooming mistake.


