
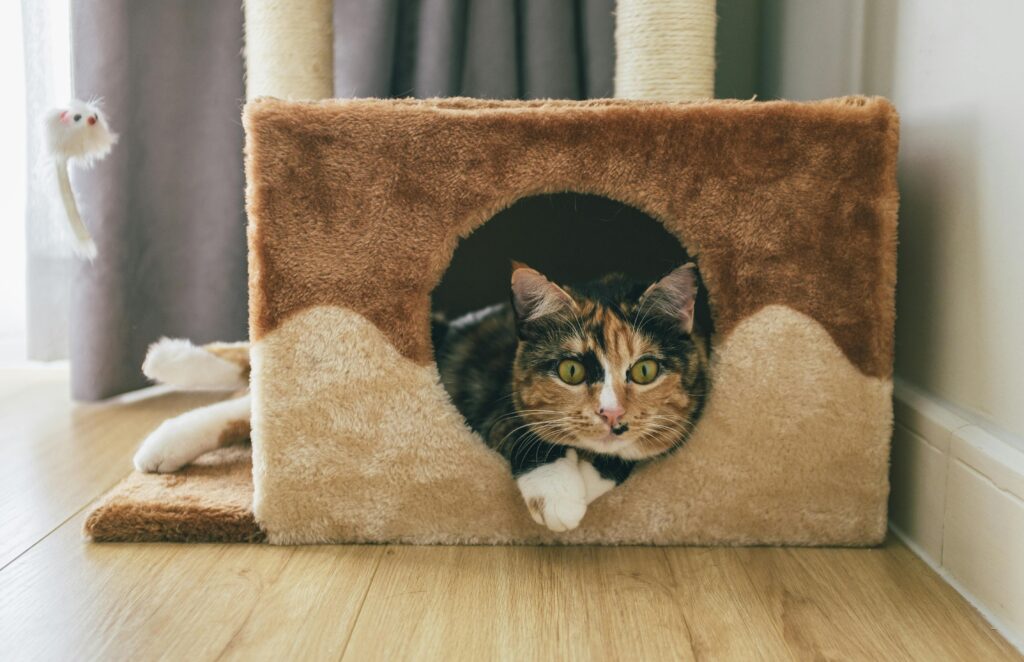
Free DIY cat tree plans with measurements are the starting point every cat-owning builder needs, because a cat tree is one of the most universally beneficial investments in feline behavioral health that any indoor cat owner can make, and building one yourself delivers a structurally customized, aesthetically matched, financially sensible result that no mass-produced flat-pack product can replicate. The commercially available cat trees that retail between $80 and $400 are built to a price point that produces flimsy platforms, carpeting that disintegrates within months, and dimensions that fit no specific home or cat. Free DIY cat tree plans with measurements, by contrast, give you control over every dimension, every material, every platform size, and every finish choice, producing a structure that fits your ceiling height, matches your interior, suits your cat’s specific size and preferences, and will outlast any store-bought alternative by years.
Catster’s 2026 compilation of 19 free DIY cat tree plans confirms that the DIY cat tree category has exploded in creativity and sophistication, with builder communities now producing designs ranging from simple single-post scratching towers to elaborate multi-level wall-mounted cat kingdoms and organic natural branch structures that function as genuine interior design pieces. The Home Depot’s DIY cat tree construction guide identifies the three primary reasons owners build rather than buy: cost savings of 50 to 75 percent compared to comparable commercial products, customization of dimensions to match the specific cat and space, and material quality control that commercial price-point manufacturing cannot deliver.
This guide covers the complete free DIY cat tree plans with measurements landscape: the classic freestanding build with full measurements, the natural branch build, the wall-mounted system, the eco-friendly upcycled build, the modern minimalist tower for 2026 aesthetics, and every essential technique from sisal rope attachment to platform carpeting to base stability engineering.
Table of contents
- Free DIY Cat Tree Plans With Measurements: The Core Design Principles First
- What Makes Free DIY Cat Tree Plans With Measurements Structurally Safe
- Free DIY Cat Tree Plans With Measurements: The Classic Freestanding Build
- Complete Measurements for the Classic Freestanding Free DIY Cat Tree Plans With Measurements
- DIY Cat Tree With Real Branches: The Organic Natural Build
- The Complete Guide to Building a DIY Cat Tree With Real Branches
- How to Build a Wall Mounted Cat Tree: The Space-Saving Solution
- Step-by-Step Instructions for How to Build a Wall Mounted Cat Tree
- Eco Friendly Upcycled Furniture Cat Tree: Sustainable Building in 2026
- How to Attach Sisal Rope to Wood Post: The Essential Technique
- The Correct Method for How to Attach Sisal Rope to Wood Post
- Modern Minimalist DIY Cat Tower 2026: Clean Lines and Contemporary Design
- Building a Modern Minimalist DIY Cat Tower 2026 for Contemporary Interiors
- Free DIY Cat Tree Plans With Measurements: Safety and Finishing Checklist
- Frequently Asked Questions About Free DIY Cat Tree Plans With Measurements
- Your Complete Build Sequence for Free DIY Cat Tree Plans With Measurements
Free DIY Cat Tree Plans With Measurements: The Core Design Principles First
What Makes Free DIY Cat Tree Plans With Measurements Structurally Safe
Before selecting from any free DIY cat tree plans with measurements, understanding the engineering principles that separate a safe, durable cat tree from a wobbling hazard ensures that every build decision reinforces structural integrity rather than compromising it.
The Home Depot’s structural cat tree guide identifies the base as the single most critical structural element: build a sturdy base that will not tip over by making it larger than the platform. A 24-inch square minimum is recommended for a single-post structure, with larger bases required for multi-post or tall builds. The base weight relative to the overall height determines tip-resistance, and the most common structural failure in DIY cat trees is an undersized or underweighted base on a tall structure.
Shadow Cats’ professional cat tree construction plans (PDF) provides the most engineering-focused approach among freely available free DIY cat tree plans with measurements, designing every build to maximize the use of standard lumber dimensions to minimize waste, using one full sheet of plywood and four 8-foot 4×4 posts as the material foundation for two complete cat trees simultaneously.
Universal structural principles for all free DIY cat tree plans with measurements:
- Platform weight capacity minimum: each platform must support at least three times your heaviest cat’s body weight without deflection
- Base-to-height ratio: the base footprint should be at minimum one-third of the total structure height for freestanding builds
- Post diameter: 4×4 lumber posts (actual 3.5 x 3.5 inches) are the standard minimum for single-post structures over 48 inches tall
- Fastener depth: wood screws should penetrate at minimum two-thirds of the receiving piece’s thickness for structural joints
- Platform overhang: no platform edge should extend more than 6 inches beyond its support post without an additional support bracket
Free DIY Cat Tree Plans With Measurements: The Classic Freestanding Build
Complete Measurements for the Classic Freestanding Free DIY Cat Tree Plans With Measurements
The classic freestanding multi-platform cat tree is the most accessible build for first-time DIY cat tree builders and the most directly addressed by available free DIY cat tree plans with measurements resources. New Adventures in Life’s 12-step free DIY cat tree plan and Instructables’ 21-step DIY cat tree house guide together provide the most comprehensive measurement-inclusive plans freely available online.
Materials list for a standard 3-platform freestanding cat tree (approximately 60 inches tall):
- One sheet of 3/4-inch plywood (48 x 96 inches) for platforms and base
- Two 4×4 posts at 8 feet (cut to required heights)
- Sisal rope (100 feet minimum for full post coverage)
- Carpet remnant (approximately 4 square yards)
- Heavy-duty wood screws (2.5-inch and 3.5-inch)
- Wood glue
- Staple gun and 1/2-inch staples
- Sandpaper (80-grit and 120-grit)
- Jigsaw and circular saw
- Power drill with drill bits and screw bits
Platform cutting measurements from the Instructables plan:
Instructables’ base and platform dimensions provide the following verified measurements:
- Base rectangle (A): 55 x 40 cm (21.65 x 15.74 inches)
- Base square (B): 30 x 30 cm (11.81 x 11.81 inches)
- Round platforms (C): 40 cm diameter (15.74 inches) cut with jigsaw
- Post heights: shortest 85 cm (33.46 inches); middle posts 120 cm (47.24 inches); tallest 173 cm (68.11 inches)
- Cat house bottom: 50 x 36 cm (19.68 x 14.17 inches)
- Cat house sides: 38 x 23 cm (14.96 x 9.06 inches) x2
- Cat house top: 38 x 36 cm (14.96 x 14.17 inches)
- Cat house back: 36 x 20 cm (14.17 x 7.87 inches)
- Cat house front (with entry hole): same as back with 15 cm circular cutout centered
Step-by-step classic build assembly:
- Cut all plywood pieces to measurement using a circular saw for straight cuts and a jigsaw for curves and circles. Smooth all cut edges with 80-grit followed by 120-grit sandpaper, paying particular attention to the circular platform edges that the cat will step on and rest against
- Cut the double-layer base by cutting two identical 24-inch square pieces and laminating them with wood glue and 2.5-inch screws driven from beneath. The Home Depot’s base construction guidance specifically identifies the double-layer glued base as the most effective stability technique for freestanding structures
- Mark post positions on the base, keeping posts at minimum 6 inches from each base edge to maintain the base’s structural margin
- Drill pilot holes through the base into each post position and secure posts with 3.5-inch wood screws driven from beneath the base, using wood glue at each post-base joint for secondary retention
- Attach platforms to posts at planned heights using wood screws driven through platform into post top, or using metal L-brackets for platforms that attach to post sides
- Cover all platforms with carpet remnant cut slightly oversized, wrapped over edges, and secured with staple gun on the underside. Notch carpet corners for clean folds at 90-degree platform corners
- Attach sisal rope to posts using the technique detailed in the dedicated sisal section below
- Inspect every fastener, tug every platform firmly, and verify the structure does not rock before allowing cat access
DIY Cat Tree With Real Branches: The Organic Natural Build
The Complete Guide to Building a DIY Cat Tree With Real Branches
A DIY cat tree with real branches is the highest-aesthetic and most structurally unique cat tree build available, producing an organic natural structure that functions simultaneously as a statement piece of interior design and a maximally enriching climbing environment for the cat. By Brittany Goldwyn’s comprehensive DIY cat tree using a real tree guide is the most detailed and photographically documented free resource for the natural branch build approach, developed from a project that has remained structurally sound for over a decade.
Finding and preparing branches for a DIY cat tree with real branches:
New Adventures in Life’s natural branch sourcing guidance identifies branch selection as the most critical step in the DIY cat tree with real branches process: start by measuring the available space, then use the available space measurements to determine the cuts on the branch. Their featured build began with a branch originally 12 feet tall and about 5 feet wide, cut down to the dimensions that fit the available interior space.
By Brittany Goldwyn’s branch preparation protocol identifies the following preparation sequence:
Source branches:
Fallen branches from your own property, branches pruned during garden maintenance, or branches sourced from local tree service companies (who often provide cut branches free of charge) are all appropriate sources. Avoid branches from unknown public land or roadsides where pesticide or herbicide exposure cannot be ruled out
Dry the branches:
Fresh branches must be dried for a minimum of 2 to 4 weeks before indoor use to prevent warping, cracking, and mold development. Stand branches upright in a dry, ventilated area during drying
Remove the bark:
By Brittany Goldwyn’s bark removal step identifies bark removal as genuinely labor-intensive but essential, preventing bark-dwelling insects from entering the home and creating a smooth surface that accepts stain and sealant properly. Use a draw knife or paint scraper for large sections and a wire brush for crevices
Sand, stain, and seal:
Sand with 80-grit then 120-grit sandpaper, apply a wood stain if desired, then seal with a non-toxic pet-safe polyurethane or oil finish. Allow the sealant to cure completely (minimum 72 hours) before any cat contact
Build a weighted base:
Drill holes in the branch base and attach to a large, heavy plywood base using threaded rods and construction adhesive. Savannah Gans’ DIY cat tree construction notes confirm that the base must be drawn to match the actual branch contact point dimensions for proper fit
Attach platforms:
Determine platform positions by moving the branch into its intended indoor location and measuring for ledge placement from that position. New Adventures in Life’s ledge installation method recommends installing ledges one at a time from the bottom up, allowing the position of each ledge to inform the next
How to Build a Wall Mounted Cat Tree: The Space-Saving Solution
Step-by-Step Instructions for How to Build a Wall Mounted Cat Tree
How to build a wall mounted cat tree is the highest-space-efficiency approach to feline vertical territory, converting unused wall space into a functional cat climbing and perching system without any floor footprint. Mystic Waffle’s wall-mounted cat tower construction guide provides the most measurement-specific how to build a wall mounted cat tree instructions freely available, and Catastrophic Creations’ cat wall design guide provides the authoritative spacing and layout guidelines.
Wall mounting spacing specifications from Catastrophic Creations:
Catastrophic Creations’ design guide establishes the industry-standard spacing guidelines for how to build a wall mounted cat tree systems: design your cat wall to have 12 to 16 inches between shelves horizontally, and 12 to 18 inches spacing vertically. These intervals ensure cats can jump comfortably between shelves without the spacing being too wide for confident jumping or too close to allow proper landing and repositioning.
Materials for a 6-foot wall-mounted cat tower (Mystic Waffle plan):
- PVC pipe: 6-foot length (interior diameter approximately 3 inches)
- 2×6 wood stud: 12 inches, cut to fit PVC interior for stabilizing plugs
- 35 feet of sisal rope per foot of pipe (210 feet total for 6-foot post)
- 1×4 wood board for base disc
- Wall-mount brackets (rated for minimum 50 lbs each)
- Wood screws: 3-inch length for wall stud attachment
- Drill and stud finder
Assembly sequence for how to build a wall mounted cat tree:
Mystic Waffle’s step-by-step assembly protocol provides the following sequence:
- Cut PVC pipe to 6-foot length (adjustable for ceiling height)
- Measure the interior diameter of the PVC pipe (approximately 3 inches) and cut a 12-inch 2×6 stud section to match that interior width
- Round both sides of the cut stud piece to match the interior curvature of the PVC using a rasp and sandpaper
- Cut the rounded stud piece in half to produce two 6-inch stabilizing plugs, one for each end of the PVC
- Drill a hole through the PVC perpendicular to the inner stud at the very bottom of the pipe. Thread sisal rope through the hole and tie a secure anchor knot on the inside end. This is the sisal attachment anchor that prevents the rope from unwrapping during use
- Wrap sisal rope tightly and consistently up the full length of the PVC, maintaining even tension throughout
- Shape a circular base disc from 1×4 wood to fit the base of the PVC and attach securely
- Locate wall studs using a stud finder and mark positions. Mount brackets into studs with 3-inch screws, verifying each bracket is level before final tightening
- Attach wall-mounted platforms to brackets at the Catastrophic Creations-specified 12 to 18 inch vertical intervals
- Cover platforms with carpet remnant or faux sheepskin fabric secured with staple gun on the underside
Eco Friendly Upcycled Furniture Cat Tree: Sustainable Building in 2026
Building an Eco Friendly Upcycled Furniture Cat Tree From Reclaimed Materials
An eco friendly upcycled furniture cat tree uses reclaimed, salvaged, or repurposed materials to build a cat climbing structure that produces zero new resource demand and diverts functional materials from landfill. In 2026, with sustainable interior design at peak mainstream adoption, the eco friendly upcycled furniture cat tree is simultaneously the most environmentally responsible and the most design-forward approach to the category.
The most accessible sources of upcycled materials for a eco friendly upcycled furniture cat tree build include:
Old wooden ladders:
A salvaged wooden step ladder or extension ladder provides a ready-made vertical structure with built-in horizontal rungs that cats naturally use as platforms. Add carpet-covered plywood platforms spanning between rungs, wrap visible uprights with sisal rope, and the result is a structurally complete cat tree that requires no primary cutting or joinery
Wooden cable drums (telecom spools):
Large wooden cable drums salvaged from construction sites or utility companies provide circular platforms of ideal diameter (typically 24 to 36 inches) that stack to create a multi-level cat tower with minimal additional construction
Reclaimed pallet wood:
Pallet wood provides free structural lumber for platform surfaces, base construction, and wall-mounted shelf brackets. Sand thoroughly to remove splinters and verify pallets are heat-treated (HT stamp) rather than chemically treated (MB stamp indicates methyl bromide treatment, which is not safe for pet contact)
Old wooden furniture:
Salvaged side tables, bar stools, and wooden chairs provide ready-made structural elements that can be combined, stacked, and modified into multi-level cat structures. Estate sales, charity shops, and curbside salvage are productive sources
Tree branches from garden pruning:
As detailed in the natural branch section, pruned garden branches provide the most organic and zero-cost structural elements for the eco friendly upcycled furniture cat tree build
Dreamies’ DIY cat tree materials guidance confirms that reclaimed and natural materials are entirely appropriate for DIY cat tree construction provided they are properly cleaned, dried, and finished before use, and that all surfaces accessible to the cat are free from sharp edges, loose fasteners, and toxic finishes.
How to Attach Sisal Rope to Wood Post: The Essential Technique
The Correct Method for How to Attach Sisal Rope to Wood Post
How to attach sisal rope to wood post correctly is the single technique that most determines the longevity and durability of any DIY cat tree’s scratching surface. Sisal rope applied incorrectly unravels within weeks of cat use; applied correctly, it lasts years of intensive scratching without loosening.
Mystic Waffle’s sisal rope attachment method provides the most mechanically sound how to attach sisal rope to wood post technique:
Materials needed:
- Natural sisal rope (3/8-inch diameter for standard scratching posts; 1/2-inch for thicker posts preferred by large cats)
- Power drill
- Hot glue gun and glue sticks
- Scissors or utility knife
Step-by-step how to attach sisal rope to wood post:
- Anchor the start: Drill a small hole through the post near the base (or use the PVC anchor-hole method for pipe posts). Thread the rope through the hole and tie a double knot on the interior side. This mechanical anchor prevents the rope from ever unwinding from the base even under aggressive scratching tension. Do not rely on glue alone at the starting anchor point
- First wrapping section: Apply a bead of hot glue along a 3 to 4 inch section of the post surface. Immediately wrap the sisal rope tightly against the glued section, pressing firmly as you wrap to ensure full contact between rope and adhesive. The wraps must be touching each other with no gaps; gaps allow cats to catch claws between wraps
- Progress in sections: Continue applying hot glue in 3 to 4 inch sections and wrapping immediately behind the glue application. Working in short sections prevents the hot glue from cooling and losing adhesion before the rope contacts it
- Maintain even tension: Keep consistent rope tension throughout the wrapping process. Loose sections will be pulled away by cat scratching, creating the starting point of rope unraveling
- Secure the end: At the top of the post, drill a second anchor hole, thread the rope through, and tie a finishing knot on the interior. Apply a final generous hot glue bead at the termination point and press the rope firmly into it. Allow to cool completely before handling
- Final inspection: Run your hand firmly along the entire wrapped surface. Any section that shifts, gaps, or feels loose should be reinforced with additional hot glue applied by lifting the rope slightly and working the glue nozzle beneath it
Modern Minimalist DIY Cat Tower 2026: Clean Lines and Contemporary Design
Building a Modern Minimalist DIY Cat Tower 2026 for Contemporary Interiors
The modern minimalist DIY cat tower 2026 aesthetic represents the most significant design evolution in the DIY cat furniture category, moving away from the carpet-covered traditional tree toward clean natural wood platforms, exposed joinery, neutral fabric upholstery, and structural forms that complement contemporary and Scandinavian-influenced interiors rather than conflicting with them.
Catster’s 2026 DIY cat tree design compilation identifies the modern minimalist approach as the dominant trend in 2026 DIY cat furniture, driven by the increasing demand for cat furniture that owners are genuinely comfortable displaying in well-designed living spaces. The modern minimalist DIY cat tower 2026 replaces carpet with natural hardwood platform surfaces, replaces brown sisal with natural undyed rope or even leather cord wrapping, and uses geometric platform shapes and clean post lines that reference mid-century modern furniture aesthetics.
Design principles for a modern minimalist DIY cat tower 2026:
- Material palette: Natural birch plywood or solid pine platforms with clear polyurethane finish; white or light grey upholstery fabric or faux sheepskin for platform covering; natural undyed sisal or manila rope for post wrapping; black powder-coated hardware for brackets and fasteners
- Platform shapes: Circular, hexagonal, and asymmetric organic platforms replace the standard rectangular carpet-covered shelves of traditional builds. Kreg Tool’s mid-century modern cat tree plan (featuring labeled platforms and posts in a clean line drawing) provides an excellent template for the geometric modern minimalist DIY cat tower 2026 platform approach
- Post treatment: A single natural wood post (4×4 birch or poplar, sanded to 220-grit and finished with natural oil) wrapped in natural sisal rope is the signature element of the modern minimalist build
- Hardware visibility: Where traditional builds hide all hardware under carpet, the modern minimalist DIY cat tower 2026 deliberately exposes quality hardware as a design element. Black hex-head bolts with visible washers on platform connections are a common deliberate design choice in contemporary builds
- Color coordination: Design the entire tower to coordinate with a specific corner of the room, selecting fabric and wood finish tones that pull from the room’s existing palette rather than introducing the default beige-and-brown commercial cat tree aesthetic
The Home Depot’s cat tree material guidance confirms that plywood panels are the ideal platform material for any modern minimalist DIY cat tower 2026 build, combining structural strength, dimensional stability, and smooth surface quality that accepts both fabric upholstery and direct wood finishing with equal effectiveness.
Free DIY Cat Tree Plans With Measurements: Safety and Finishing Checklist
The Pre-Use Safety Inspection for All Free DIY Cat Tree Plans With Measurements
Free DIY cat tree plans with measurements produce the intended result only when the finished structure passes a thorough safety inspection before the cat encounters it. The Home Depot’s completion safety guidance identifies the non-negotiable final inspection requirement: do not leave any staples, screws, or other items that might harm your cat sticking out.
Complete pre-use safety and finishing checklist:
- Run both hands across every surface the cat will contact, checking for protruding staples, screw heads, nail points, or splinter-raising rough grain
- Push and pull each platform firmly in all directions to verify zero movement at fastener joints
- Apply lateral force to the base of the structure and verify it does not rock, slide, or tip
- Check that all sisal rope wrapping is firmly adhered with no loose sections or gaps between wraps
- Verify that all carpet or fabric edges are fully stapled with no loose corners that a claw could catch beneath
- Inspect all chemical finishes (stains, polyurethane, oils) are fully cured before cat contact. Most water-based polyurethanes require 72 hours; oil-based require 7 days minimum for full hardness and off-gassing completion
- For natural branch builds specifically: inspect for any insect activity, soft spots indicating decay, or cracking that has developed during drying that compromises the branch’s load-bearing capacity
Frequently Asked Questions About Free DIY Cat Tree Plans With Measurements
The best free DIY cat tree plans with measurements are available at Instructables’ 21-step cat tree house guide (complete with precise centimeter and inch measurements for every component), New Adventures in Life’s 12-step natural branch cat tree plan, Shadow Cats’ professional PDF construction plans (designed for maximum material efficiency using standard lumber dimensions), and Catster’s 2026 compilation of 19 free DIY cat tree plans. Each provides different build styles from classic freestanding to natural branch to wall-mounted.
How to build a wall mounted cat tree safely requires locating wall studs with a stud finder, mounting brackets directly into studs with minimum 3-inch wood screws, and following the Catastrophic Creations spacing standard of 12 to 16 inches horizontal spacing and 12 to 18 inches vertical spacing between shelves. Mystic Waffle’s wall-mounted cat tower guide provides the complete post construction instructions using PVC pipe wrapped in sisal rope anchored at both ends through drilled holes.
The Home Depot’s stability guidance identifies a minimum 24-inch square double-layer glued plywood base as the foundational stability requirement for freestanding builds. Shadow Cats’ professional plans engineer every build to maximize standard lumber efficiency while maintaining structural integrity. Every platform must support at minimum three times the cat’s body weight, every fastener joint must be pilot-drilled and glue-reinforced, and the finished structure must pass a hands-on push-pull tipping test before the cat is introduced.
Your Complete Build Sequence for Free DIY Cat Tree Plans With Measurements
Free DIY cat tree plans with measurements produce a professional result when the build sequence is followed systematically from design through safety inspection:
- Measure your space and cat: Record ceiling height, available floor or wall space, and your cat’s body length and weight before selecting a plan. The plan must fit both the space and the cat’s physical scale
- Select your build type: Classic freestanding for maximum platform variety; natural branch for organic aesthetic; wall-mounted for zero floor footprint; eco-friendly upcycled for zero new material cost; modern minimalist for contemporary interior compatibility
- Source and prepare materials: For natural builds, allow 2 to 4 weeks for branch drying. For lumber builds, purchase from The Home Depot or similar and verify all dimensions before cutting
- Cut all pieces before assembly begins: Cut and sand every component to final dimension before any assembly glue is applied, allowing dry-fit verification of all joints
- Assemble base first, then posts, then platforms: Build from the bottom up, verifying stability at each stage before proceeding to the next level
- Apply all surface treatments before sisal and fabric: Complete wood staining, sealing, and curing before attaching sisal rope or fabric to prevent finish contamination of the coverings
- Complete safety inspection: Follow the full checklist above before the cat’s first access
For continued reading, explore Siamese Cat Personality Traits: The Complete Guide 2026, How to Treat Cat Dandruff at Home: The Complete Guide 2026, and Best Cat Food for Healthy Skin and Coat 2026 in our complete responsible cat ownership series.


